
3D SCANNING AND PRINTING
WEEK 05
Task:
- Test the design rules for your printers
- Design and 3D print an object, that could not be made subtractively
- 3D scan an object (and optionally print it
3D SCANNING
Tools:
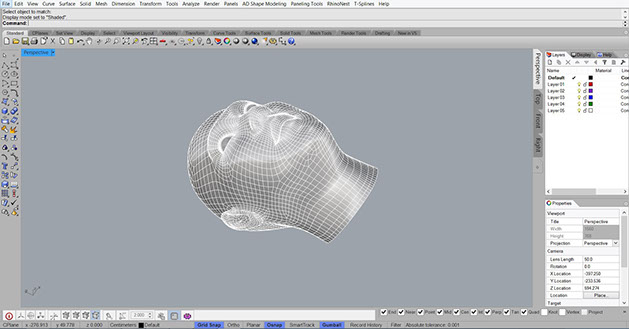
- FaceGen Modeller
- Rhinoceros//Grasshopper//Firefly
- FaceGen Modeller
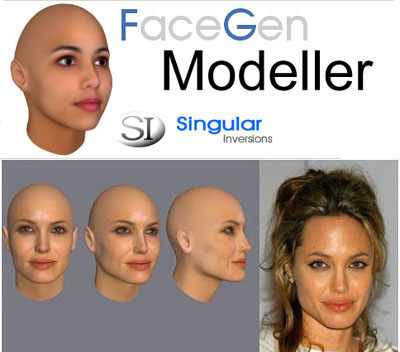
FecaGen Modeller is an easy technologies for create 3D animated human face from one or more photographs, the inconvenient is that only creates faces without hair but the pros is that create almost realistic faces by few steps assigning feature points, edit faces with different parametric controls for morph the whole faces to adjust shapes. Finally for more detailed modulation, the settings of the face scanning can customize many adjustments from race, age, gender and caricature.
The settings display is in real time so the edit faces makes more easily and instantly apply animation morphs and then for export to several formats: FBX, 3Ds, Maya ASCII (ma), LWO, OBJ, XSI, WRL o STL including all texture maps to .PNG, .JPEG, .TGA or .TIFF.
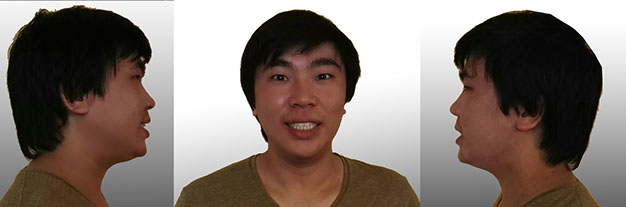
First step
- Take photos from frontal, left and right without background
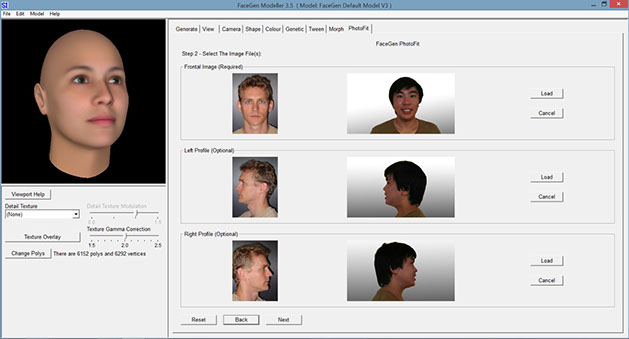
Second step
- FaceGen Photofit - Load images from views required
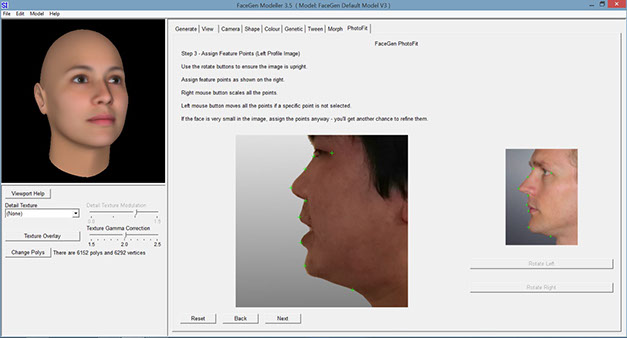
Third step
- Assign feature points as the example to refine correctly face shapes
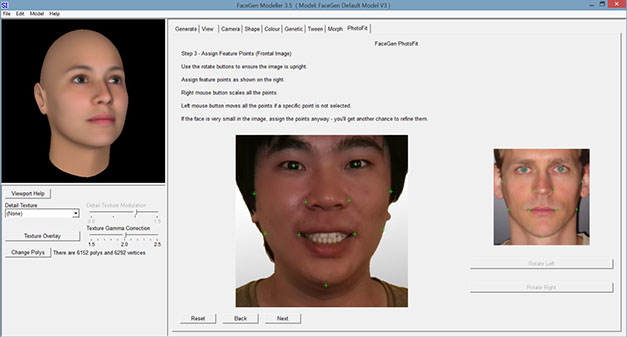
- Make the same for left and right profile
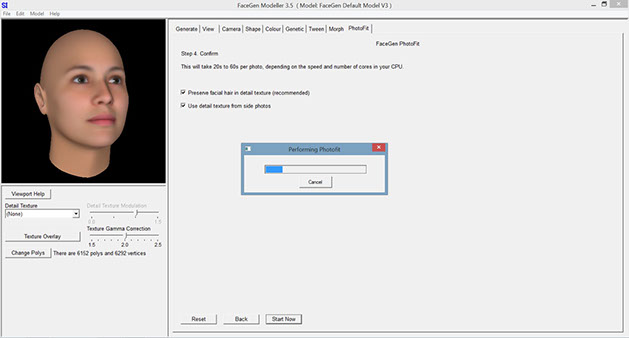
Performing photofit: preserve facial hair in detail texture and use detailed texture from side photos
Fourth step
- Modify settings: Generate random face or choose other parameters such as gender, age, caricature and race morphing
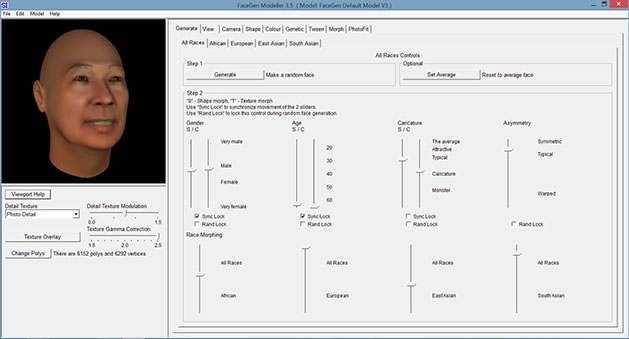
Sixty years old
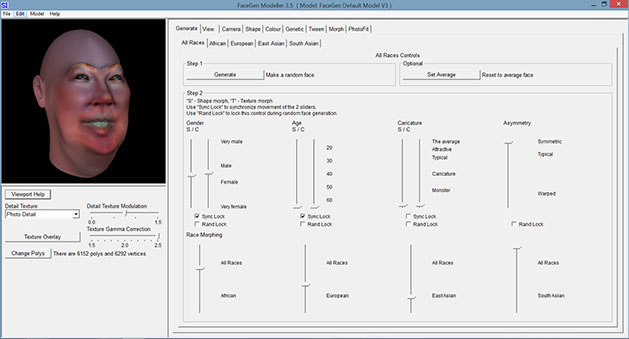
Generate sixty gears old/caricature monster
PRINTING 3D MODELING
Tools:
- Wings 3d
- Rhinoceros / Grasshopper
Machine:
- form+1
3D printer materials and equipment:
- Grey Photopolymer resin Formulation (FLGPGR02)
- Alcohol, spatula,cutting pliers, latex gloves and container
- Wings 3d
Wings 3d is a open source polygon modeler that is easy to use
Shortcuts:
- SPACE : select/deselect
- Tab : view numeric entry in drag mode
- C : vertex connect
- I : select similar
- S : smooth object
- L : loop edges
Before starting to modeling I followed this tutorial
First step
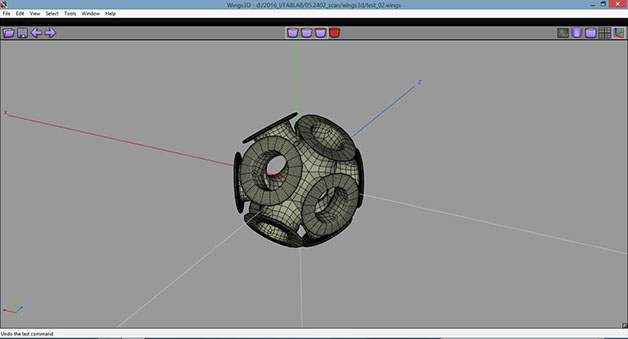
Right click / icosahedron
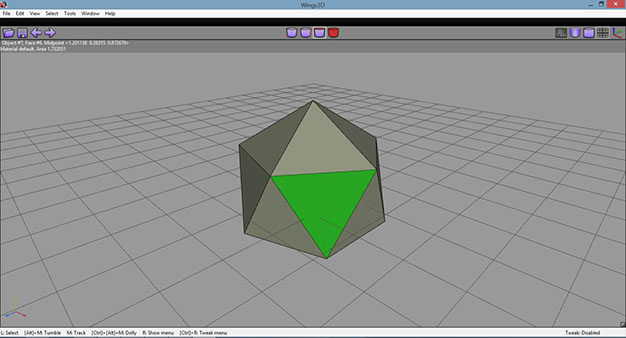
Select the polygons and insert it then extrude, weld the vertex, weld the vertex and smooth. There are many ways to reach different results.
Same process with different results
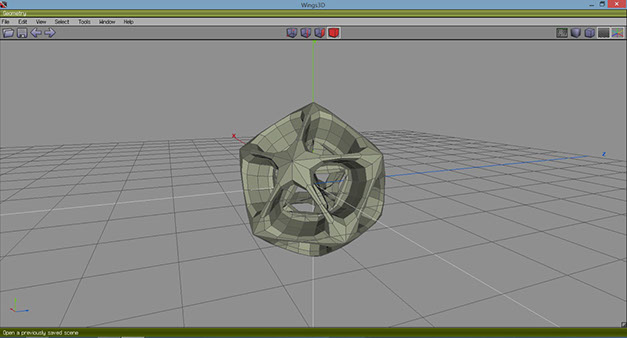
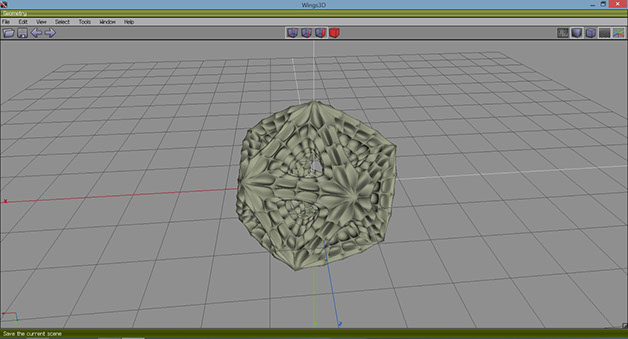
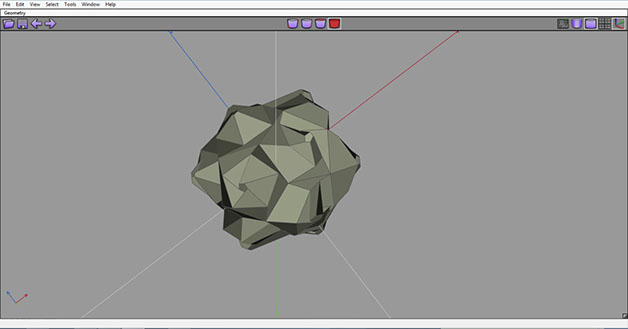

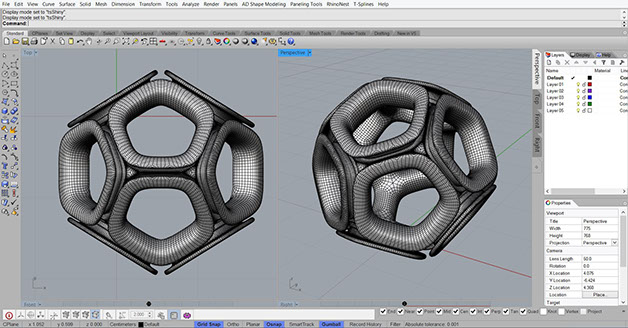
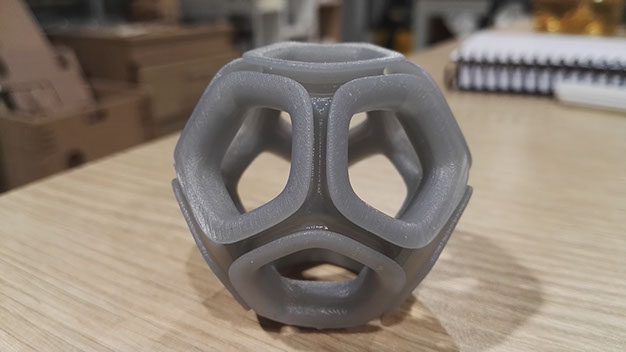
Finally I made a model that would take a long time to do it in other programs. Then exported to rhinoceros in .stl format to verify the quality of the joints.
PRINTING PROCESS

Formlabs based Massachusetts was founded in 2011 it began as a project sponsored in kickstarter page with almost 3 million dollars creating the Form 1 3D printer.
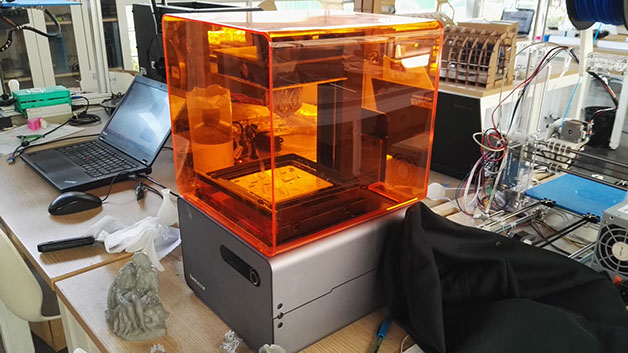
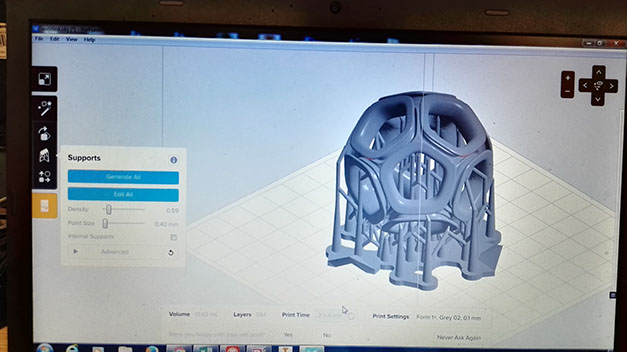
Formlabs software environment
The formlab software is very easy to use, inside the program just modify the supports (density)
and move or rotate the object for has a less time of print.
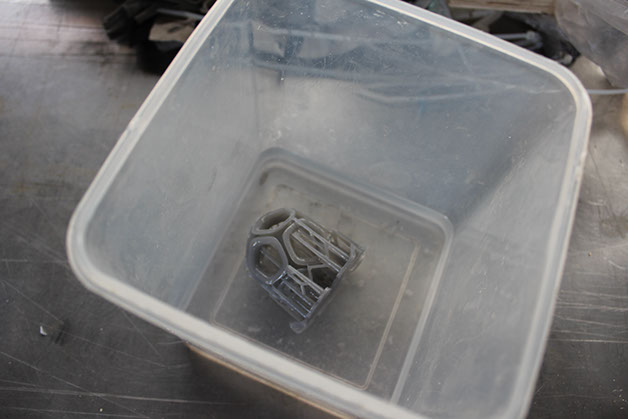
Make sure that the tank is full
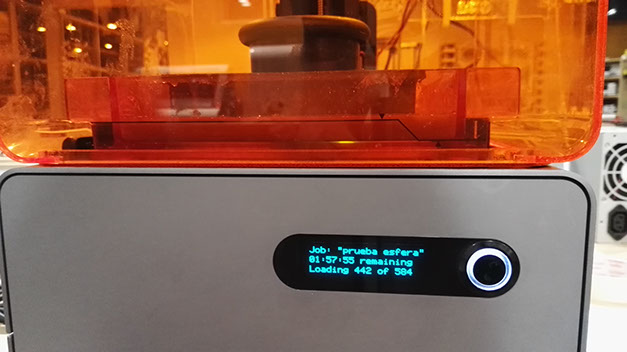
Next day
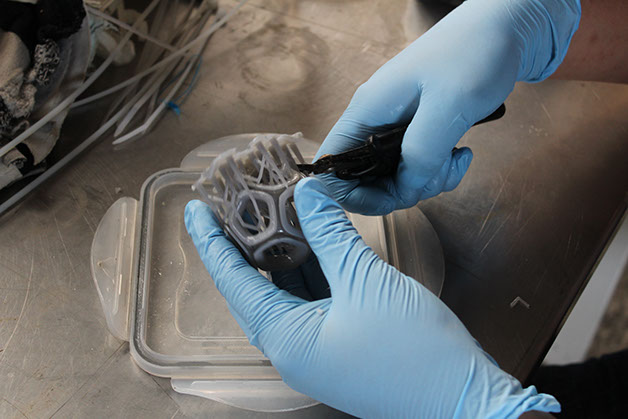
Close up shoot
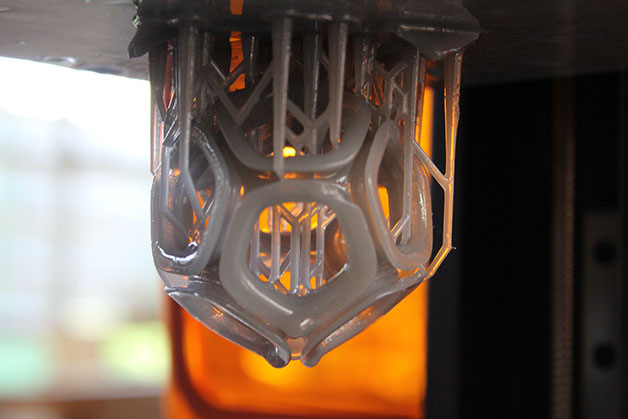
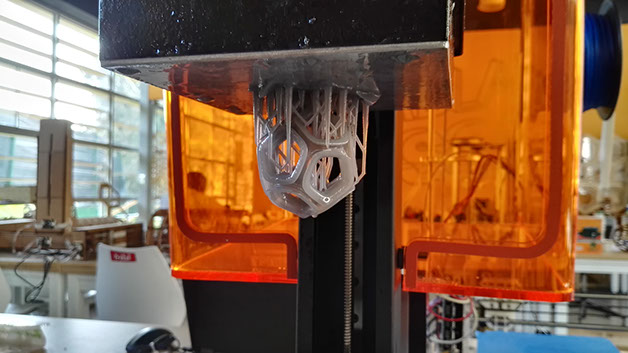
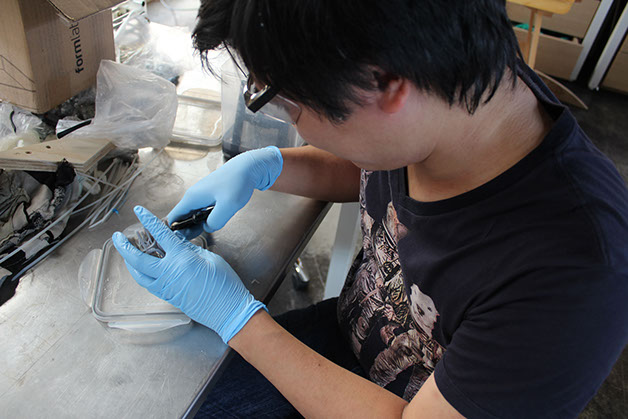
Wear gloves to avoid contact with the resin and spatula to remove the object. Spray alcohol to facilitate the process and pliers to cut the supports.
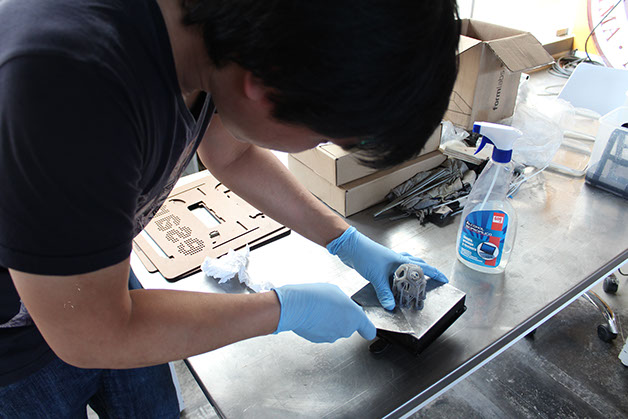
Place the object in the container of alcohol to smooth the surface after cutting the supports
Remove residue of resin for continuous use
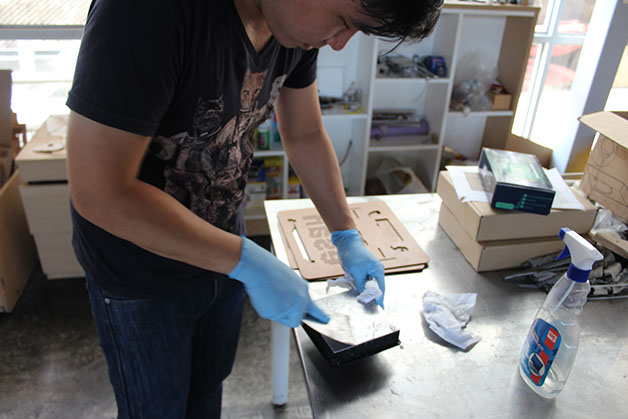
Let it dry for a day
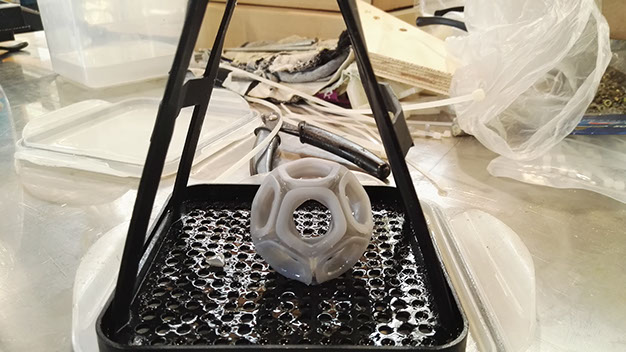
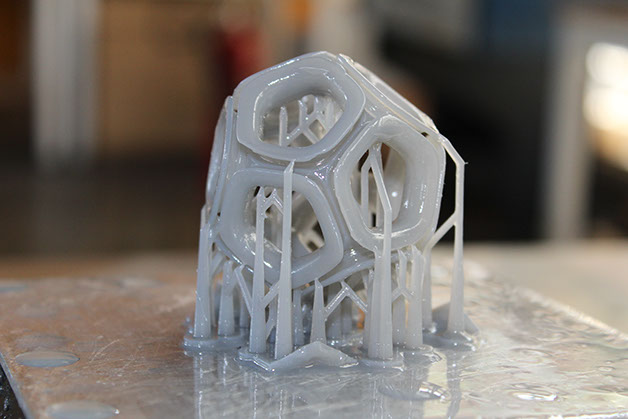
Outcomes "hero shot" photo
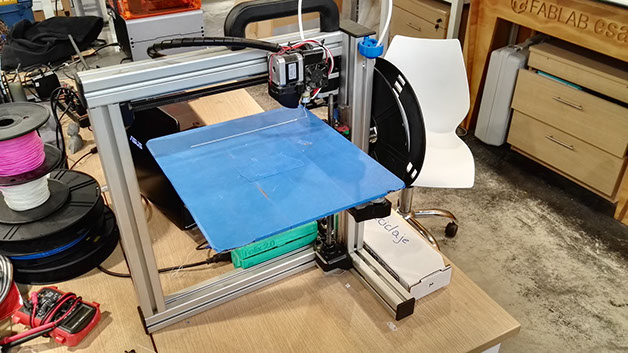
I want to print the same model in the Felix 2.0 printer, but when its my turn, the machine stopped working until further notice.
Conclusions
- Advantages and limitations
-
- Formlab is a best 3D printer on the world market the limitation of this 3D printer is can't print an object bigger than 30 cm. This machine made many supports (structures). Finally this machine has precision better than other printers.
-
- 3D scanning Facegen is easy and intuitive to use just with few steps. But as the name of the program just scan the face and other problems is this program scan the head without hair.
-
What I learned by testing the 3D printers:
- The materials of the 3D printers has certain of limitations regarding the cost, because it could print using local materials with low cost production.
- The process for printing an object is simple with just tree steps, you can be printed it. The program is very intuitive and practical.
Learning outcomes
- Identify the advantages and limitations of 3D printing and scanning technology.
- Apply design methods and production processes to show your understanding.
Have you:
- Described what you learned by testing the 3D printers:
-
Shown how you designed/made your object and explained why it could not be made subtractively
- The design may no be subtractively, because first of all the material (resign) should be solid for the laser go subtracting layers of design.
- Scanned and object
- Outlined problems and how you fixed them
- Included your design files and "hero shot" photos of the scan and the final object.
Download files
Copyright © Jorge Huang Li - FAB ACADEMY 2016