
ELECTRONICS PRODUCTION
WEEK 04
Task:
- Make an in-circuit programmer
- Hello.ISP.44
Tools and equipment:
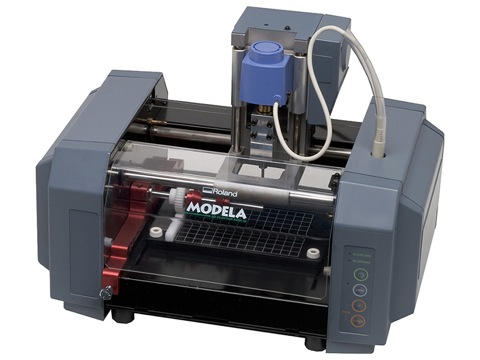
- Milling machine: Roland MDX-20 mill
- Milling cutter: 1/64 for mill the circuits and 1/32 for cut the board
- Welding tools: Soldering iron stand, soldering wire and solder paste
- Multimeter
Software:
- Fabmodules
- Eagle
- Gimp
Review the HelloISP.44
HelloISP.44 is a programmer board that we going use to program other boards along the academy.
The microcontroller that will be used for this assignment is ATtiny44.
Programmer: An electronic devices that configures a programmable circuits
Data Sheet: A document summarizing the performances and other characteristics of a component
Microcontroller: A programmable integrated circuit capable of executing the orders recorded in its memory

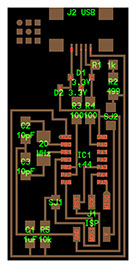
Components:
- 1 ATtiny 44
- 1 capacitor 1 uF
- 2 capacitor 10 pF
- 2 resistor 100 ohm
- 1 resistor 499 ohm
- 1 resistor 10k
- 1 resistor 1k ohm
- 2 jumpers 0 ohm
- 1 crystal 20 mhz
- 2 zender diode 3.3v
- 1 mini usb cable
- 1 2x3 pin header

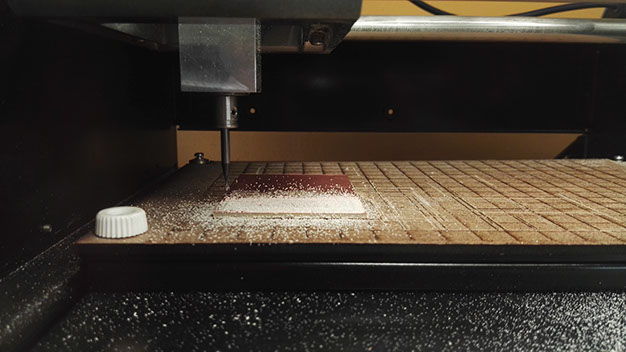
Milling process
- Roland MDX-20 mill
Roland MDX-20mill is a machine that make pbc circuits and 3D scanner
PBC fabrication
-
Materials:
- Copper plate
- Double-Sided Bonding Tape
- Milling cutter: 1/64 for mill the circuits
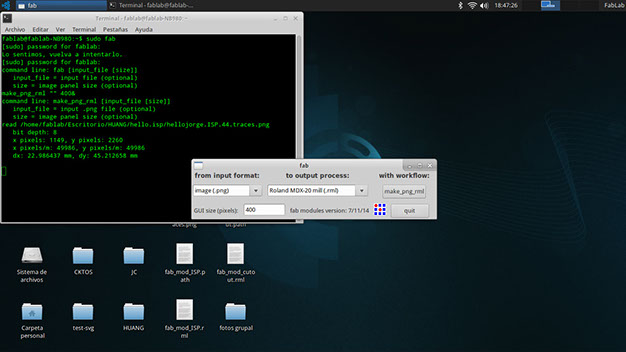
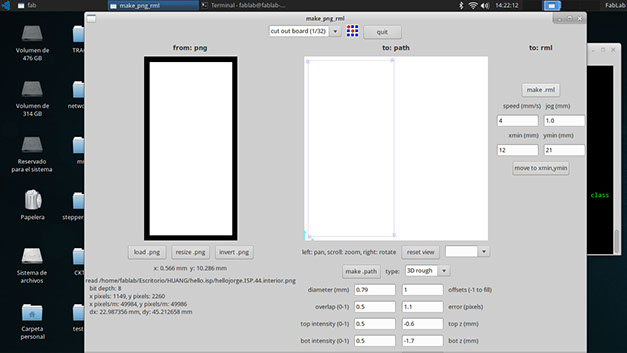
Open terminal in ubuntu
- Type: sudo fab for open fabmodules
- Input format: image(.png)
- Output process: Roland MDX-20.mill(,rml)
- With workflow: make_png_rml

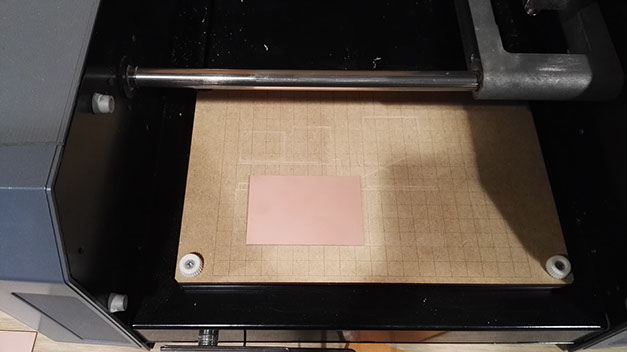
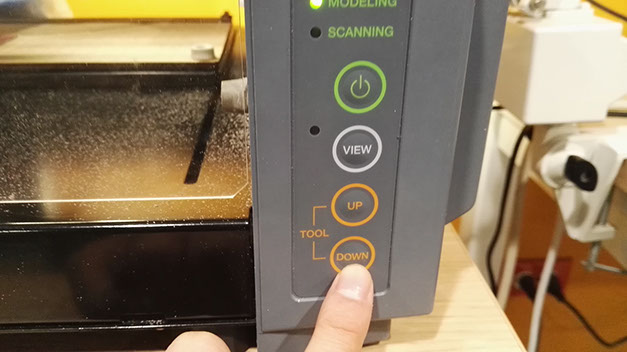
Put the copper board in modela bed and cap the machine and move the milling cutter down
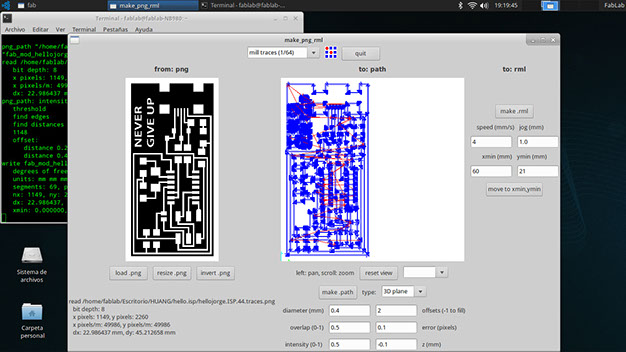
Make_png_rmk menu:
- Load png(select your traces image)
- Select type of milling cutter: mill traces (1/64)
- Offtset(-1 to mill): 4
- Error (pixels): 0.1
- Press: Make .path
- xmin ymin : move the coordinate of the copper board and press move to xmin, ymin
- Calibrate manually z axix.
- Make. rml: show the milling time
- Send it / star milling
Open terminal in ubuntu
- Type: sudo fab for open fabmodules
- Input format: image(.png)
- Output process: Roland MDX-20.mill(,rml)
- With workflow: make_png_rml
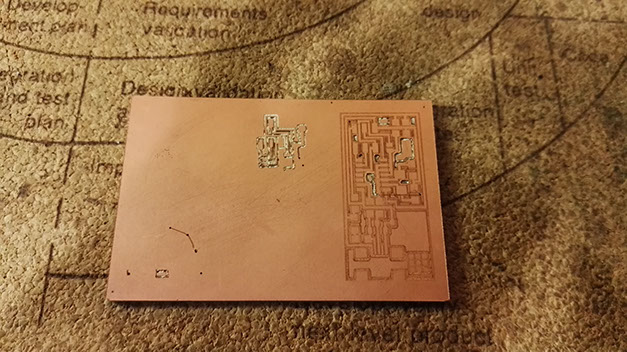
First attempts
Two milling cutters broken because the milling cutter are not adjust to the modela adapter
Cut pcb:
- Change the cutter milling to 1/32
- Same workflow of the first milling progress but just change the type of millling cutter in this case: "cut out board"
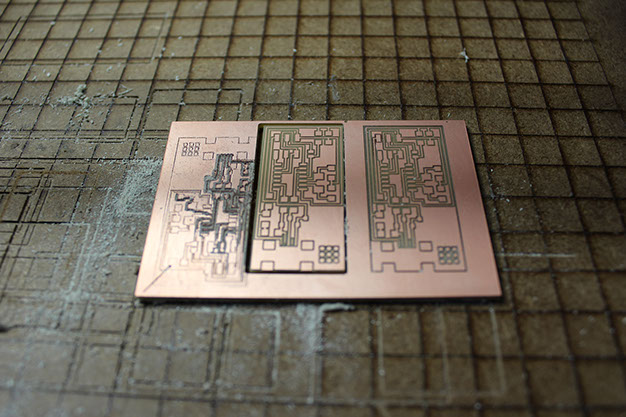
Cutting board seems easy
Before to cut the board I used them for welding test
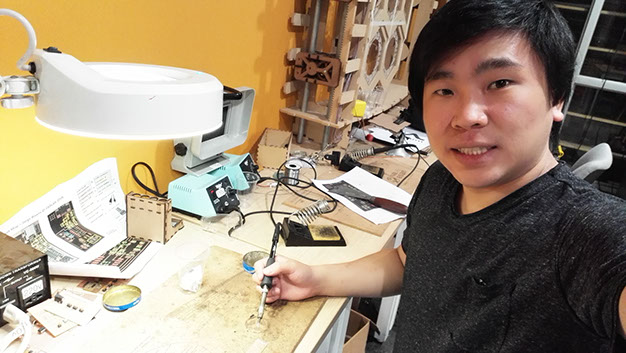
Welding process
Welding procress
- Welding tools: Soldering iron stand, soldering wire and solder paste
- I started soldering the ATiny44, because look more difficult than other parts.
- Later the diodes need to sold in the correct position of the anode and cathode
- Soldering iron (cautin) can burn the components if are more than 65 centrigade of temperature
- One trick is to put welding the plate in a part of the component to facilitate placement and prevent movement

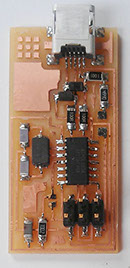
Heroshot
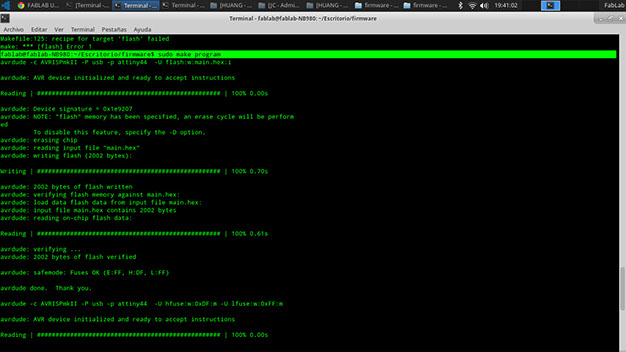
Programming
- Hello.ISP in Ubuntu
Download files:
Download drivers in ubuntu terminal:
- apt-get install flex byacc bison gcc libusb-dev avrdude
- apt-get install gcc-avr
- apt-get install avr-libc
- apt-get install libc6-dev
Inside the firmware folder: right click and choose "open terminal here"
Type commands:
- make clean
- make hex
- sudo make fuse
- make program
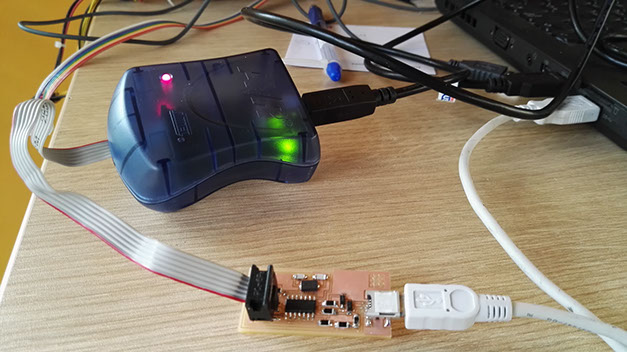
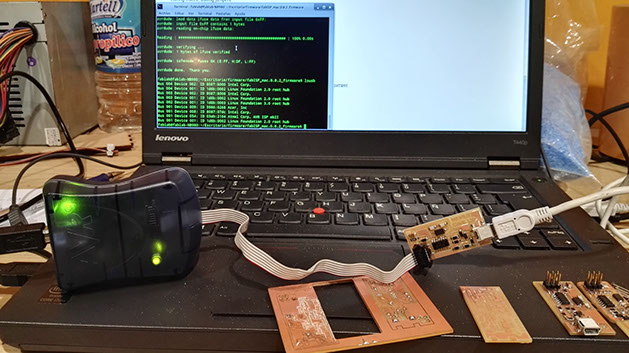
Connect the helloISP.44 board to the avrispMKII and microusb for power supply. The light of the AVR should be green or connect the AVR other way round but it still no working
Second attempt
- Hello.ISP version never give up
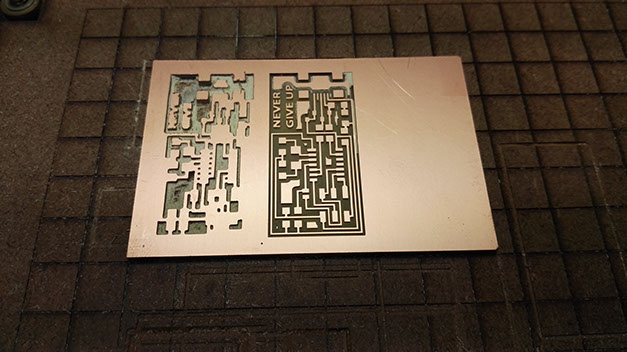
In this second attempt I made the same process with the modela and improving soldering skills.
I wrote in the board "never give up" for continue trying up to program the board.
Because already I broken 3 milling cutters of 1/64 and sold 3 boards that can be flash (program)
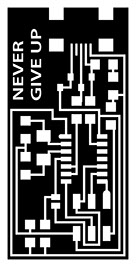

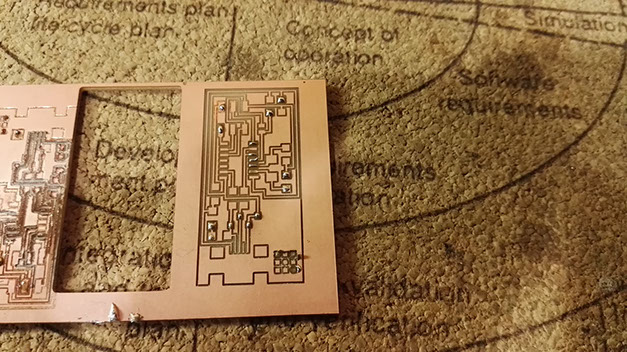
TRACES
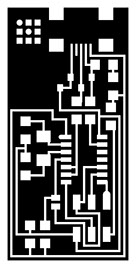
INTERIOR
And the same, I still making fails attempt but I continues trying
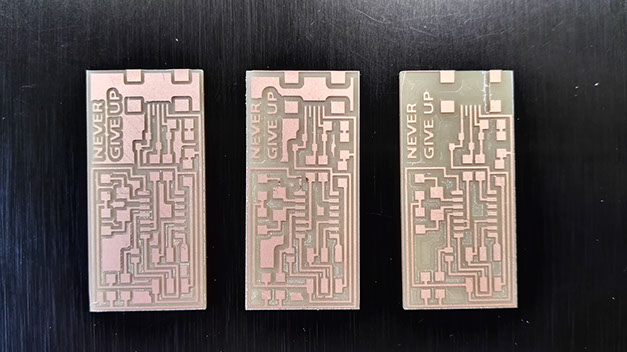
BOARD 01
BOARD 02
BOARD 03
Heroshoot
Finally I made 3 perfect boards for documentation here are the parameters:
Board 01
- Offset: 2
- Error pixels: 0.1
- 8 minutes
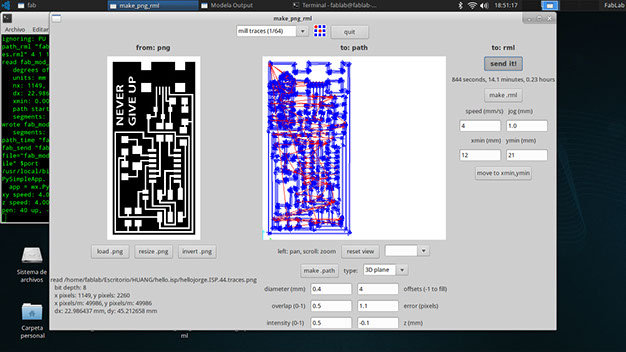
Board 02
- Offset: 4
- Error pixels: 0.1
- 14 minutes
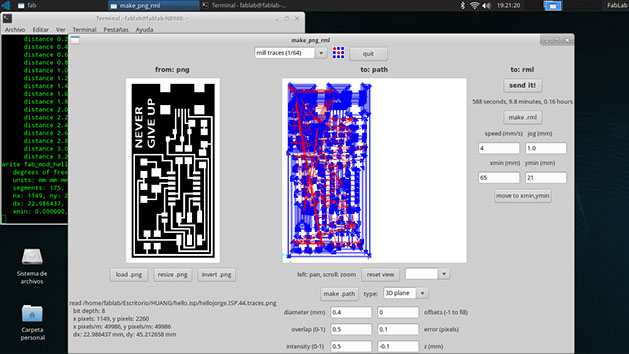
Board 03 (best choose for prevent welding problems with the traces)
- Offset: 0
- Error pixels: 0.1
- 20 minutes
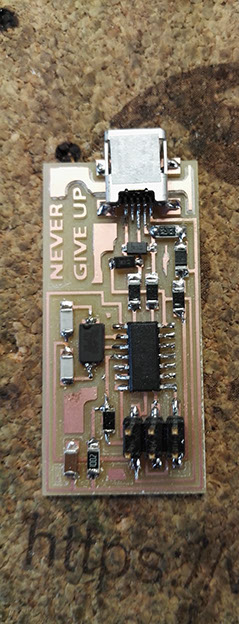
Soldering
After weld the components of helloISP.44 version "never give up"
Programming again
- Hello.ISP in Ubuntu
Connect the helloISP.44 board to the avrispMKII and microusb for power supply.
Open terminal in ubuntu with right click and then type "sudo fab" to accesss
Download files:
Download drivers in ubuntu terminal:
- apt-get install flex byacc bison gcc libusb-dev avrdude
- apt-get install gcc-avr
- apt-get install avr-libc
- apt-get install libc6-dev
Inside the firmware folder: right click and choose "open terminal here"
Type commands:
- make clean
- make hex
- sudo make fuse
- make program
Before to start to flash the board open the file makefile and change the code with notepad or brackets because I found some problems for flash the first board.
AVRDUDE = avrdude -c avrisp2 -P usb -p $(DEVICE) # edit this line for your programmer to
AVRDUDE = avrdude -c avrispMKII -P usb -p $(DEVICE) # edit this line for your programmer
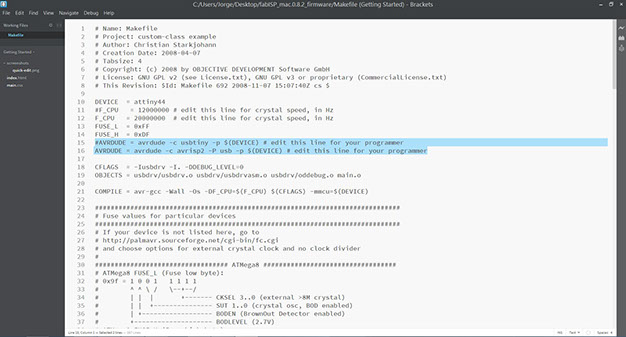
This change is necessary for admit the avrispMKII as programmer
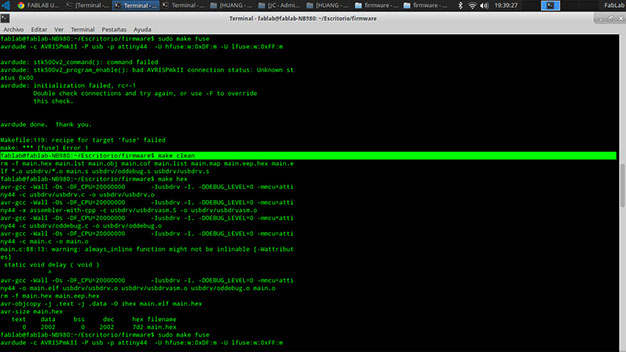
sudo make clean
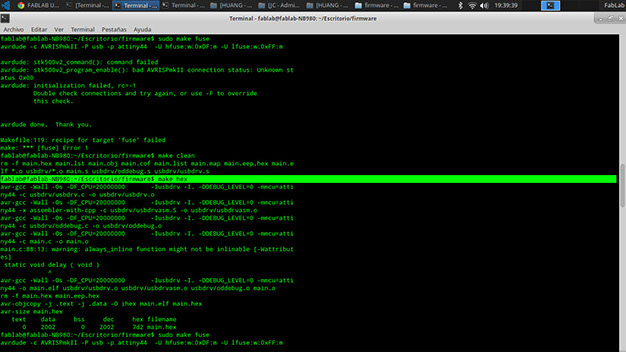
sudo make hex
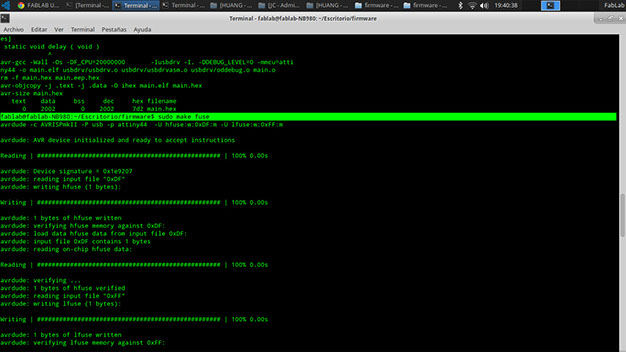
sudo make fuse
sudo make program
And thats all
I need to improve my self using the roland modela and welding time for made more attempts if I fail.
Learning outcomes:
- Describe the process of production
- Demonstrate correct workflows and identify areas for improvement if required
Have you
- Shown how you made the board
- Explained any problems and how you fixed them
- Included a "hero shot" of your board
Download files
Copyright © Jorge Huang Li - FAB ACADEMY 2016