Bootloading the Fabduino
I used the Arduino IDE 1.6.8 to bootload the Fabduino.
The conections layout:
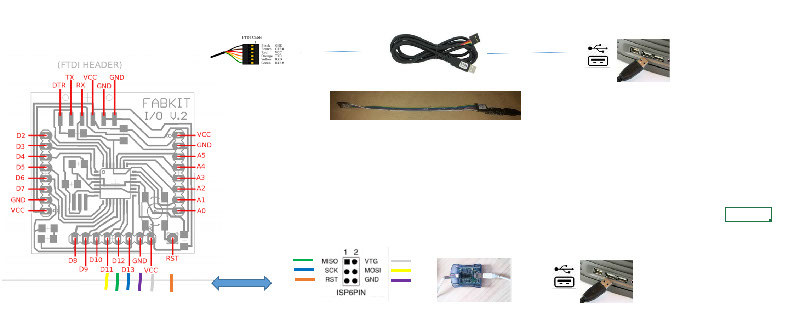
A FTDI cable, or inthis case a USB to TTL converter, is conected between the PC and the FABDUINO. And AVRISP MKII programmer is connected D11, D12, D13, GND, VCC and RESET.
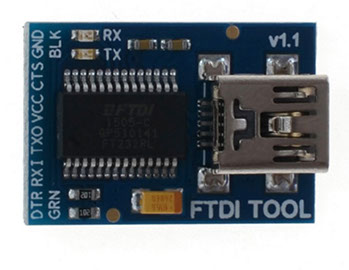
The USB to TTL DEVICE Crius
For a detailed connection reference of the cable assembled with this device go here
You'll need the Arduino software, version 1.0. You can download Arduino 1.0 from the Arduino site.
Bootloading the Fabduino
We are going to burn the bootloader in the Fabduino - ATmega168 with a 8 Mhz external clock.
Power the Fabduino and your Programmer. The USB to TTL device have the VCC and GND pins, and has to be connected to the 6-pin programming header on Fabduino, so when programming the board not needs to use external power.
Identify the serial port that is connected to Fabduino.
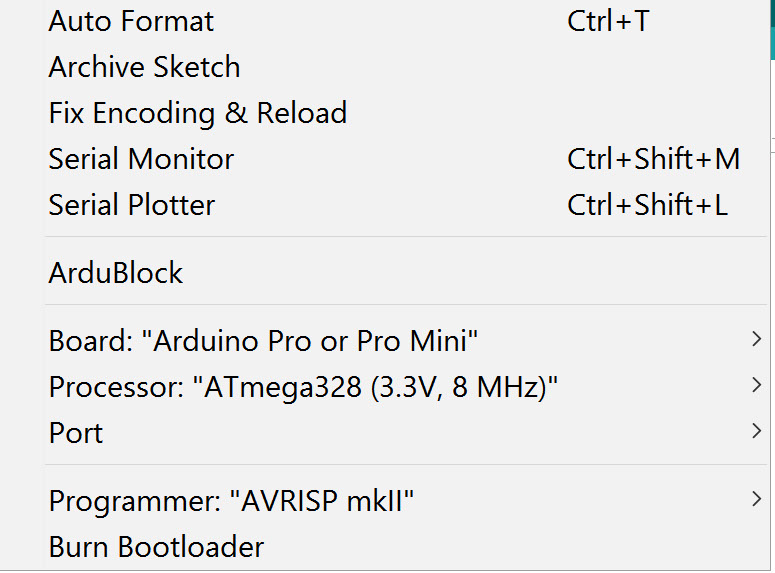
Select your board type: Tools > Board > Arduino Pro or Pro Mini (3.3V, 8 MHz) w ATmega168
If you are using an ATmega328 - make sure to select the Arduino Pro or Pro Mini (3.3V, 8 MHz) w ATmega328 option.
Select your programmer: Tools > Programmer menu > AVRISP mkii
I used the AVRISP MKII programmer. Connecting the ISP pins (5V, GND, SCK, MISO, and MOSI) from the FabISP to the Fabduino board I soldered a RESET pin (right most pin on bottom of fabduino) to the RESET pin
Then click on: Tools > Burn Bootloader
It was ok.