
Week 3 - Computer-Controlled Cutting
I've made 2 assignments at a time : Computer-Controlled Cutting on vinylcutter and Electronic Production ! Strange association isn't it ?
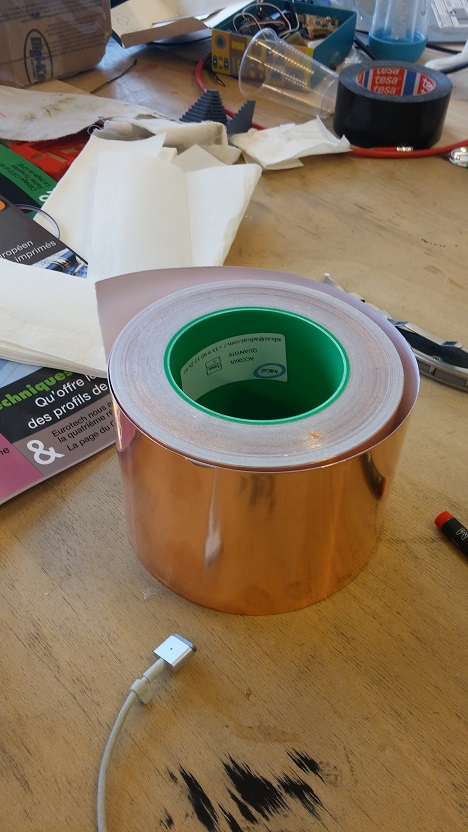
Romain Di Vozzo in Fablab Digiscope show us a material made from copper (100µm thickness) on a solid support.
This configuration makes it possible to cut on the vinylcutter
I decided to test this association on Fablab Descartes's vinylcutter : Roland Camm-1 Pro GX300, with the copper roll that look like this (see below)
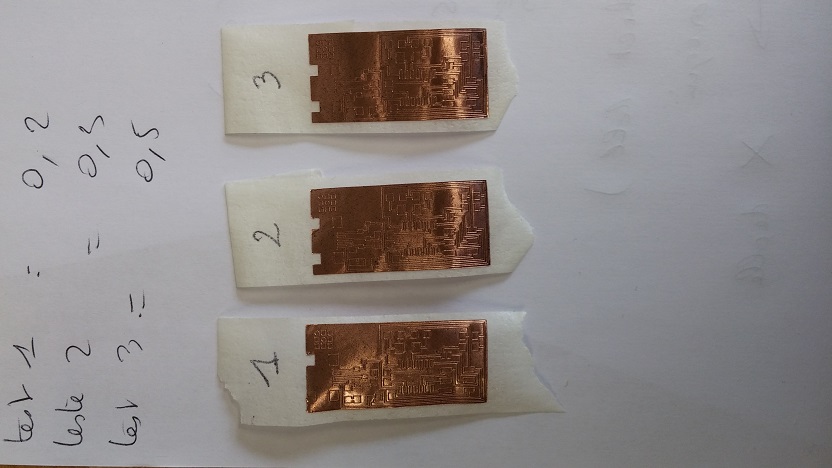
First test
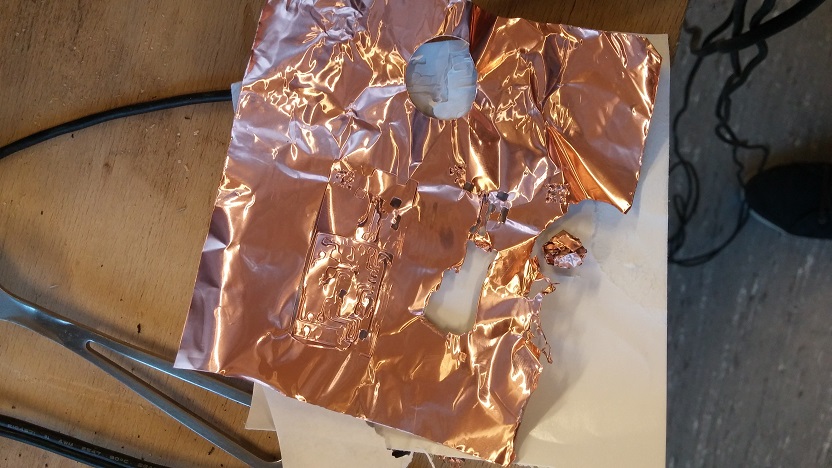
As you can see, I tried directly with standard parameters for standard vinyl and the result is ... catastrophic !
This material is not enough adhesive on the support material, so the copper comes off the support
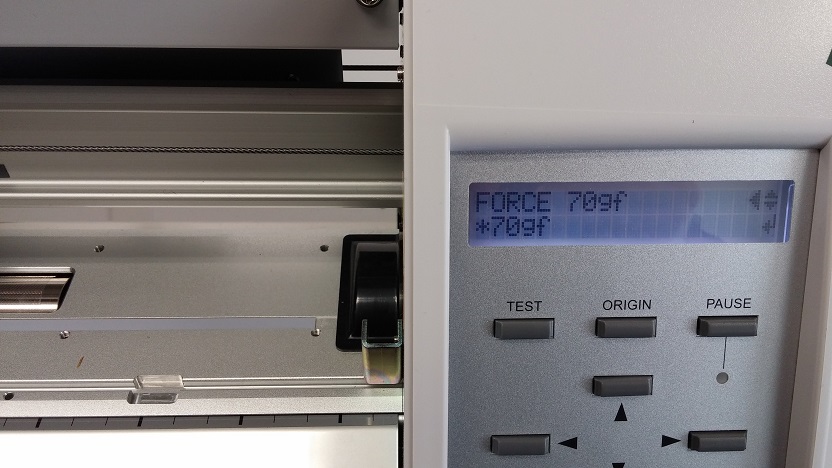
After few tests, the force was set to 70gf which is convenient to pass throuhg the copper. This value depend of your cutter and the material bought, but it could be a good start for your tests
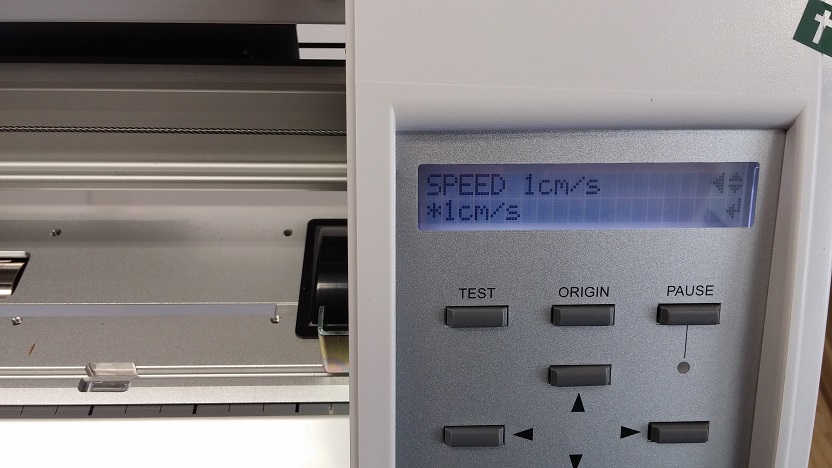
The speed need to be set to the minimum value of your machine or approximately at 1cm/s. Do not try to get speeder or you will have some default on square angle and the copper will comes off the support
When the cutting process is finish, you need to apply a transfer tape one your piece of copper cutted.
Here you can also see different tests made to define the depth of the cutter. 0,5mm seems to be the best setting for me !
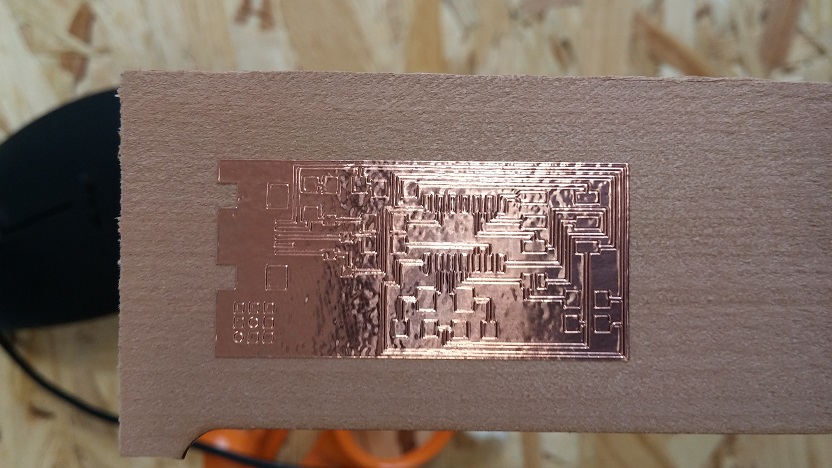
Now you can apply your circuit board on the desired support. Here is pear veneer ... Yes WOOD !
To be sure that the copper will stick more on the veneer than on the transfer paper you have to press hard and be conscientious when you take off the transfer paper
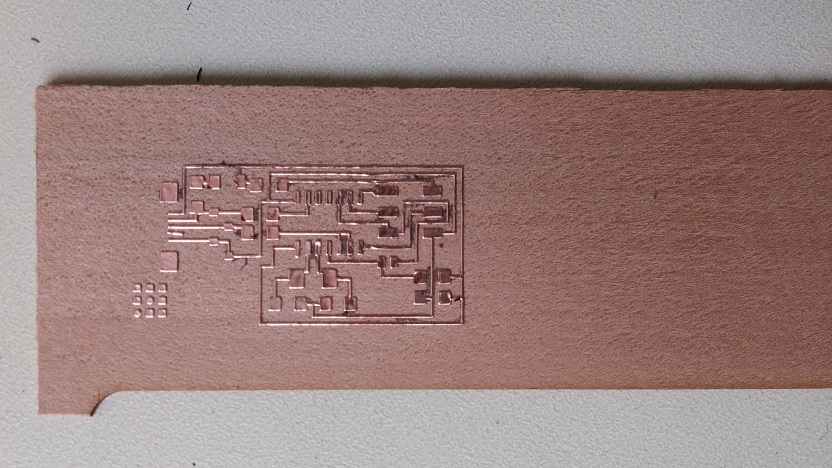
Now you have to realize the "Weeding" (Echenillage in French). This operation consist in removing the useless part of copper with a brussel clip to get the track of the board !
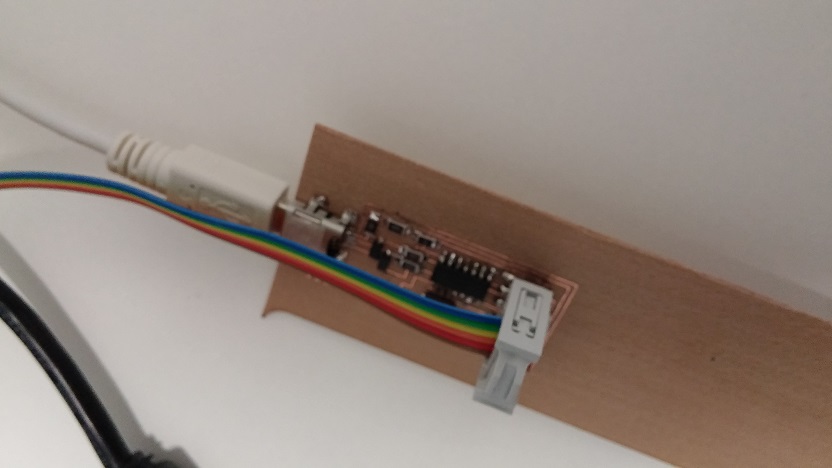
Here is the result after Soldering
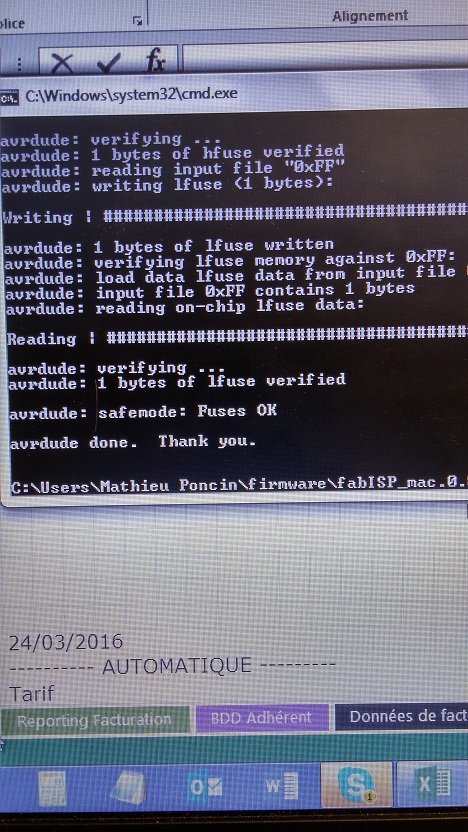
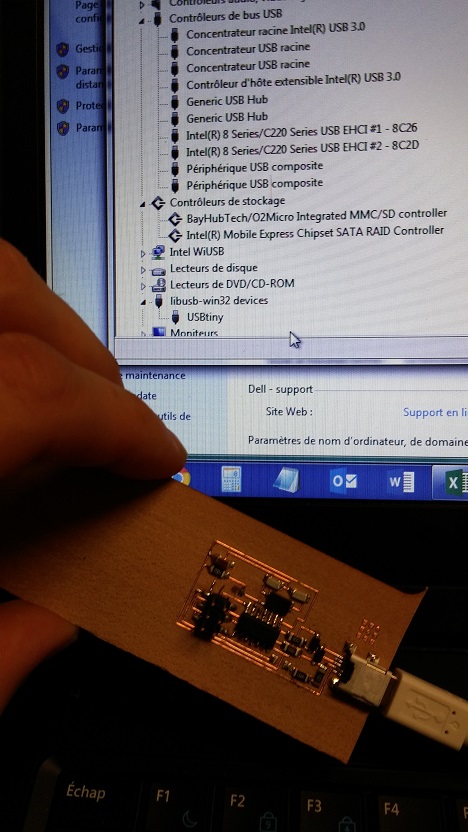
Proof of success ;) :
FUSES OK !
libusb-win32 devices connect !
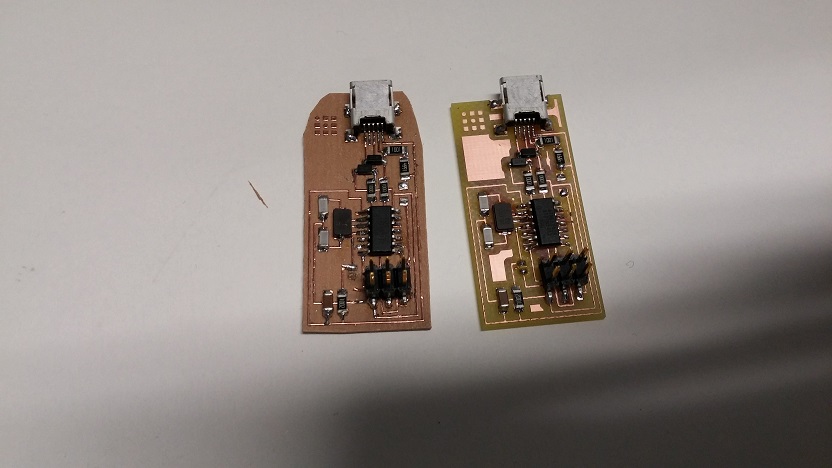
Comparison of the two methods