Electronic Production
MIT'S BRIEFMake the FabISP in-circuit programmer
Mill the board
Solder the components on the board
Set it up for programming
The FabISP is an in-system programmer for AVR microcontrollers, designed for production within a FabLab. It allows you to program the microcontrollers on other boards you make, using a USB cable and 6-pin IDC to 6-pin IDC cable. It is based on the USBtiny and V-USB firmwares, which allows the ATtiny44 to perform USB communication in software.
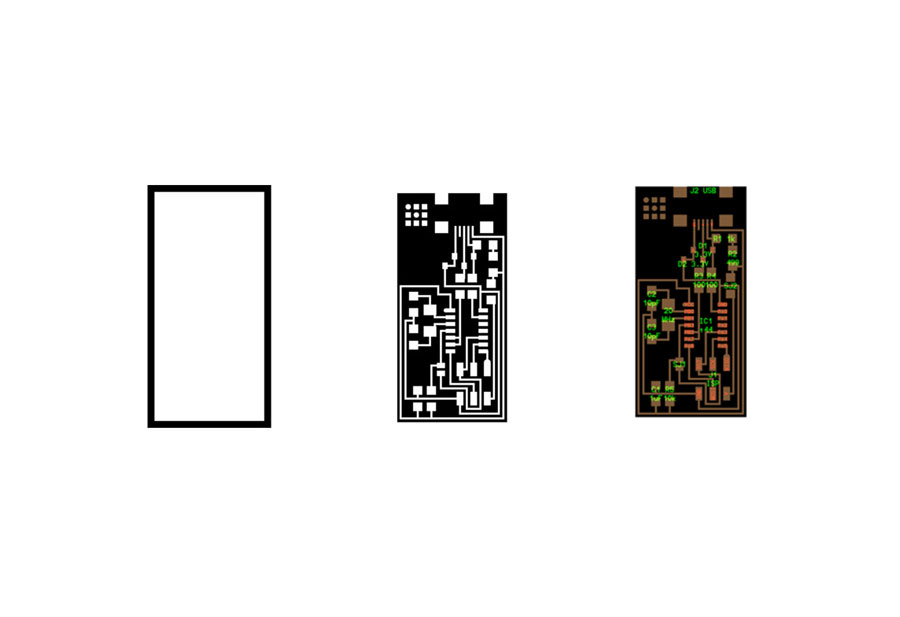
Preparing the Board
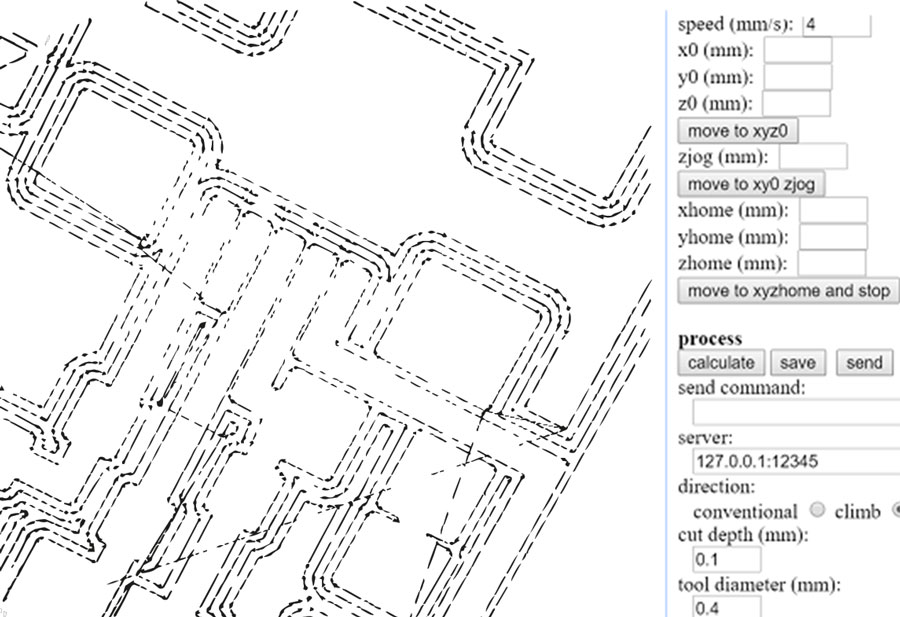
We will be milling the board using a precision desktop milling machine : the Roland SRM-20.So we will open the Fab modules and upload the .png files of the fabisp.
Then we will follow these steps:- select "mill traces (1/64)" in the dropdown menu for the aircut
- set X,Y and Z
- the offset is 1 ; depht:0
- click on "make path" - click on "make .rml"
- select "mill traces (1/64)" in the dropdown menu for milling the circuit
- set X,Y and Z
- change the offset to 4 and the depth is 0.1
- click on "make path" - click on "make .rml"
When the milling is finished we will change the milling-bit for a 1/32 bit and well'll follow these steps:
- load the other .png with the outlines
- set X,Y and Z
- change the offset to 1 and depht 0,5
- click on "make path"
- click on "make .rml"
- click on "begin milling"
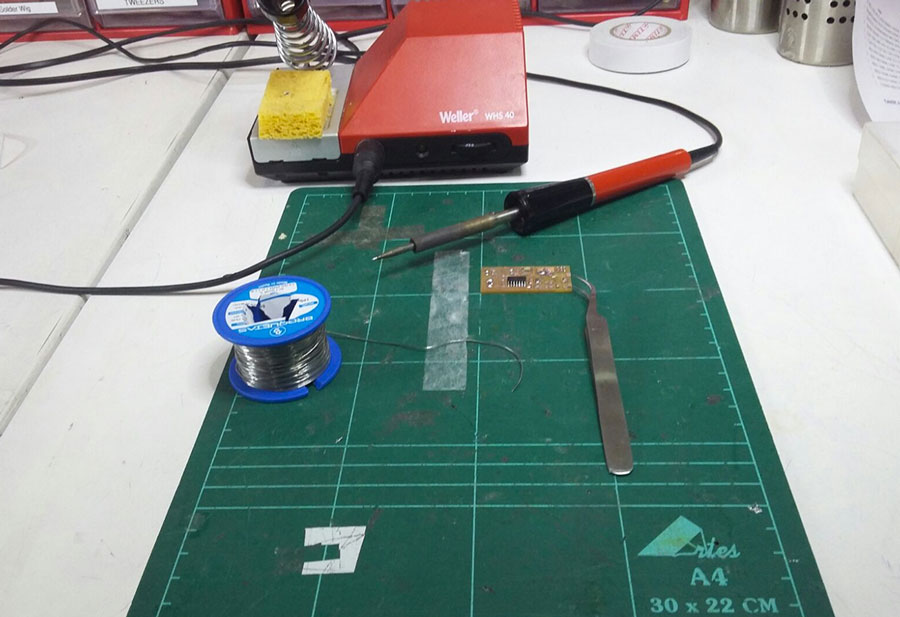
Soldering the Board
Soldering very tiny components was not easy and my first issue was the
"Solder Bridge".
The image below shows just an example of two solder joints.
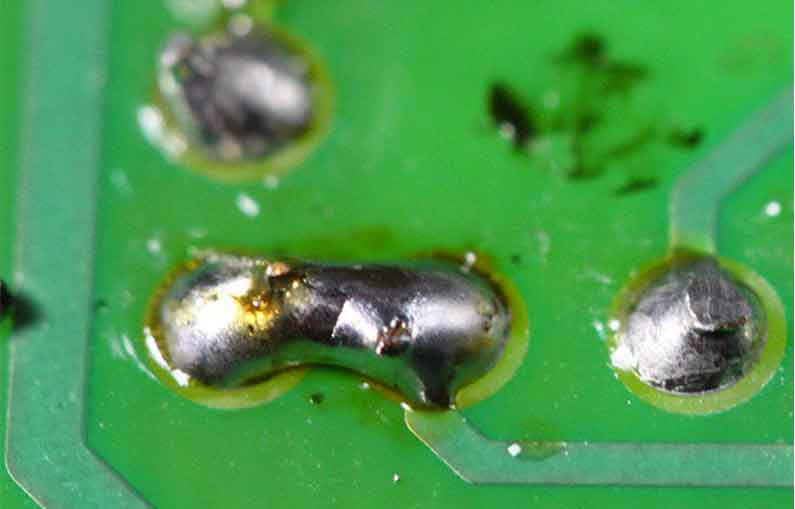
 I managed to join the solder bridge. This represents two solder joints forming an unintended connection melted together. I used a hot iron between the joints. The solder wick also helped get rid of the access.
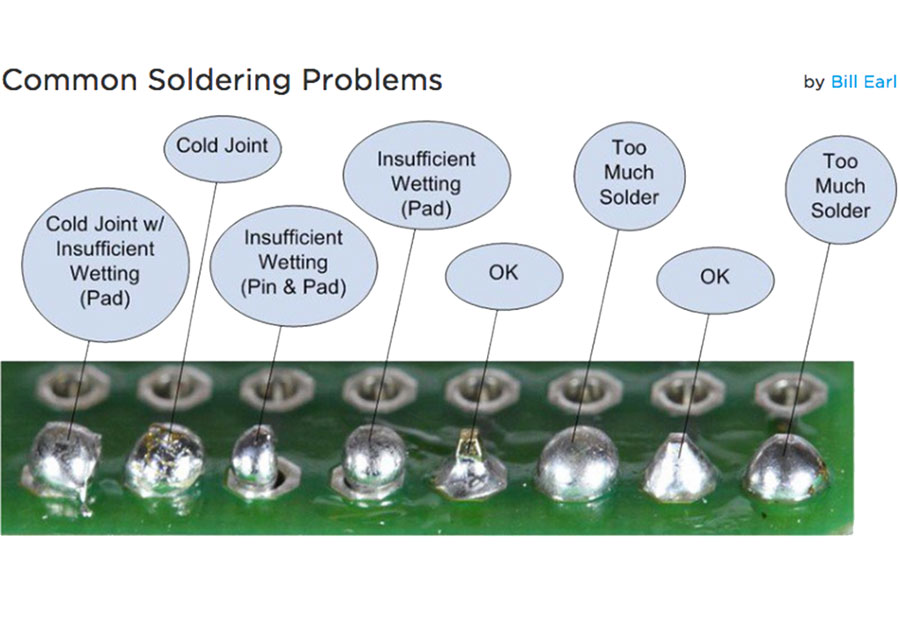
Regarding the components, I started with the smaller ones like resistors and capacitors before trying the microcontroller.Most of the components can be oriented either way, with the exception of the microcontroller (the circle marking pin 1 should be in the lower left) and the zener diodes.
I managed to join the solder bridge. This represents two solder joints forming an unintended connection melted together. I used a hot iron between the joints. The solder wick also helped get rid of the access.
Regarding the components, I started with the smaller ones like resistors and capacitors before trying the microcontroller.Most of the components can be oriented either way, with the exception of the microcontroller (the circle marking pin 1 should be in the lower left) and the zener diodes.
-At the soldering station we will use these tools:
- tweezers
- solder
class="item-intro text-muted">Components to solder:
1 IC MCU AVR 4K FLASH 20MHZ 14SOIC ATTINY44A-SSU-ND
1 CRYSTAL 20.000000MHZ 8PF SMD 644-1039-1-ND
2 DIODE ZENER 3.3V 500MW SOD-123 BZT52C3V3-FDICT-ND
2 CAP CER 10PF 50V 5% NPO 1206 311-1150-1-ND
1 CAP CER 1UF 50V 10% X7R 1206 445-1423-1-ND
1 RES 499 OHM 1/4W 1% 1206 SMD 311-499FRCT-ND
2 RES 100 OHM 1/4W 1% 1206 SMD 311-100FRCT-ND
1 RES 1.00K OHM 1/4W 1% 1206 SMD 311-1.00KFRCT-ND
1 RES 10.0K OHM 1/4W 1% 1206 SMD 311-10.0KFRCT-ND
2 RES 0.0 OHM 1/4W 1206 SMD 311-0.0ERCT-ND
1 CONN RECEPT MINI USB2.0 5POS H2961CT-ND
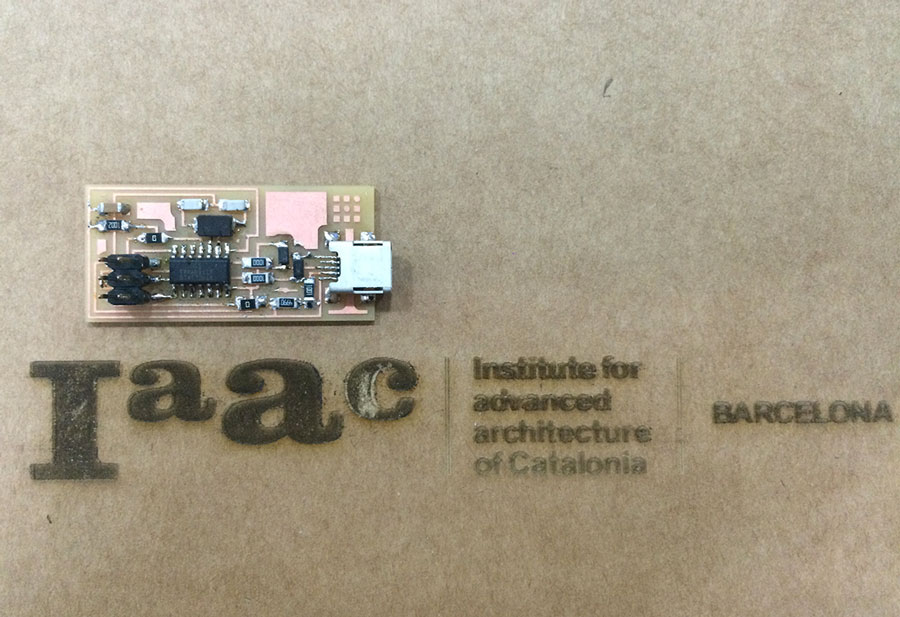
After this precision work our FabISP is ready and it works!!!
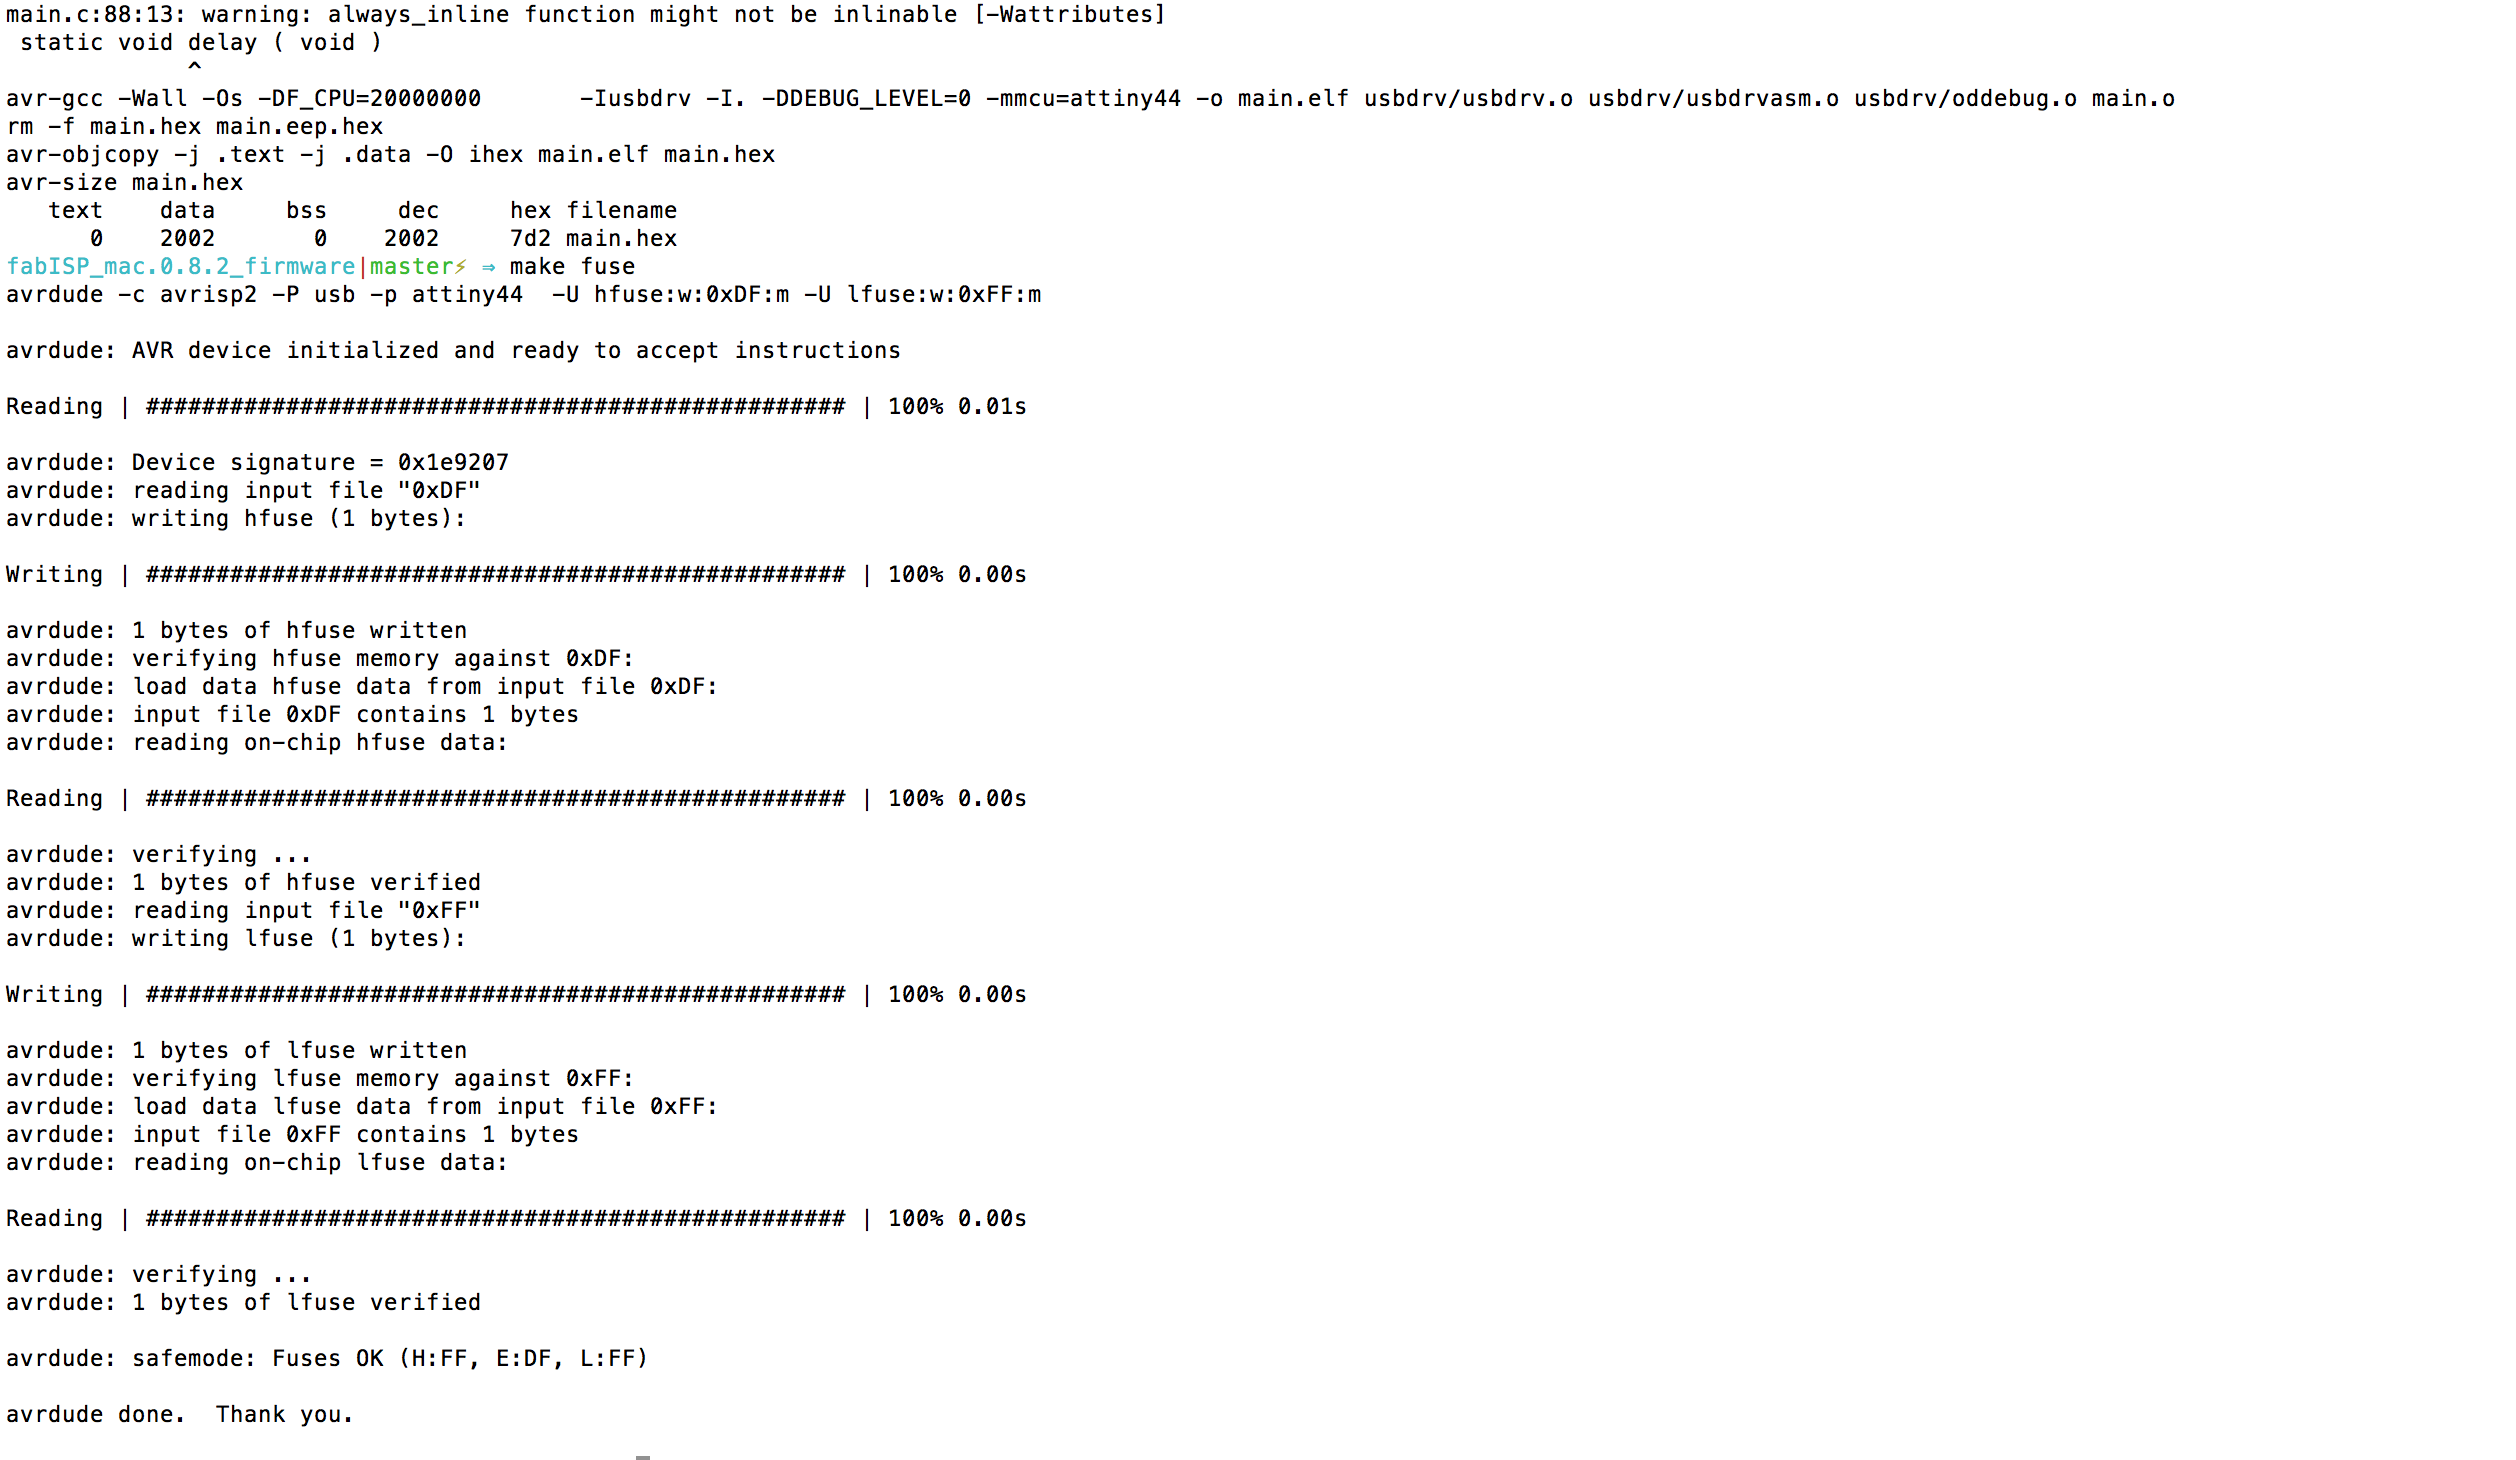
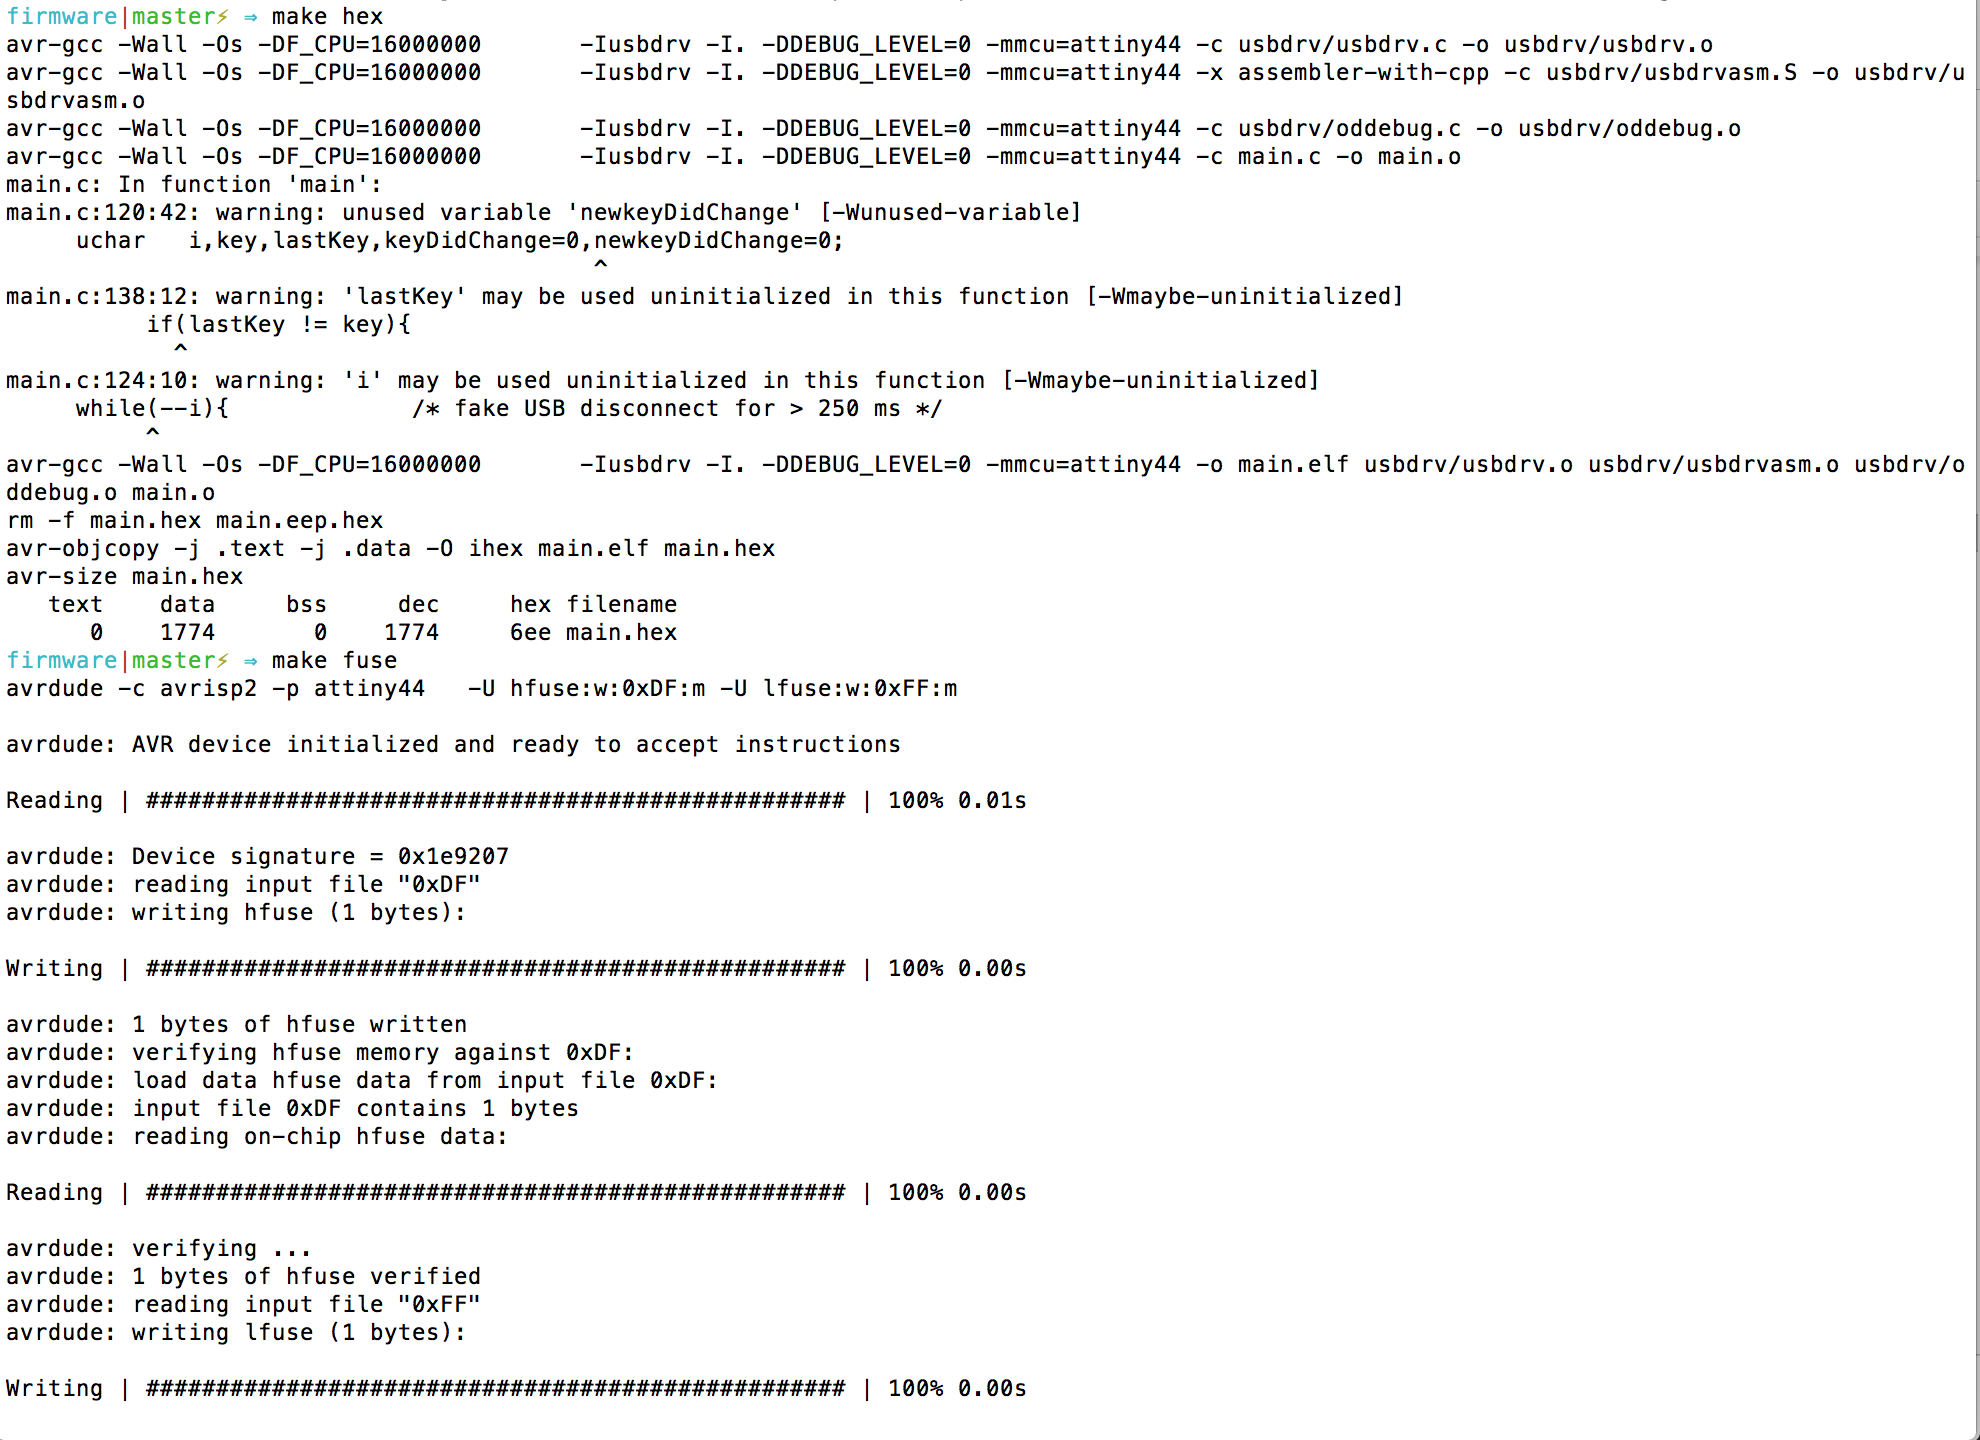
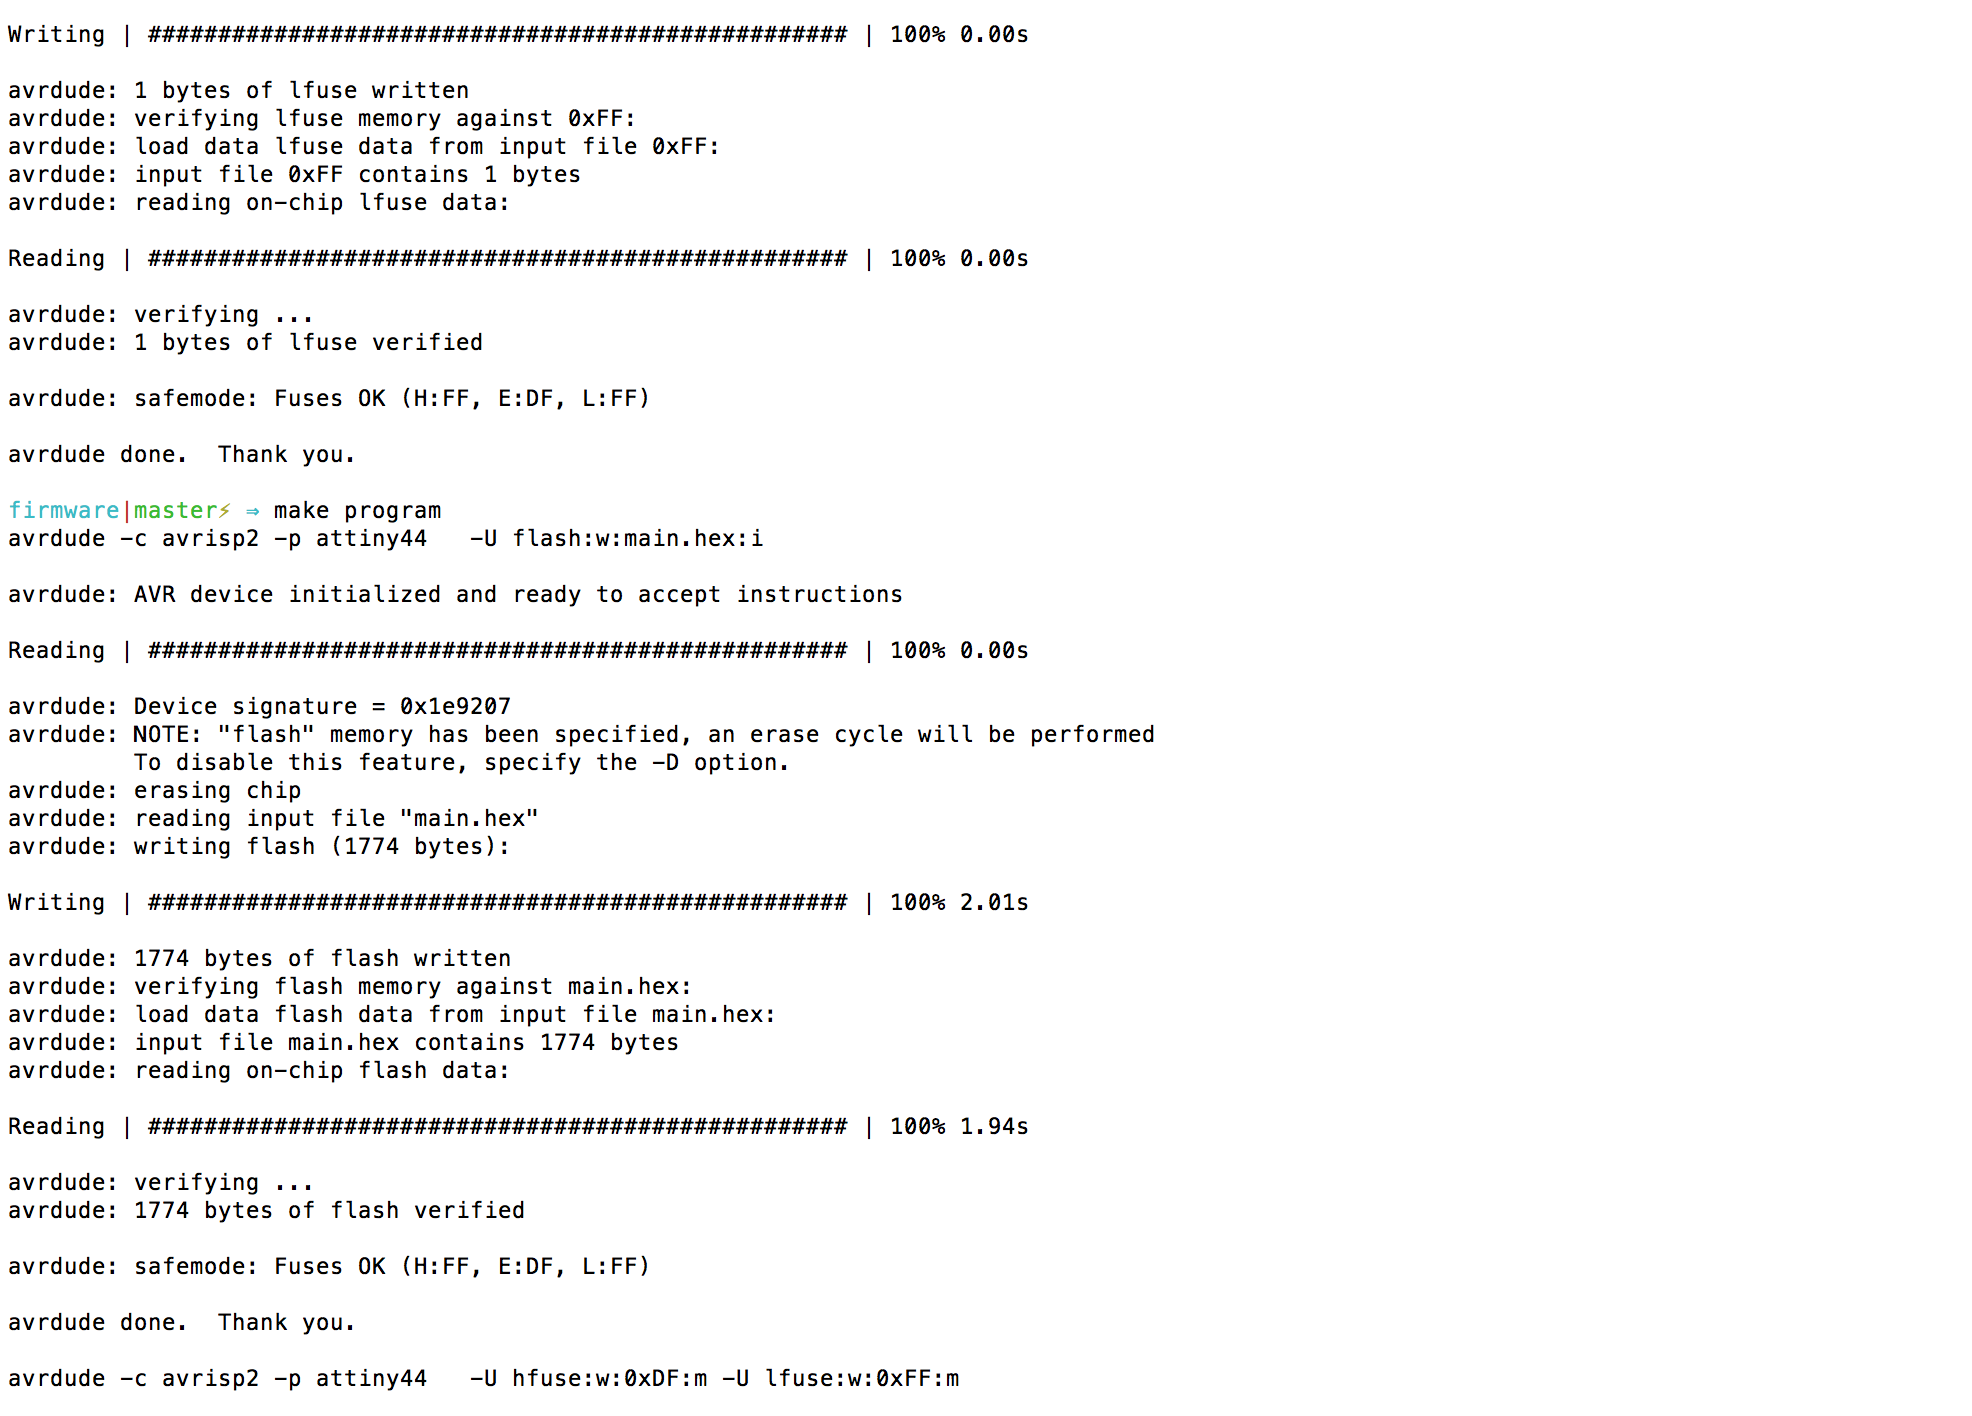
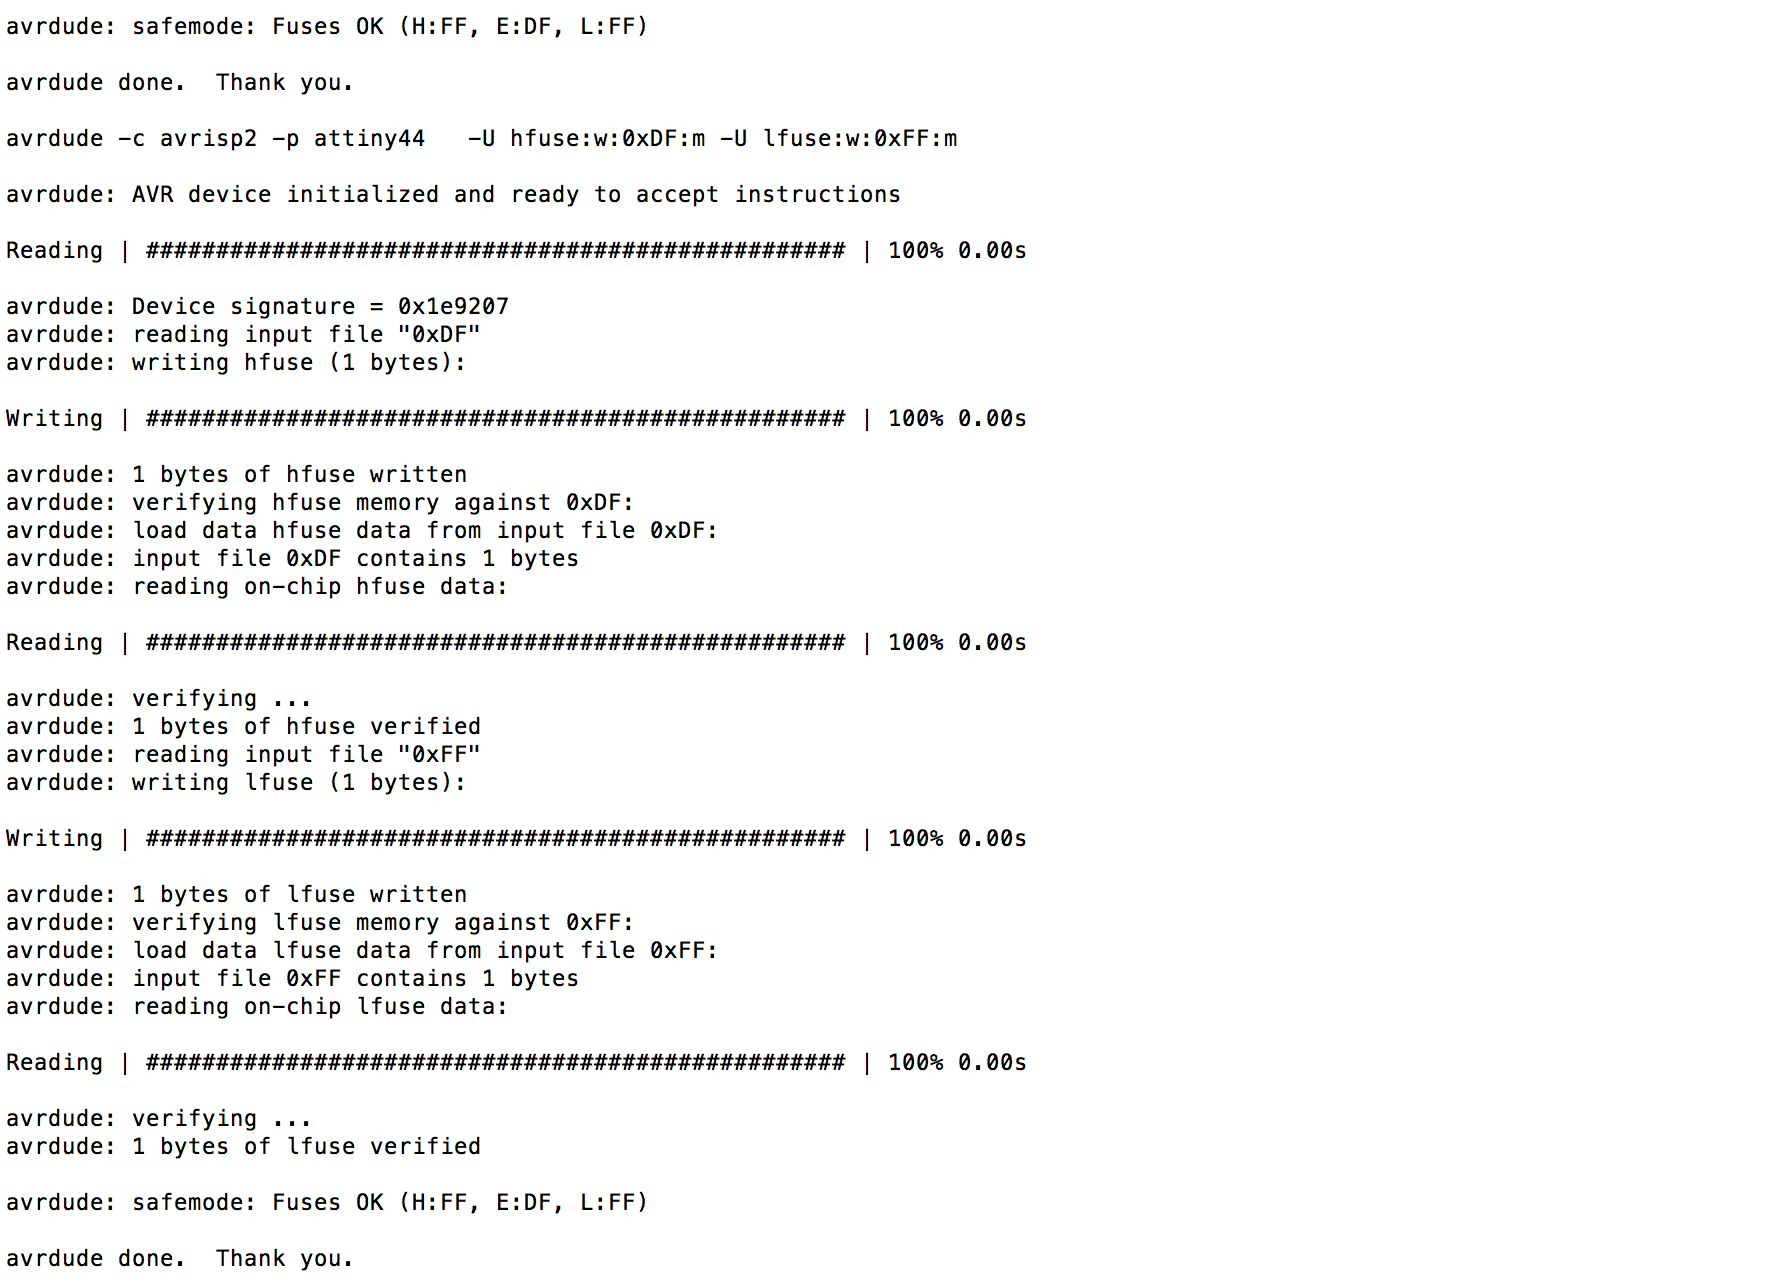
Programming the ATtiny44
If we connect the FabISP to a computer, it should appear as a USB device that can be seen in the Device Manager on Mac OS X.
- connect the fabisp to the computer via a usb-cable
- connect the avr-isp-bootloader. Here, if green lights appear, the soldering works, ran by the following commands:
- make clean
- make hex
- make fuse
- make program.
Fab Isp programming Tutorial