Week 07:
Computer-Controlled Machining
Objectives
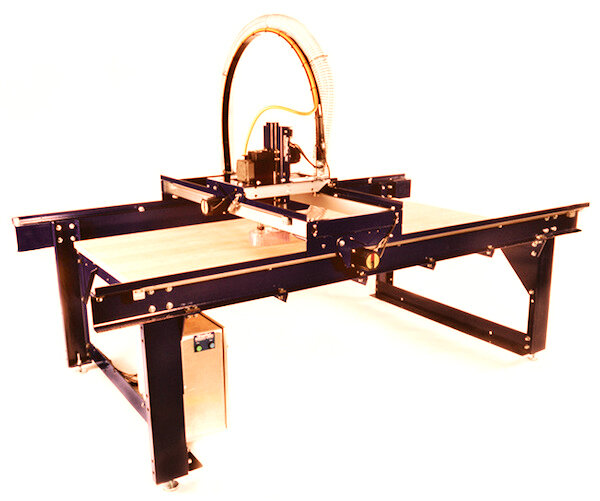
Make something big on a CNC milling machine. We have a ShopBot.
Software
- Fab Modules
- SolidWorks
- Rhino
- RhinoCam
- PartWorks
Machines
- CNC milling machine
Practices
Methodology for how to make a CNC milled product
- image research
- hand-sketch
- sketch in SolidWorks
- add definite measurements to the design
- make design parametric
- translate to lasercutter file for prototype
- lasercut
- adjust file based on what you learn
- see joint tests for your material to determine final design tolerances for milling machine
- lay file out for milling machine and make dogbone fillets with PartWorks
- mill
- adjust via sanding
- any finishing for which you still have the time, patience, or energy
Research
This is basically a running blog of my thoughts:
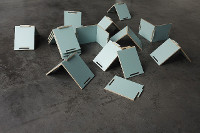
First inspired by Christoph Niemann's lockers for BluePrint Co-working space in Hong Kong.
However, attracted, finally, to a more efficient use of material. I like this design b/c it looks even better when there's more of it:
Now, let's start with the idea that one of the shelves could be a standing desk surface.
JOINTS
- Reference links:
- joints from Juan Pablo Quintero and Coroflot
- Dovetails joints
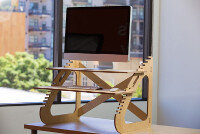
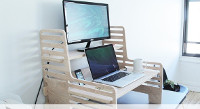
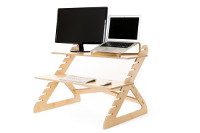
- ReadyDesk
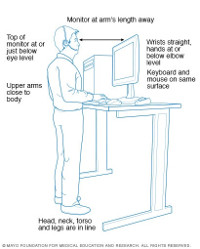
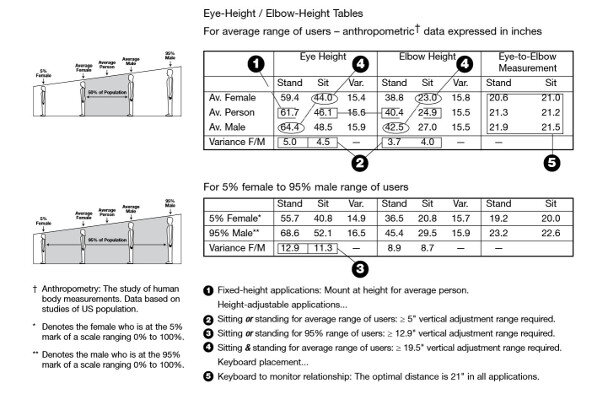
- Height measurement tables for ergonomic design
- Thinking about putting together Ready Desk technology with Open Desk looks with Ladder Shelves functionality.
- Dell U2715H 27" monitor.
Dimensions:
With Stand: 16.1~20.7 x 24.1 x 8.1" / 409.9~524.9 x 612.7 x 205 mm
Without Stand: 14.3 x 24.1 x 1.8" / 363.4 x 612.7 x 46.4 mm - Ideas for simple adjustability are seen above.
I prefer typing on my laptop over typing on a free keyboard, however, what I'd really like to be able to do is use two monitors at once. So, there's a that accommodates that called Ready Desk:- 31" wide x 22" tall x 24" deep
- Shelf notches at: 3-1/2", 5-1/2", 7-1/2", 9-3/8", 11-3/8", 13-1/4", 15-1/4", 17", 19", 21"
I chose an external monitor that seems a reasonable size and a reasonable price on which to base measurements:
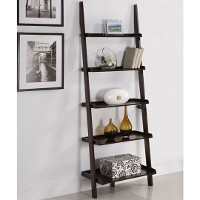
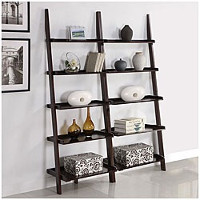
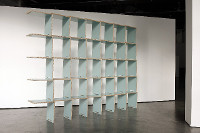
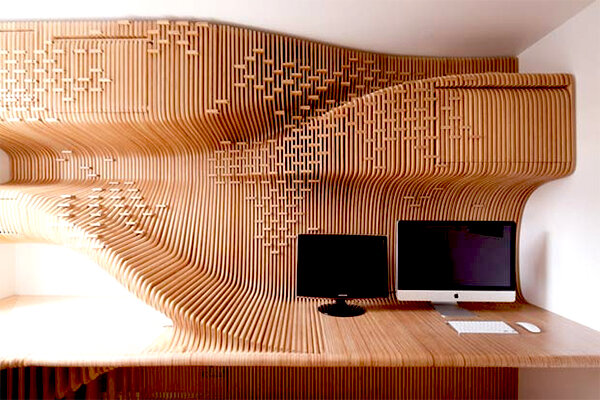
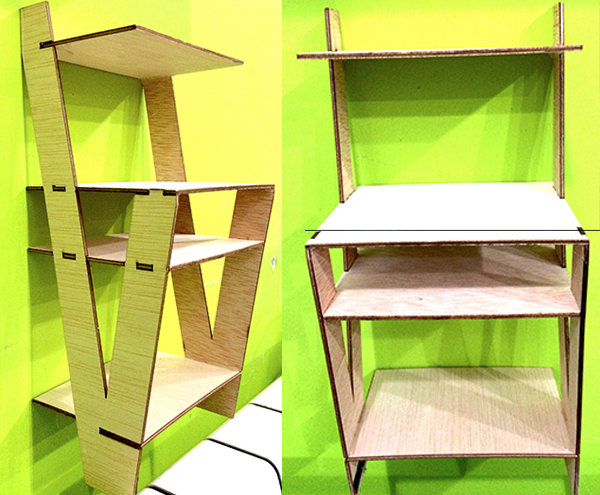
And look at this! A lovely CNC milled shelf system
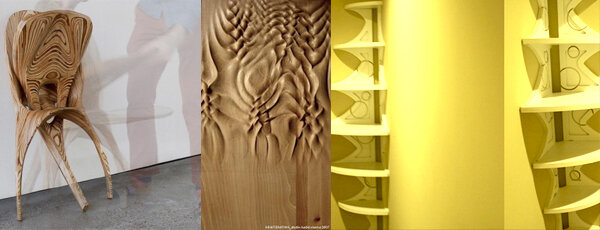
And the Kalo chair, that highlights materiality; a milled pattern that is gorgeously irresolute; and some biomimicry:
And,
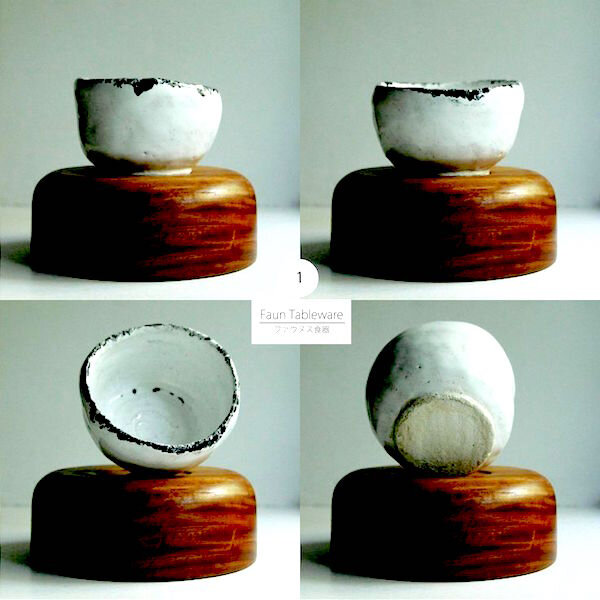
I add another constraint into the final project: wabi sabi. See this example of raku kintsugi, a Japanese ceramic technique. Can I get good enough at 3-D modeling while in Fab Acad to model something like this?
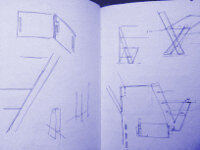
Drawing by hand
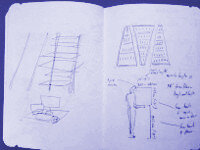
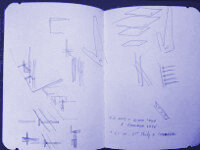
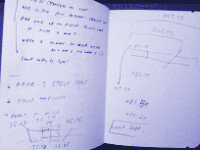
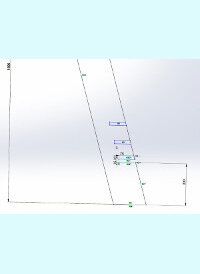
SolidWorks: parametrics
NOTE: Control 8 is critical for resetting the view for us non-Windows users who keep skewing the picture plane. Because of the skewing, I had plenty of lines become angled that were supposed to be horizontal / vertical.
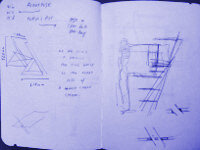
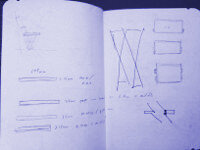
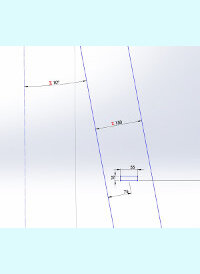
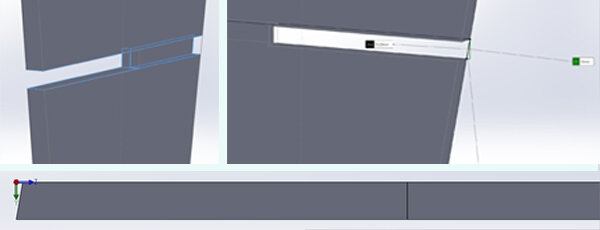
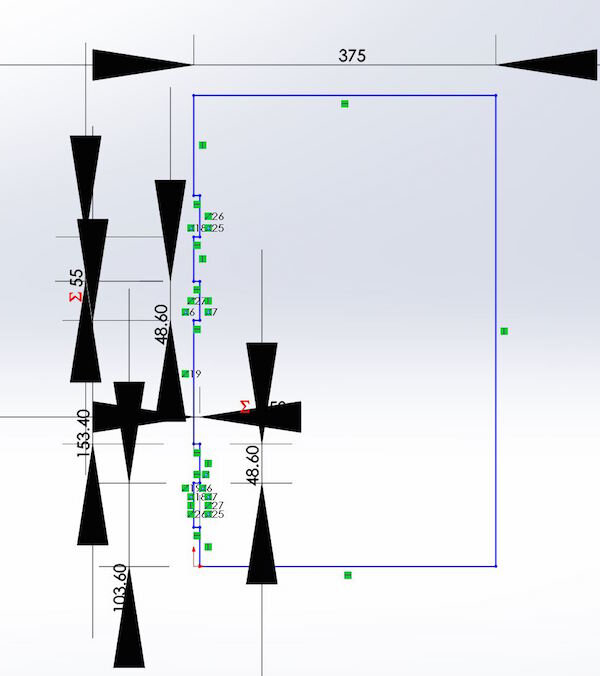
See below some global variables set in SolidWorks in an attempt to help myself out with parametrics. I am using the variables, converted to a text file and then linked to the next SW part file, to define the parameters of the part files.
"tab width"= 55mm
"angle offset from vertical"= 10deg
"material width"= 15mm
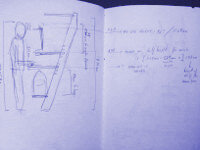
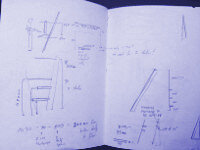
I'll add one file here, which is a quick test for a type of joint in Rhino.
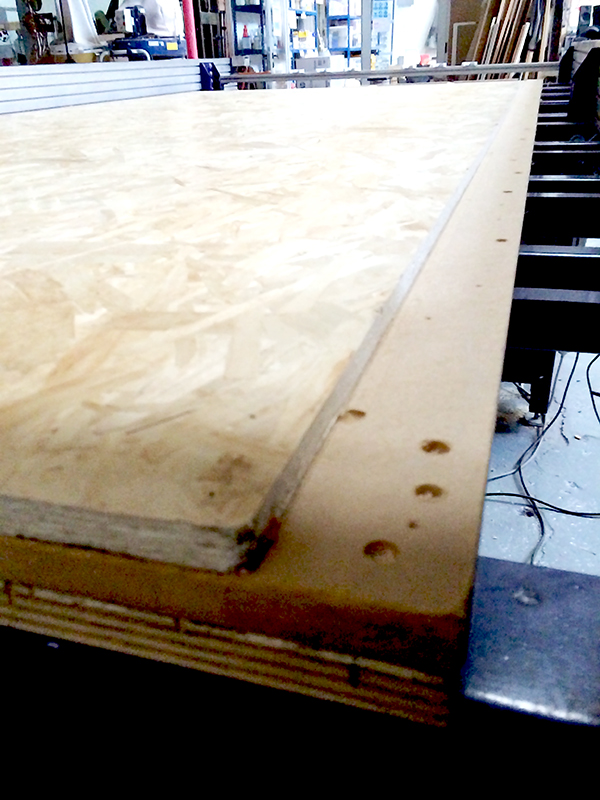
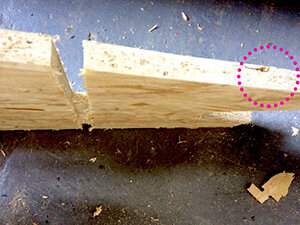
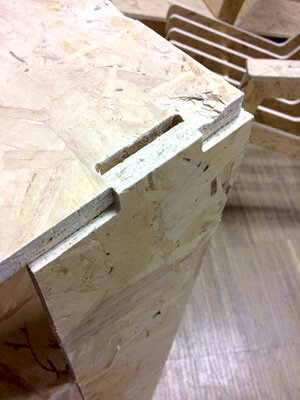
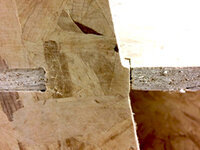
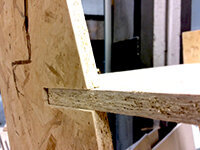
Tolerance test on the ShopBot
The best fit for our 15mm OSB is, surprisingly, tabs of 15mm! No offset seems to work best for a press-fit joint.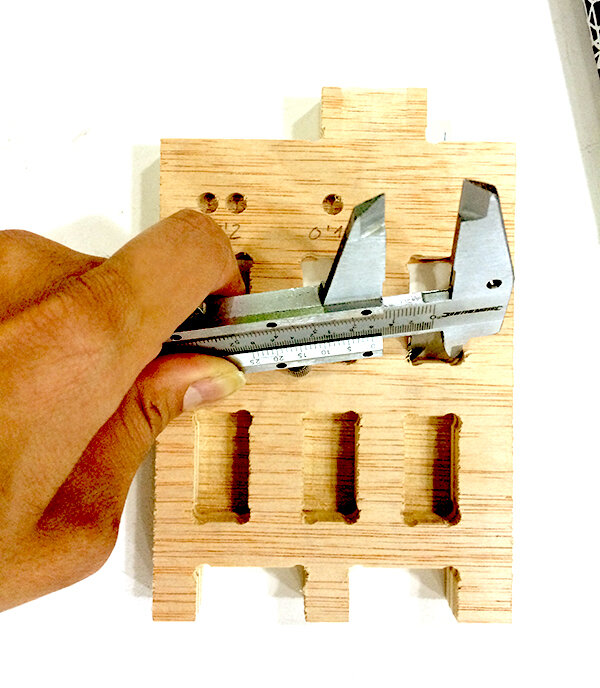
Starting a daily account of the shelf-making ...
16 Mar 16. Wed.
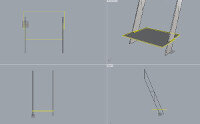
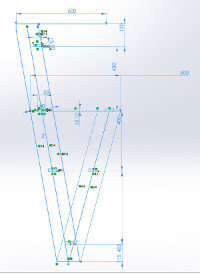
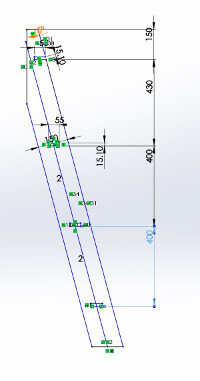
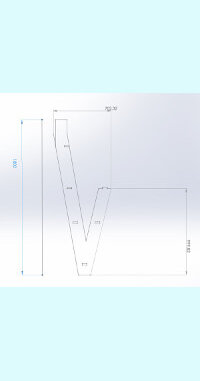
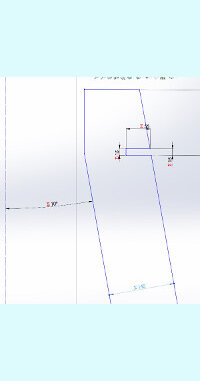
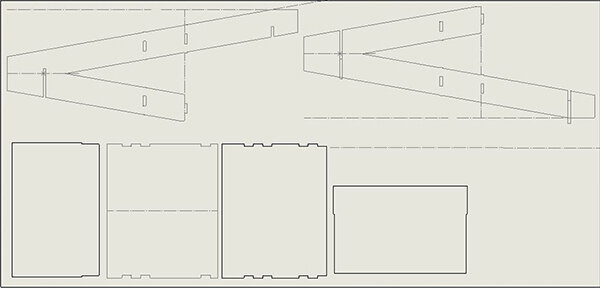
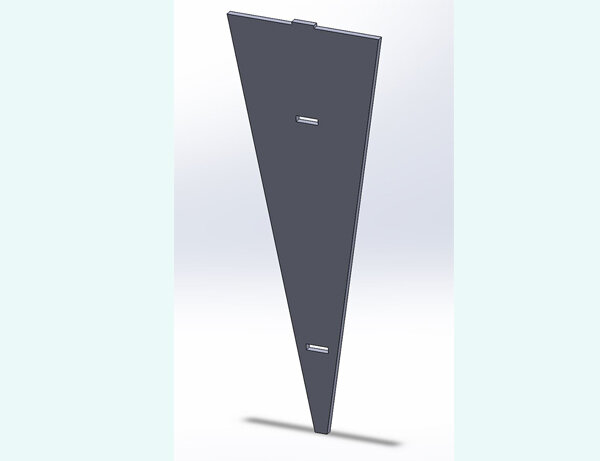
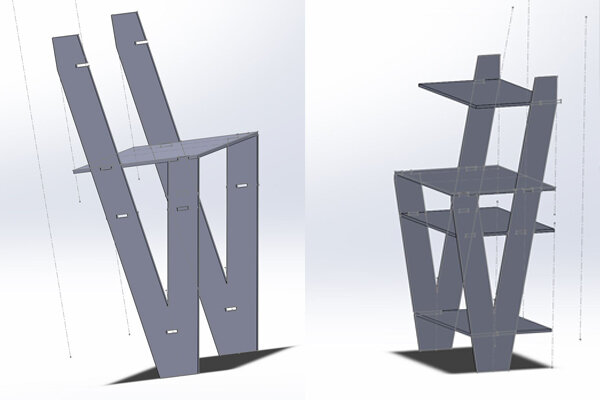
As my fluency in SolidWorks increases, I succumb and resist and succumb to making a more and more graceful design. I do hold myself accountable for not having actually milled a single part yet; I have fallen prey to my design and the pleasure of getting some sense of competency with a 3-D program, for which I'd been starving in the Fab Acad context. My struggle today was with working with the SolidWorks assembly. The various parts files go together, or "mate," in the assembly file. I have some tricky notches that I was fiddling and fiddling with to get to match. The challenge is because the sides of my shelf are diagonal, not vertical, and they are mating with horizontal shelves, so I'm finessing the joints so there's no obscene gap, but instead a modest join.
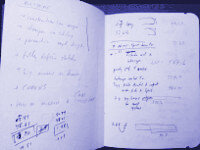
Explanation of the block of pics below, starting from top left and going clockwise:
(1) Santi said this solution was nonsense and suggested I be more discreet. I agreed, and made
(2), which, as you can see from the pic, did not match up perfectly. After a lot of prodding (like a blind piezoelectric Roland scanning sensor), I discovered I was working with different depths for the shelf in the part files! This is easy to do when the measurements are kind of arbitrary in the first place, and you just change them 'cause you feel like it (this is not a very sophisticated way of designing, and this lack of sophistication installs itself in your files if you don't get up and fabbercise regularly).
(3) You can see all the small measurements on the shelves to make the notchings fit.
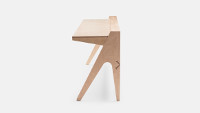
The bottom left drawing is of the "simple" finished shelf joint.
CLOCKWISE:

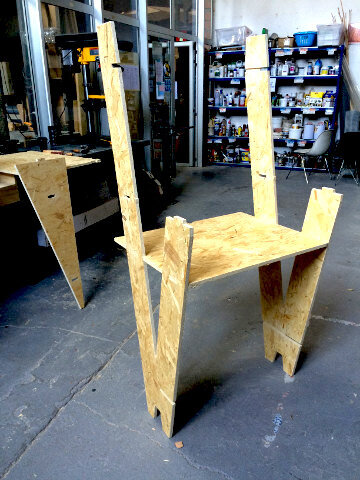
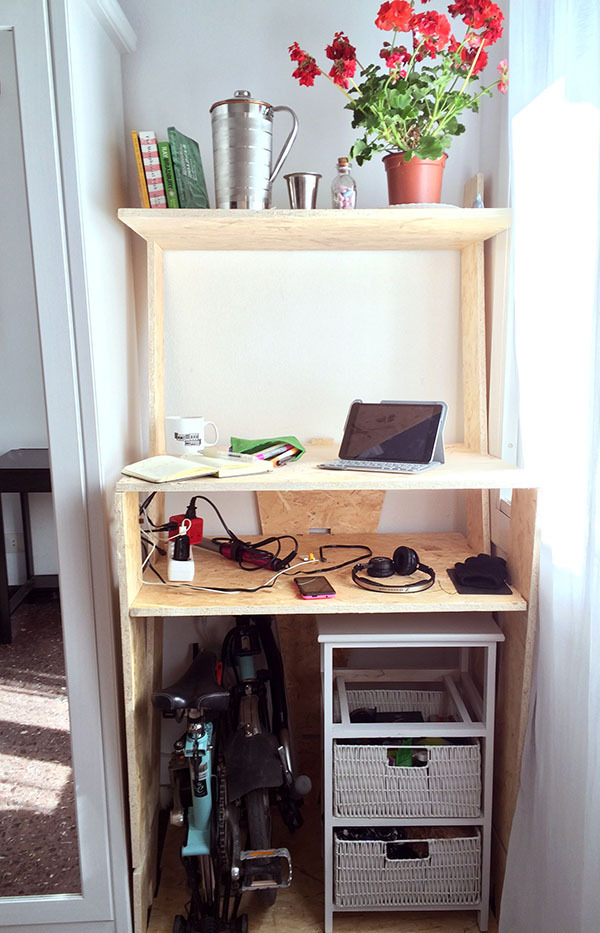
How it turned out:
17 Mar 16. Thurs.
/// struggles in parametric design
Having been so proud of using equations in SolidWorks, I'm now spending a long time resolving errors that arise because of them. It is holy work, of course, having watertight numbers ~ but I need to slip whole days of hours into the nights to get it done.
This slot-plus-pocket took me hours and hours to figure out the right sequence of commands so as to not to get errors and accomplish the form.
Inspired to see a beautiful pattern in strange cancer of arrows that popped up:
18 Mar 16. Fri.
Going to lasercut, running into problems to get the file to cut. The computer is not communicating with the Spirit Laser Pro, which I have not used before. I spent a half hour watching the attempted resolution, then abandoned my hawkish and birdbrained observation in order to recoup some time finessing the design on SolidWorks.
Gori reminded me to ALSO scale the thickness of the material: it needs to be 3mm. I have a secured a 3mm piece of scrap and fit the parts onto the footprint of the scrap piece.
/// lasercutting: the MultiCam 2000
Ingi did a tutorial on the MultiCam 2000. It's overkill for my project, but the Epilog was occupied with a multi-hour project and the Spirit pleaded the Fifth and refused to talk.
* Check out a great tutorial on the Multi-Cam! *
/// chamfering a(t the) bit
And another pot of functions in SolidWorks: the chamfer / fillet command. I played around with these.
In SolidWorks, I used the measuring tool to determine how to determine a distance-to-distance-defined chamfer:
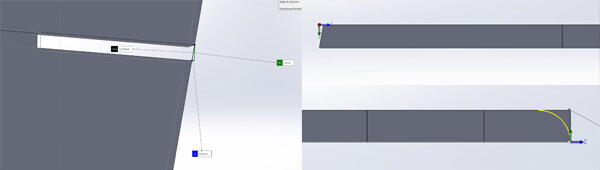
I tried a fillet on the main shelf with a radius of 15mm. How is the top edge of this fillet going to look, I wonder? Will it be a smooth line to the main surface, or a slightly recessed edge? We'll see ...
For some reason, multiple paths cut. "Sel Dup" in Rhino to eliminate unnecessary overlays of lines. What is the equivalent in SolidWorks?
On further reflection, I think the machine seemed to cut multiple times in the same place because of me and my fancy fillets.
/// cut extrude
A major challenge I had with SolidWorks is realizing that, in order to make a pocket cut or a track, I need to make a "cut extrude" that exists IN A DIFFERENT SKETCH from the part on which I'm working. The sketches do a boolean between each other. Lord, I spent hours fussing with that one. Consequences of the bad judgment of a tired person. Did you know we actually lose IQ points when we are underslept? It's the same as coming to work drunk. It might be more refreshing to stop work and actually get a bit drunk instead.
/// lessons from lasercutting a prototype
Maybe I need another part. The unbalanced design I created is nifty and sleek, however, considering the uncertain circumstances and multiple users at IaaC, it seems foolhardy not to add a part that wil stabilize the shelf if someone pulls it away from a wall.
I also learned that, in order to prototype, it might be better NOT to use designs with pockets, because the laser cutter cannot imitate a half-width cut. Something to consider.
/// prepping a 3-D SolidWorks file to lasercut:
Here's the process for getting a file from .sldprt to .dxf:
- get all files out of sketch mode / into extrude mode
- save each part as .slddrw; makes a drawing from the part
- open a drawing file in SolidWorks (as opposed to a part or an assembly file)
- set board size (find your scrap for the laser bed and measure it)
- fix scale (1:5 divides dimensions by 5)
- open "palette" and drag your parts to lay them out
- file save as .dxf
- send to cloud to print on laser / mill
19 Mar 16. Sat.
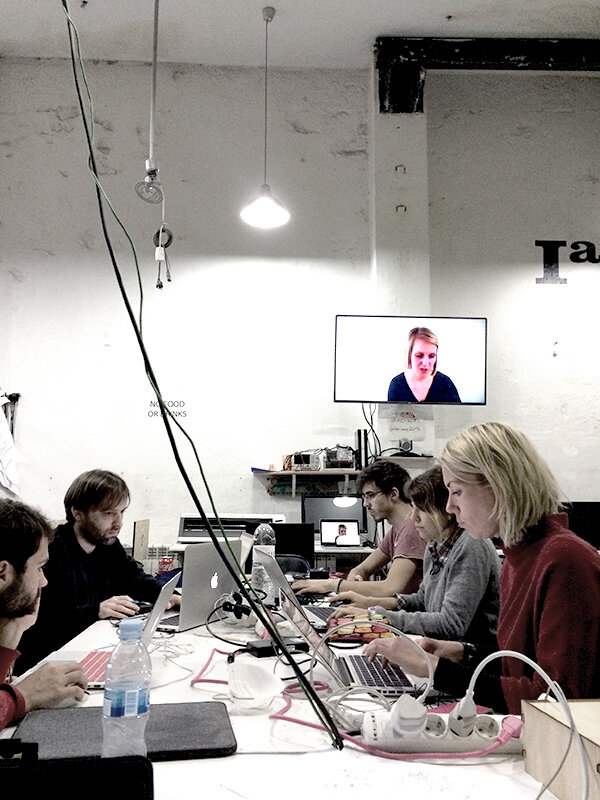
IaaC is sweet and calm today.
/// patterns
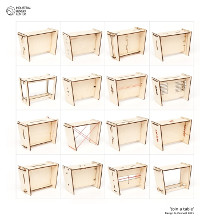
Working on design adjustments based on the model I lasercut last night. I thought to make some more triangles. And fiddling with chamfer / fillet adjustments. Getting the hang of cuts.

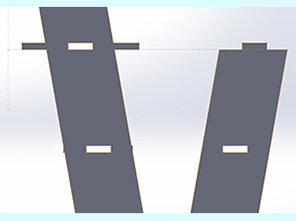
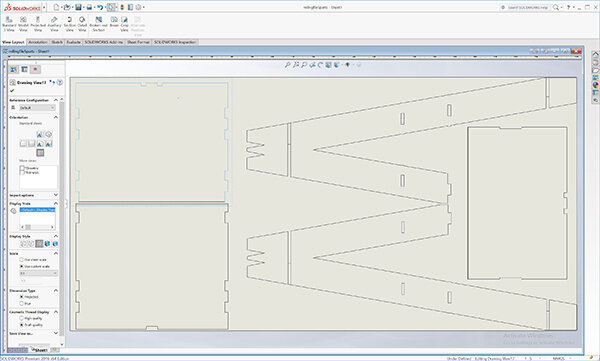
I suspect my top shelf is in the wrong position. I am impatient now, though, and simply want to mill a product! And make adjustments based on that afterwards. So, finished enough for now:
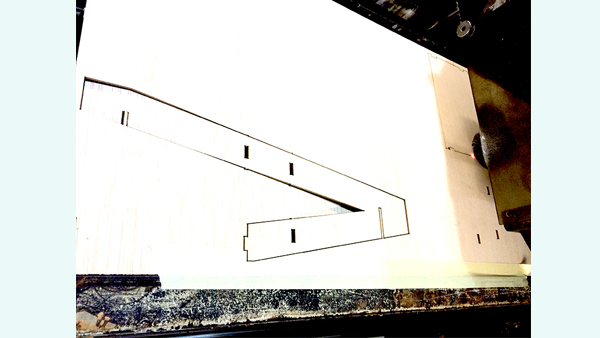
/// laying out the cuts
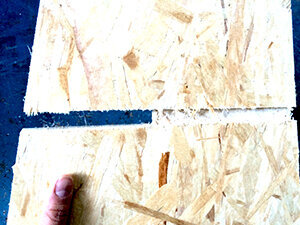
I decided not to worry about ensuring all my pieces fit on one board. As a result, I need two OSB sheets! Keep this in mind for next time: some foresight at the beginning can prevent this superfluous expense. The layout had to be re-designed for two sheets, and the chamfers had to be taken away: I over-chamfered! The machine needs special milling bits to deal with these, and I think it needs some different g-code, too. No time to deal with this level of detail before I even have a first milled piece. Onward!
20 Mar 16. Sunday.
Frustjustments.
I know the machine is going to have trouble with the acute angles, and the design will not be improved by a splatter of dogbones. Damn it. I want to mill in the morning. So, a little more design adjustment.
22 Mar 16. Tuesday.
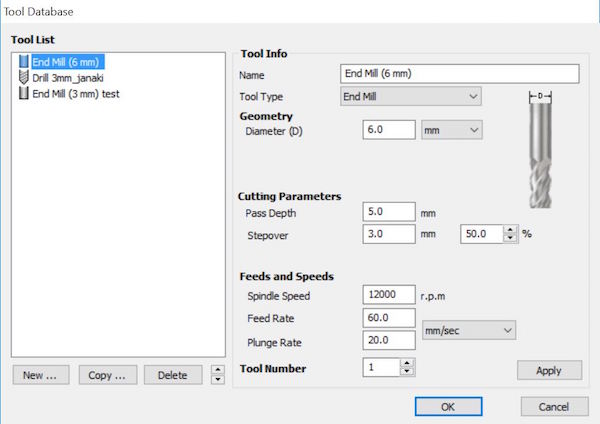
/// PartWorks
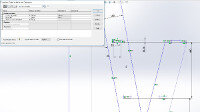
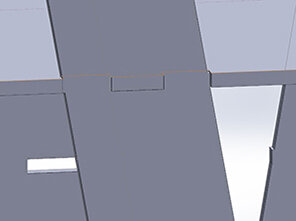
THE SHELF CONTINUES. From SolidWorks, export each part as a .dxf to PartWorks and lay out the pieces on the correct size sheet. Join all the vectors. In order to make pockets, the shape of the pocket needs to be a closed shape, so in the .dxf export from SolidWorks, re-draw the lines to make sure each cutting zone is a totally enclosed shape. Verify this by selecting and seeing what shapes appear as hot pink units.
See the pink outline defining a pocket on the right side of the image:
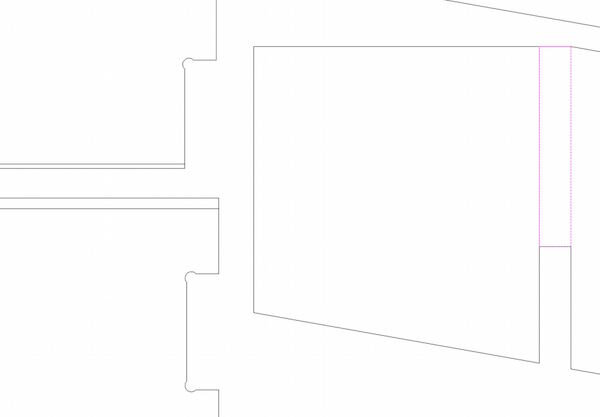
Verify with zooming to the utter maximum that the lines that appear to line up actually line up.
When everything is lined up and has its own clean outline, you can add your fillets from the menu on the left.
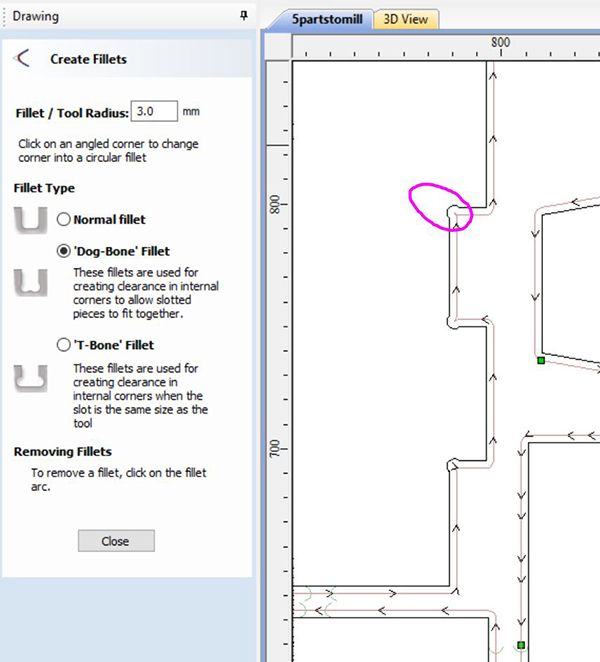
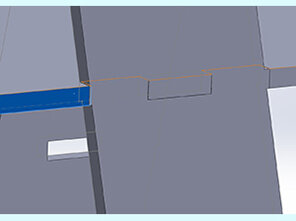
Note this problem I had ~ there was a profile toolpath error that stymied me: PartWorks insisted there was an open path. Couldn't see it. Ferdi set "join vectors" to a tolerance of 100mm and, whatever it was, the program corrrected the problem. Then the profile toolpath could be brought to completion.
I expect the milling to take a few hours.
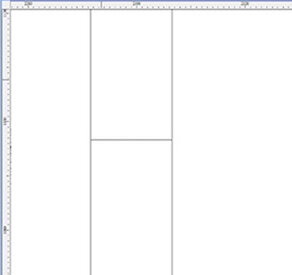
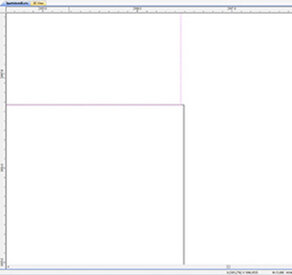
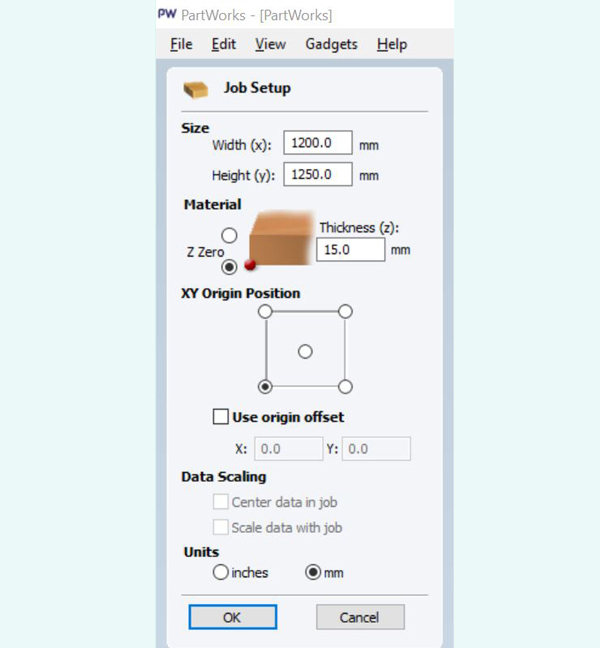
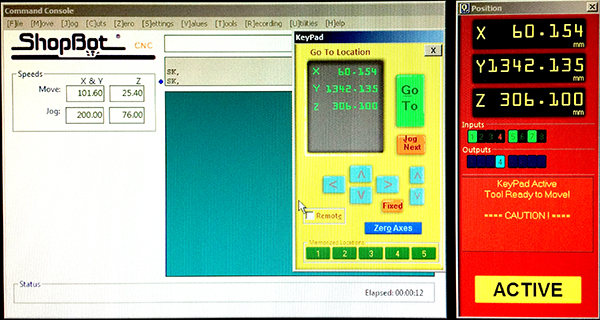
SETTING UP THE FILE TO MILL.
Specify the sheet size and the tool as you see in the following screenshots.
- new file specs: size of the board; zero at the underlay rather than at top of material; units in mm
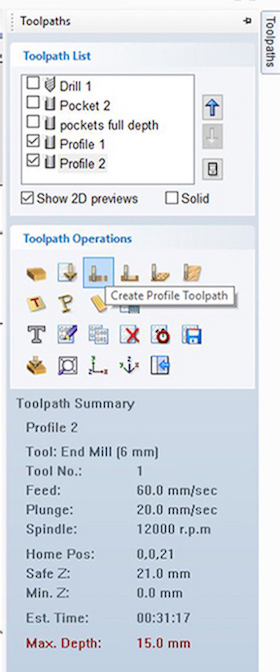
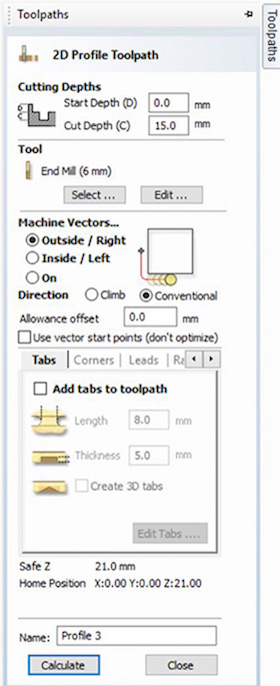
- Define the toolpaths: drilling holes, routing pockets, cutting lines. I discovered, unfortunately, that there is no obvious way to define a chamfer or fillet cut. Those details of which I had been so proud in my design I had to eliminate once the files were in PartWorks. Nevertheless! Let's take as an example toolpath: profile. Choose the profile icon. Note the definitions in the summary.
- to change or set toolpath definitions, in the next window, go to "edit" for the tool
- this project has definitions for two toolheads: a 6mm endmill and a 3mm drill
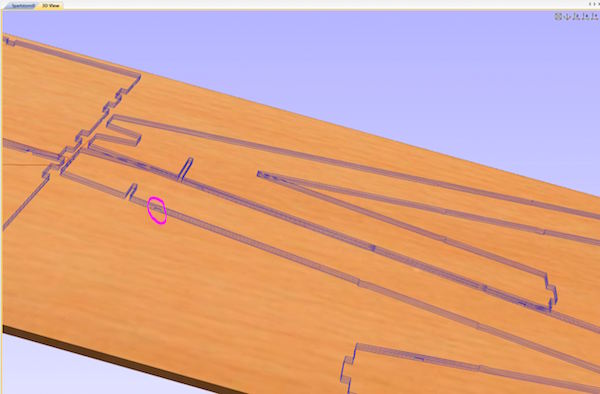
- the machine calculates the toolpath
- verify things in the 3-D view: are the number of cutpaths correct ~ i.e., is your cut-depth set correctly? Do you see the tabs (circled in the screenshot)?
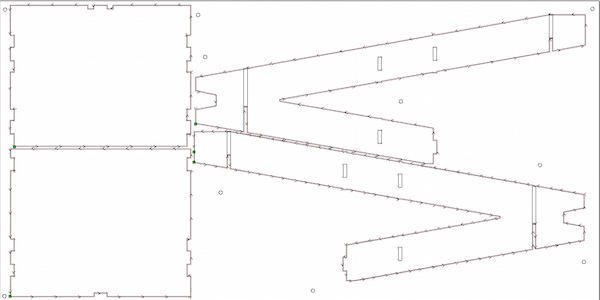
Here are the two boards laid out ~ the one on the right fits onto an offcut from someone else's project that I found:

Send each toolpath (drill holes, pockets, and through-cuts) as separate .dxf files.
23 Mar 16. Wednesday.
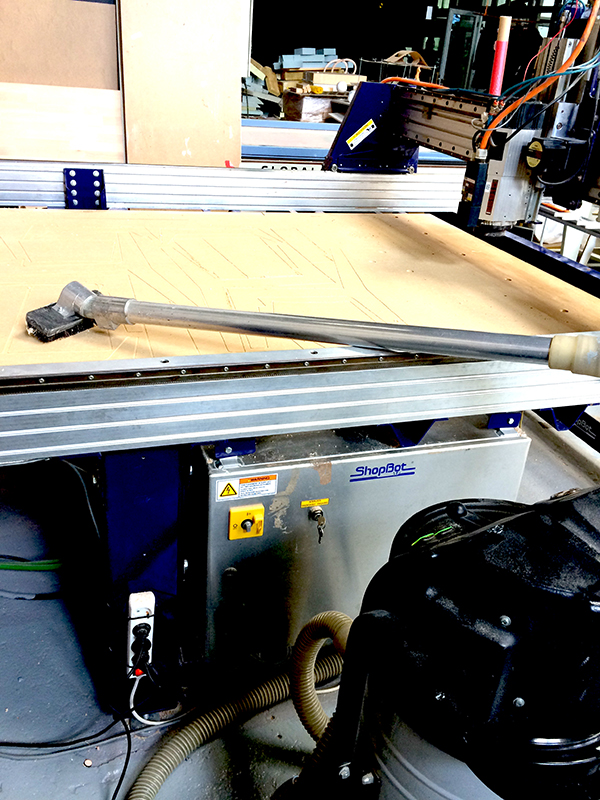
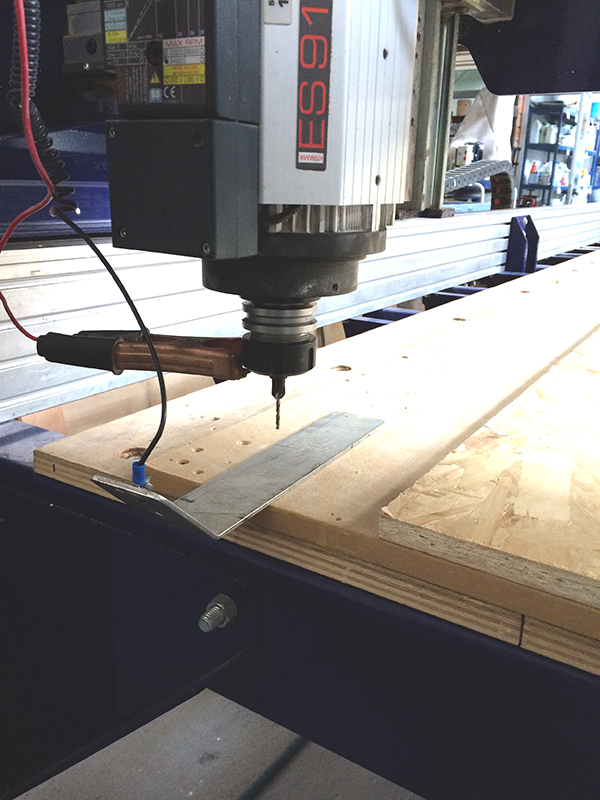
/// milling with the ShopBot
Follow these steps:
- CLEAN. Make sure the underlay is clean. (it's full of screw holes from other projects)
- PLACE BOARD. Place the board of OSB (or other material) ~ I'm lining it up with an obvious zero on the underlay.
- ASSEMBLE THE TOOL. Put together the collet holder, the collet, and the bit you need.
- ZERO THE "Z." Use the console to move the toolhead to a spot where you can check the "z" 0 by going all the way down to the underlay; to move the machine faster, press "control" while using the arrows on the keyboard or console.
- Take bit out when you're moving the machine around.
- Lay out the plate, attach the metal pliers to the tool holder, and use the console to get the toolhead close; then, you press the "zero axes" button on the console and check only the "z" axis.
- The tool will zero itself.
- We had a strange error doing this that almost broke the mill! It happened once, then didn't happen again.
- ZERO "X" and "Y." You do this by eye / manually. Then go to the console and write in "0" and "0" in the x and y rows to make this the new home.
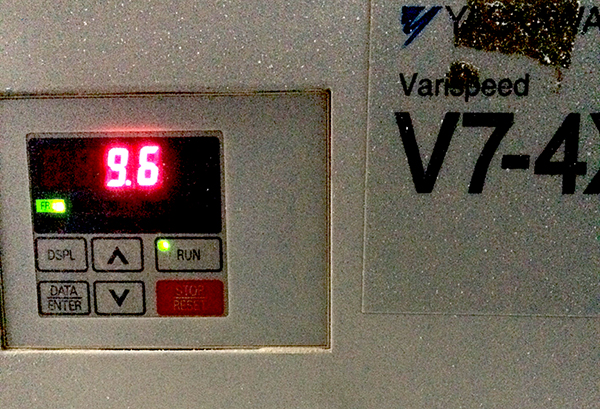
- SPINDLE SPEED. We decided the machine should say 12. There was debate about this. "9" is slow, "21" is really fast.
- CHECK FUSES. In the laser cutting room are fuseboxes. The fuses on the left should all be up! In this picture, they are down.
- LOAD PART. You load the drilling toolpath.
- START. You ask the machine to start, it gives you a dialogue, you press the physical green "start" button, and it sings to you and begins!
- SCREW. Add screws to the board. The screws heads should be countersunk below the surface of the material.
- LOAD PARTS. Go through each of the toolpaths.
- WRAP UP. Take out the toolhead, open the collet and its parts, put it away. Move the machine. Take out the screws, vacuum, knock out the tabs.
24 Mar 16. Thursday.
/// finishing, fitting, analysis
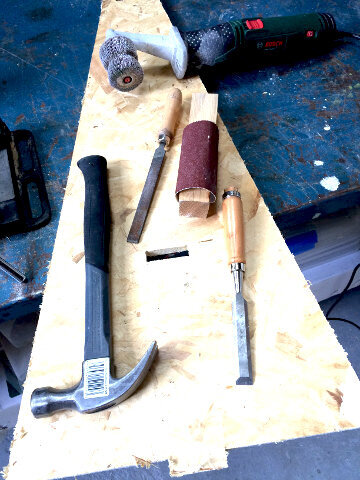
ASSEMBLING AND SANDING THE SHELVES.
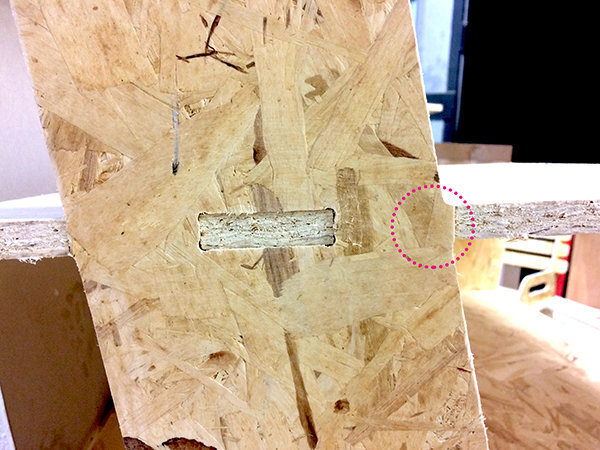
ANALYSIS: The joints without lateral connections tend to splay. And for some reason I totally misjudged the cutout in the shelves needed to nestle in the back piece. I also moved a hole for the bottom shelf and forgot to adjust its corresponding slot! I'd say I skipped the final edit!!
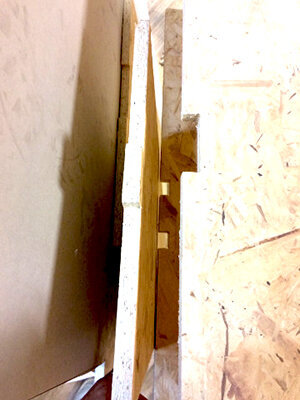
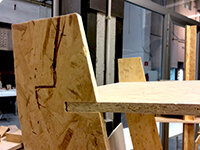
Some problems with the fit because of not tracking 3-D changes properly. Back to the drawing board for two of the pieces.
Also, I mysteriously shortened the whole thing! I will look and see which parts to alter and try to remill. I'd like to do a few more laser-cutter tests. Let's see if this gets done, as well as documenting these last two weeks, before we're at it again on Wednesday. We're technically on break now, but it's hard to pause when there's so much to do ...
/// intimacy with objects
The irrational numbers that log the hours have led to some new and more invigorated thoughts on the Final Project. I would like to keep working with furniture ~ there is a lot of programming for behavior modification that would satisfy me personally re: the furniture I use. I would be happy to be in interaction with the objects that support and cradle my body for so many hours of the day; we should have a more humane, affective connection. So here's a little bit more about that here.
Theories, Ideas, Other
Neil Gershenfeld’s TED talk
I looked at Neil’s TED talk about what FabLabs mean and was inspired (whew, thank goodness). Here are some of the thoughts that tickled me:
- "Nature’s a much more powerful computer than [what computing was imagined to be in the 50s when computer science got started]."
- "Products for a market of one person."
- locally developing solutions to local problems
Jargon-free good sense, powerful possibilities. Keep my teeth in the process; it’s genuine doer-based learning.
Simple Beauty (is rarely simple)
João was drawing on a Wacom beside me today and made me thirst to be spending some time drawing. Unfortunately I had to try to pay strict attention: he is already fluent with the CAM software we are learning; I know very little! After padding in a circle and shouting inside my own head for nine hours, when I came home I let myself just make something beautiful, something that included some drawing, even if it was on the computer.
I started on a possible crest or mascot: Jacob fighting the Angel. It’s from a Delacroix painting in Saint-Sulpice, where the human is battling with fierce anger and humiliation, and the angel is a wall, radiating a steady counterforce.

Another element of therapy: I’ve been in conversations with three people here who believe that blonde women are the perfect kind of woman. I thought coming to Barcelona instead of staying in New England, I could have a breather from pro-fair-skin chauvinism. In response, I’ve made the nose of the angel look more Eastern Mediterranean.

I thought this would be a quick project after I got the file ready! Troubleshooting. I didn’t consider time for that. There was trouble with the Roland vinyl cutter. We found out that the CUPS printer interface needed to be installed so the Raspberry Pi could talk to the vinyl cutter. While doing this with Ferdi, we authored a incipient tutorial on the process.
/// Tutorial on setting up Raspbery Pi ///
IAAC lecture: Urban Futures with the mayor of Somerville, MA
Joseph A. Curtatone (Somerville) and Christian Gärtner (Audi Urban Futures)
INTRO. Curtatone partnered w Harvard-Kennedy business school to think of new leadership strategies for Somerville, which not too long ago was called Slummerville, but currently has an average monthly apartment rent on par with New York City. It’s true ~ I know it as one of the most sought-after neighborhoods in Boston, reputed to have excellent walkability.
IDEAS
- City as experiential classroom for students. Enacting the good management techniques that the Kennedy School teaches.
- Data-driven approach to gov’t.
- Curtatone: The city had a reputation that wasn't pleasing to listen to. It had no narrative, no future plan. As mayor I wanted to change that narrative w action.
--> This talk was so jargon-filled with politician-speak that I didn’t stay. This American-politico-lingo of inflated optimism - salesmanship - and quoting old research - made me realize I care about finding out what I don’t already know, not seeing details about how what I already support works. Too much hubris, J: no need for proof if I’ve already figured it out.
IAAC lecture: Primavera de Filippi
Subject: blockchain.
Lecture was very similar to recitation we had with her in Week Two, on 08 Feb.
Handsome French-y inflection with some neat vocabulary that nevertheless all sounds a bit sadistic:
- Cryptographically activated assets
- A washing machine that buys its own soap.
- Tokens sent by contract for an apartment key that is non-physical could be useful for AirBnB.
- "Third-party reproduction” ~ think bees for plants.
- Plantoid art project needs capitalization instead of pollination. When someone gives it money it dances and sings.
- Reproduction phase. The people who give the most capital have the most weight given to their vote.
- Pyramid scheme for re-plowing funds to the artist with winning Plantoid design, base don quantity of votes.
- touting trustless technology
- Property right vs access right. This is the concept of temporary leadership applied to property. Changes the meaning of leadership, and maybe of property. Thinking of shared physical resources, I wonder: What about maintenance of real physical objects, i.e., stewardship? Does stewardship need incentive, or doe sit arise spontaneously?
- This technology imports crypto-libertarian ethics. There are, however, many technologies whose ethics have revolved/evolved (probably more than not).
- What is the relationship btwn quantity and reputation?
- Value. Is it possible to prefer lower value? Maybe that's as peculiar as saying we should find ugly people beautiful.
- Quantification based on niche value. Primavera calls it diversified value, I think. I fucking hate the idea of niche value. I am still a Western canon girl.
- Tomas prettily points out the "ethics" of the Internet: developed by the military and accelerated by pornography into a nearly universal tool today.
recitation: Silvia Lindtner on the culture of making in Shenzhen
Silvia's talking about the culture of making in China relates to Western ideas of a manufacturing renaissance. It is not a renaissance there; it is an ongoing phenomenon that is quite healthy.
- Her group is called Hacked Matter
- "Making as critical engagement" as a way to look at social engagement
Silvia has mentioned "cool and shiny" Western models, Silicon Valley ... Reinier de Graaf here at IAAC was talking about the credibility of charisma for architects ... what about the relation between charisma - design - looking cool - having credibility? Is this a notion that hinges on a Western model of the individual? Surely not ... however, I don't have insight into how "coolness" works in China and other non-Western cultures.