Week 03:
Computer-Controlled Cutting
Objectives
- Demonstrate and describe parametric 2D modelling processes.
- Identify and explain processes involved in using the laser cutter.
- Develop, evaluate, and construct the final prototype.
Software
- Inkscape
- Rhino
- fighting to install Windows on my Mac so I can use a SolidWorks license
- Homebrew
- I installed Homebrew so I could convert video formats via Terminal through this command line:
ffmpeg -i 03week05vinylcutting05.m4v -c:v libvpx -crf 10 -b:v 1M -c:a libvorbis output-file.webmHomebrew is a package manager for OS. What it does is it takes bundles of code (packages) and figures out what things that code needs to get installed in OS ~ like a manager, or a librarian, or archivist …
I liked this explanation by Bruno Skvorc.
- I installed Homebrew so I could convert video formats via Terminal through this command line:
Machines
- Epilog Laser Cutter
- Trotec Speedy 100
Practices
NB see below for parametric design and vinyl cutting.
How does laser cutting work?

Laser cutting is a subtractive manufacture method -- it takes material away through burning with a focused laser beam, leaving the equivalent to a cut in the material. The amount that is cut away is called the "kerf."
IT HELPS TO KNOW:
The focus of the beam via the machine's lenses is important, and it's important to keep the lenses clean. Also, adjusting the bed so that the beam has an accurate focus where it hits the material matters a lot in the cleanness of the cut. The goal is not to see the blackness of the burn. It is best to avoid smoke, too, as it will cause particles to accumulate on the lenses and degrade the machine's focus, therefore its effectiveness. Finally, the material should be flat, as, again, a bow in the material will affect the quality of the cut.
WHAT CAN IT MAKE?
The laser cutters we have in Fab Lab Barcelona can cut up to about 7mm. Depending on the machine, though, the laser can be a more or less effecive choice -- thicker materials are better on the CNC. We usually use less than 5mm thick material. It can cut wood, cardboard, paper, fabric, acrylic ... because it can engrave, too, by adjusting the settings, it can be used to score materials for folding. This means planar materials can be bent, paper can be turned into origami forms, and fabric can have a pattern lightly burned onto its surface.

WHAT DO THE SETTINGS MEAN?
It can take considerable time to find the right settings for a job, so consider that when trying to schedule your work. The settings we adjust are power, velocity, and frequency.
- Power is the wattage and affects how thick of a material can be cut by the machine.
- Velocity is how fast the head of the machine moves around: the laser beam can dwell less or more time in the same spot. Slow speeds can solve a lot of cutting problems; they also can cause fire. The laser requires vigilance because small fires are common.
- Frequency is how rapid the laser pulses. It can also be called PPI (pulses per inch). Lower frequency can prevent charring on materials like wood; higher frequencies can help on plastics / acrylic to give a melty, slightly polished edge. Very low frequencies can do perforation.
- Filtration. Always make sure air is moving through the machine so that the cut can do its burning, and so that the particles are tidied by the air assist.
HOW DO YOU PREPARE A FILE?
This varies by machine, as different machines have different proprietary control softwares (like with printers). The machine should be set up to address engraving lines, then inner cuts, then the outline. I find it a good practice to keep these categories of line in three separate layers when I'm working in a Rhino .3dm. I also add a bounding box layer, too, in a non-cut color, which has the dimensions of the material which I'm cutting.
Designing for and using the Laser Cutter
The goal this week is to use the laser cutter properly and to make "construction kits" of tight-fitting (press-fit) parts that can be used to make other things.
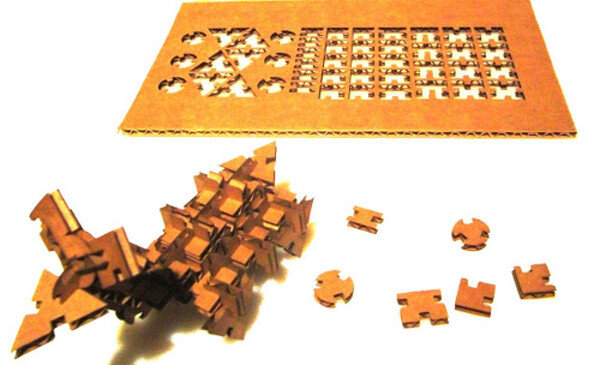
We have had some charming classes to peer at possibilities. This is an area that our home genius, Ferdi, really excels at, and his affection for the subject is clear. He shared some of his favorite projects in the realm of from 2 to 3-D. See for a few of his favorites.
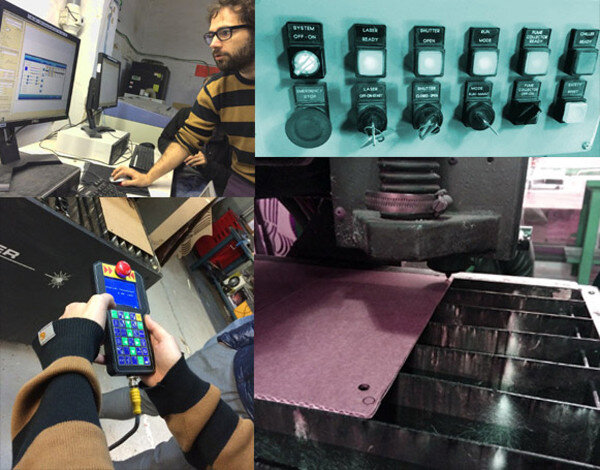
We had some instruction in how to use our Epilog Laser Cutter. We draw the files in Inkscape or Rhino, join all the paths, make sure the paths are hairline weight, separate vector and raster shapes into different layers, and send to our IAAC print cloud. Then on the cutter, it's important to do material tests for speed and frequency and power to see if all the parts are cutting cleanly. The settings will change a bit all the time, so test. Remember to start with one join before doing the whole project; this is the spiral development philosophy: see that one thing works completely before scaling up.
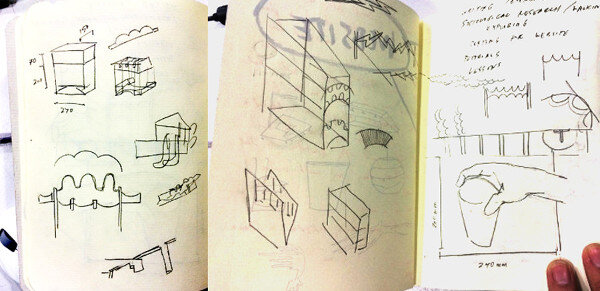
In thinking about a design, I was staring at the table in the Fab Lab and thought I might be able to design something to groom the cords and handle the coffee cups. I sketched.
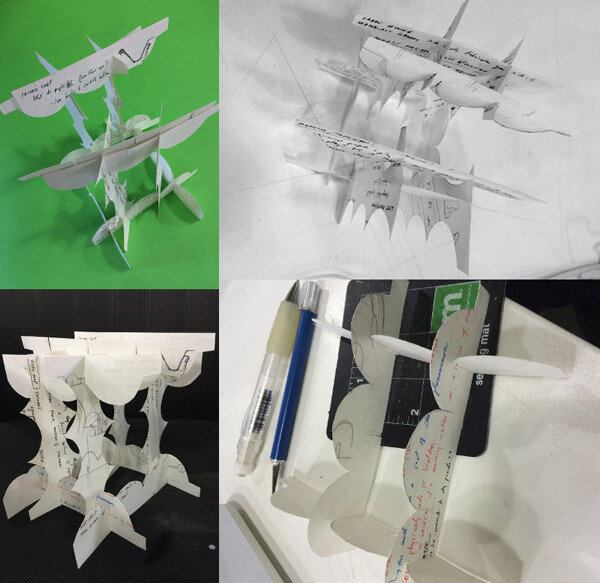
I made a paper model.
Translating the handmade model into the computer is a challenge for me, and I am battling with the different programs. Here's a catalogue of my wild strike-outs.
Rhino was easier in the end ~ got the test file ready with help from Santi and Caro and Cit and Gori!


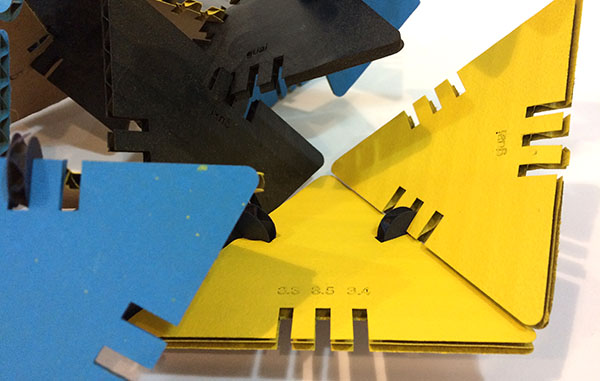
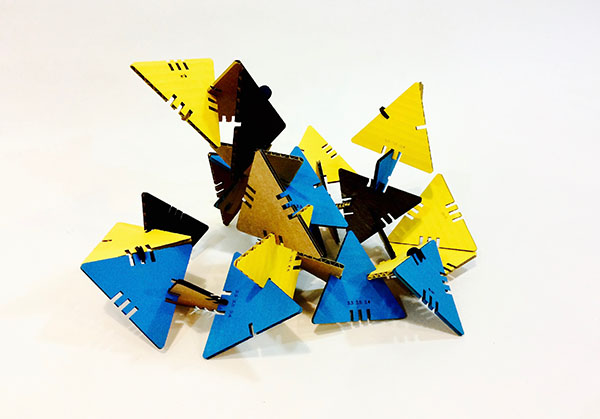
Here are the pieces:
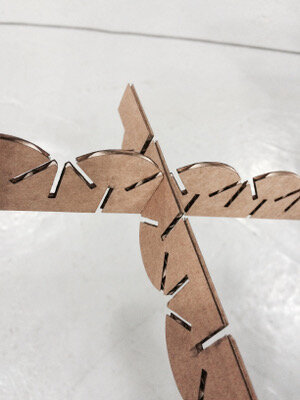
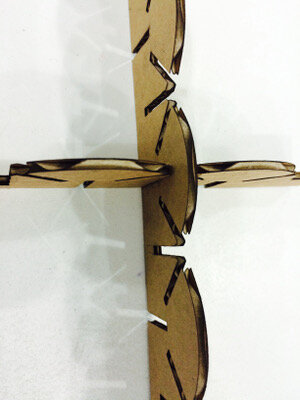
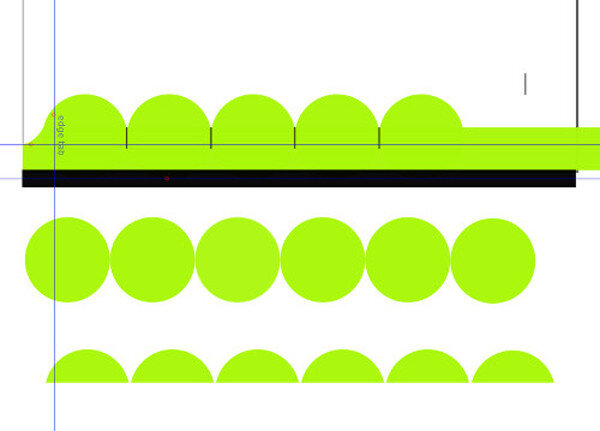
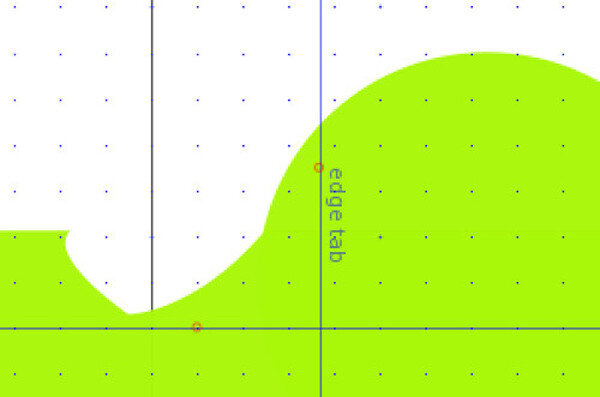
Working further: slotted triangle
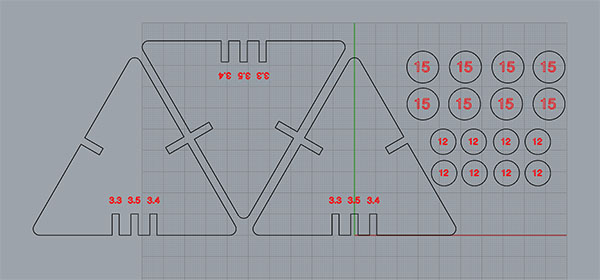
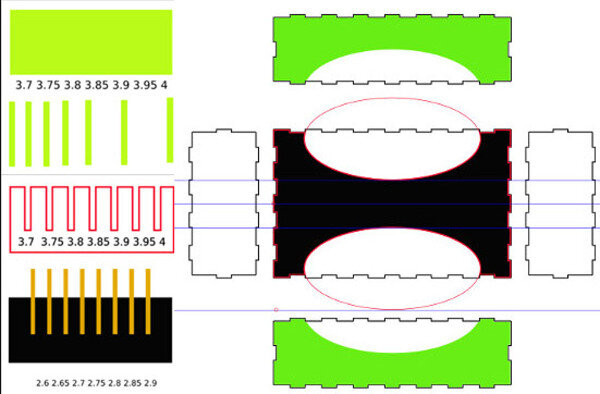
For this piece, I incorporated the "comb" technique shown above in the Inkscape files. The point of this is to find a tight fit, and the tolerances need to be quite exact to get the fit right. So for these slotted triangles, I adjusted the slot by 0.1mm from the material thickness, to find the press fit dimensions. It turns out that an exact 3.5mm worked best.
CUT SETTINGS for a Trotec Speedy 100 on 3.5mm cardboard (I ended up not doing an engraving setting, because it is not critical to the design of the piece, and I needed to save time) ::
- P 100.00
- V 55.00
- F 1000
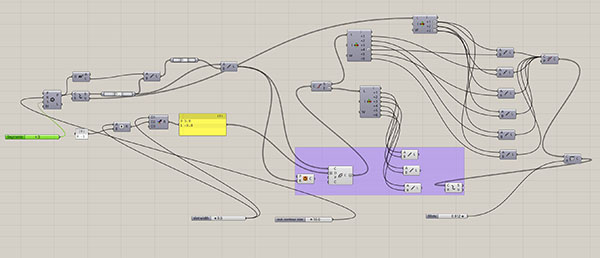
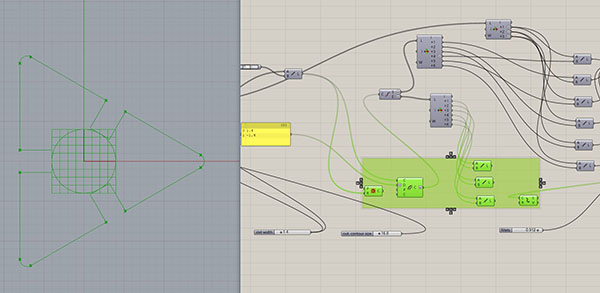
Parametrics
I also tried a parametric design with a grasshopper definition. It took a bit of untangling to get all the pieces of the slot in the right places, and to make them a continuous line with the outer perimeter that I wanted. I ended up using a bunch of list items, as you see:
Vinyl Cutter
We also looked at how to operate the vinyl cutter.
What are stickers for? Laptops! It took me many versions to make a design for my laptop cover that I didn't think would exhaust me over time; I had developed a few binary questions, thinking about prototyping choices after listening to this Planet Money podcast; every idea that seemed bright at the time felt old by the time I opened my computer to design it. I decided to go for something more abstract ~ maybe two question marks forming a heart? Then my partner and I broke up, so I dumped that dumb idea.
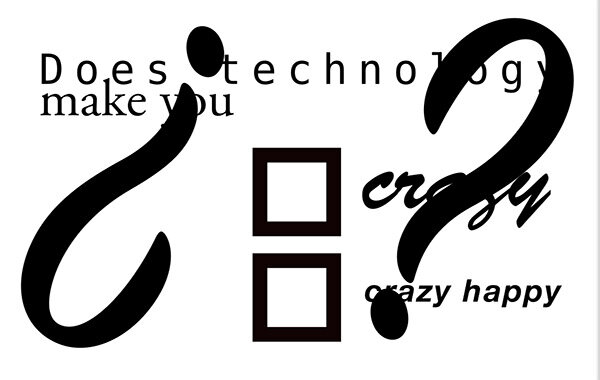
Choose
[ ] certain unhappiness
[ ] uncertain joy.
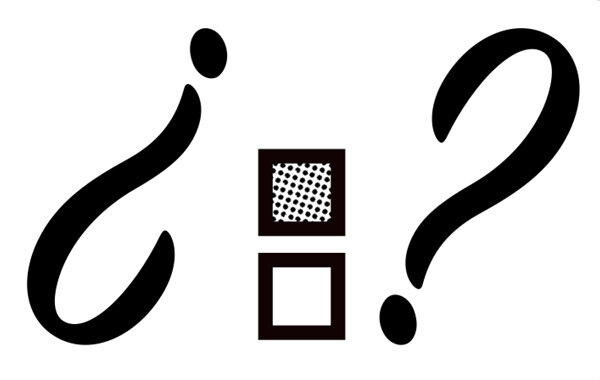
As you can see, to add some visual interest, I added a fill to the choice boxes. That was challenging to create in Inkscape, so I moved to Photoshop and made the dots with a color halftone filter. In the end, the negatives of the shapes were interesting, so I incorporated them into my design.
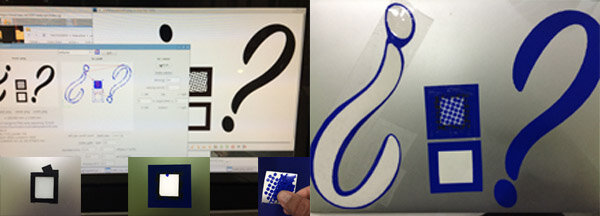
The way the vinyl cutter moves through curves is delicious.
When I played this page in Firefox, my .mv4 video file was inadequate.
 I downloaded Homebrew via the Terminal so I could run a script that converted the file into a slick and fast .webm, which is a considerably smaller file.
First, I put the file to convert on the desktop and then navigate there in Terminal:
Then, after having installed FFmpeg support via Homebrew, I enter the following command:
It looks like this when it's filled in:
Now the HTML points to two different files in two different formats, and the browser will display the first file it can read.
20160407 revision. Though the .webm is a compression, it's too big. I'm lifting it out.
Some Interesting Ideas
There has been a lot of struggle this week for me; I have had many instances of not being able to bring things to term (Windows system installation; actual prototypes on the cutter). However, I have had the chance to remind myself that process is what this whole learning shebang is about.
A merrier moment in the week brought other observations ...
- I am really enjoying that sometimes we are making rectangles and looking at rulers and sometimes we are modeling coffee cups for fabrications. The different levels of complexity are refreshing, letting the brain shuttle between toughness and relaxation.
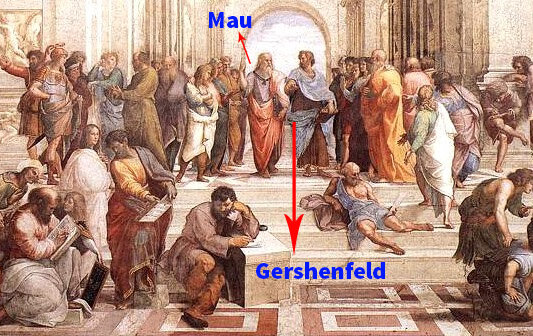
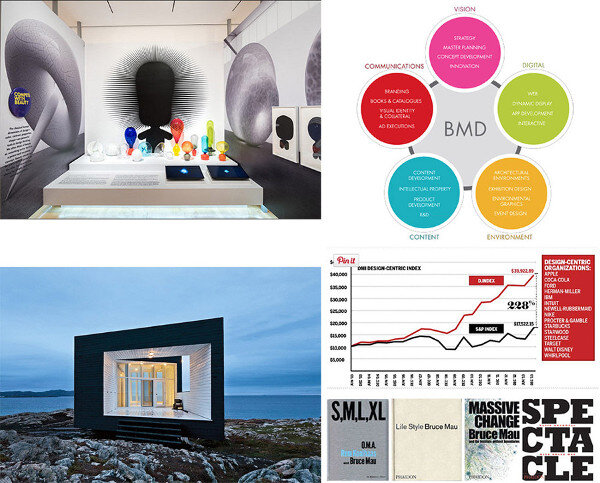
- BRUCE MAU did the recitation this Monday.
- The most striking part was at the end, when Neil Gershenfeld and Bruce Mau were talking. Mau says there are too many competencies needed for one person to master, so design in Renaissance teams. Neil said Fab Academy was about redefining literacy (implicitly, for an individual). Mau is a happy optimist who feels you can make the world better with design ~ his career, in fact, attests to legitimacy in this optimism. Neil’s demeanor is more of a steely realist. Both of them are solicited for engagements all over the world, in businesses and with universities and museums and other non-profits as well as government (Mau is redesigning Mecca; holy moly). Listening to them talk at the end felt like stooping on the stoa of Raphael’s School of Athens.
- The biggest idea for me was Mau’s statement that we’re currently re-designing what wealth means. This connects to another great idea: design how we spend our time.
- Design for all the senses plus time, not a screen experience (Mau calls it 5-D).
- Designers are ascendant because they focus on compassion for the user.
- A one-tab page of references mentioned by Bruce Mau.

Events this week:
- recitation: Bruce Mau
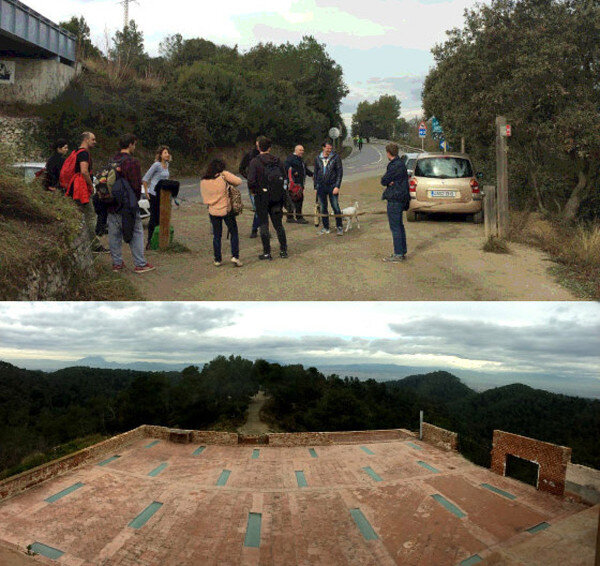
- visit to Green Fab Lab in Valldaura