Week.05 3D Print e Scan
Design and 3D print an object (small, few cm) that could not be made subtractively
3D scan an object (and optionally print it)
If you design something to be printed in FDM, the first and main task is setting the nozzle size as the unity of measurement! It is a great trick for better printing!

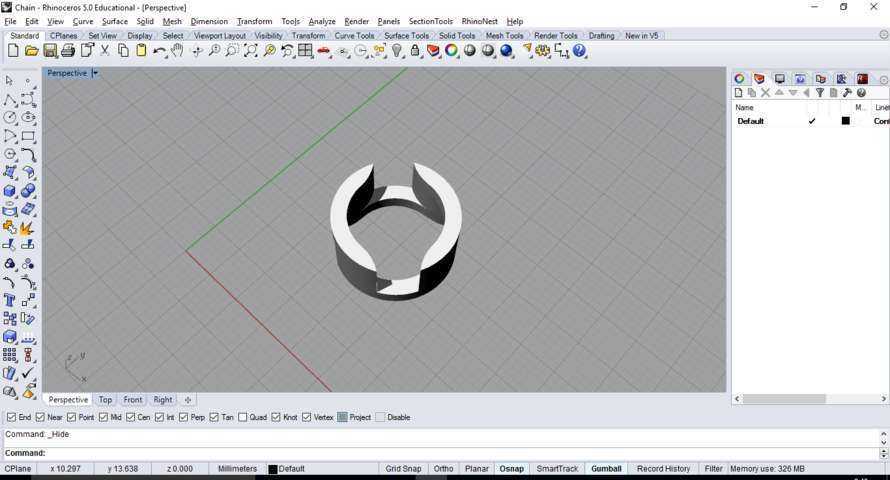
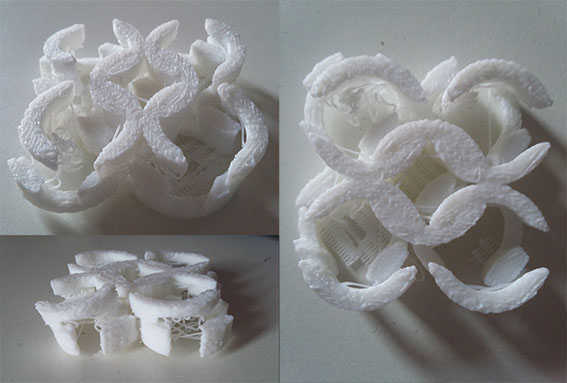
Chain from Textile workshop
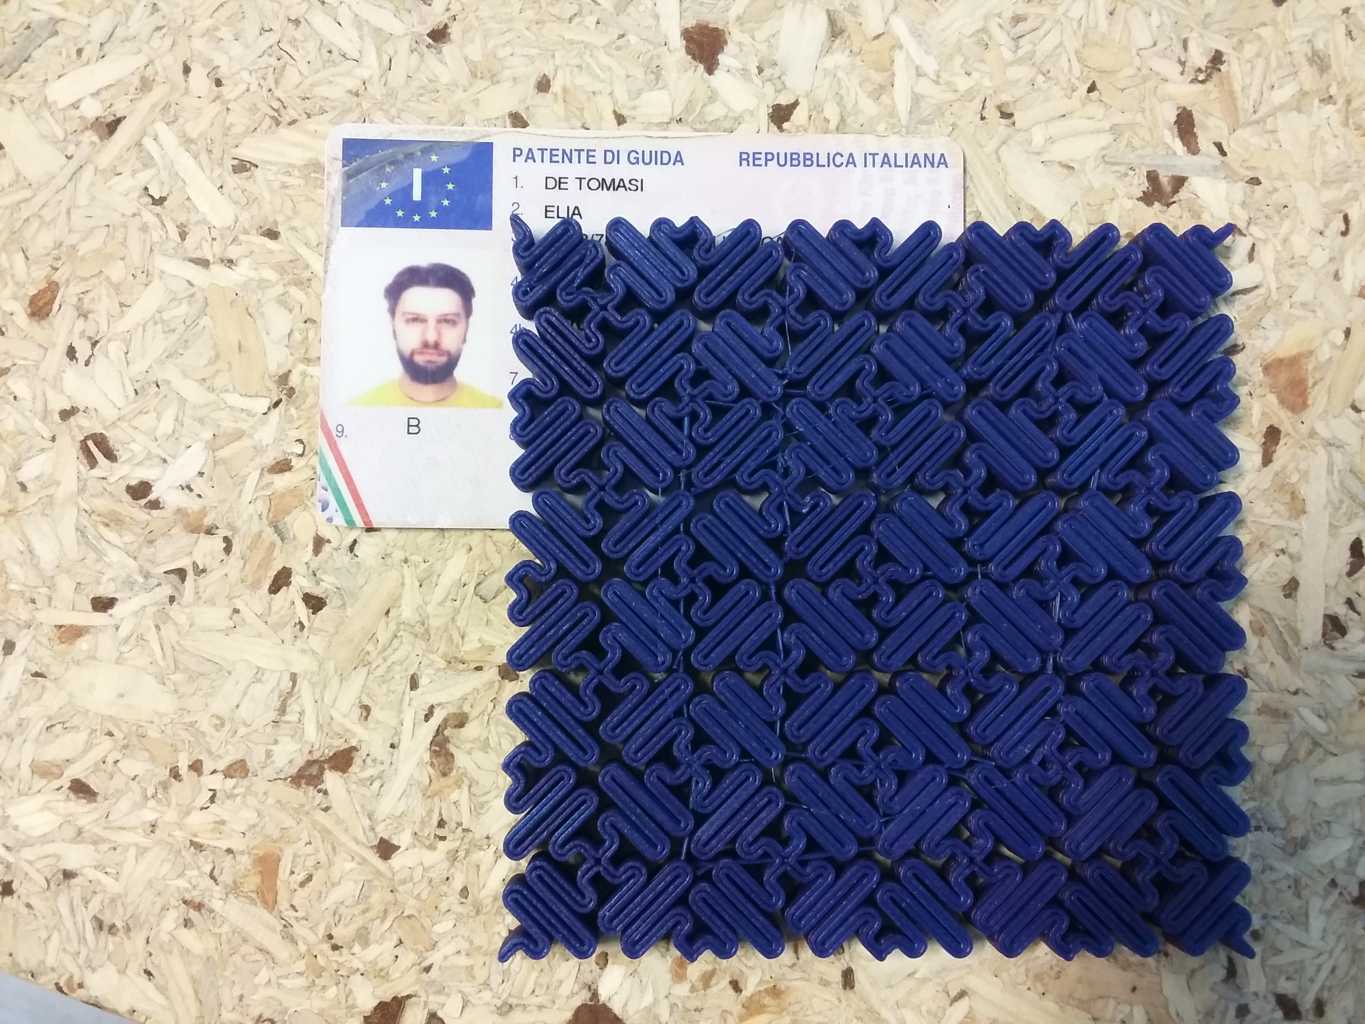
In this weekend, I decided to attend also a Textile Workshop here in Fablab BCN, during which I designed a chain as pattern for some experiment in flexible 3D print structures. For sure it is not possible to make it subtractively!
The first experiment is not as good as I would like it to be, but I think the only problem is that I didn’t know the 3D printer very well, particularly its limits and performances.
3D Print Parameters
layer height 0.2
shell thickness 0.8
bottom/top thickness 0.8
fill density 100
print speed 100 (tested 150,120,80)
support type: none
platform adhesion type: raft
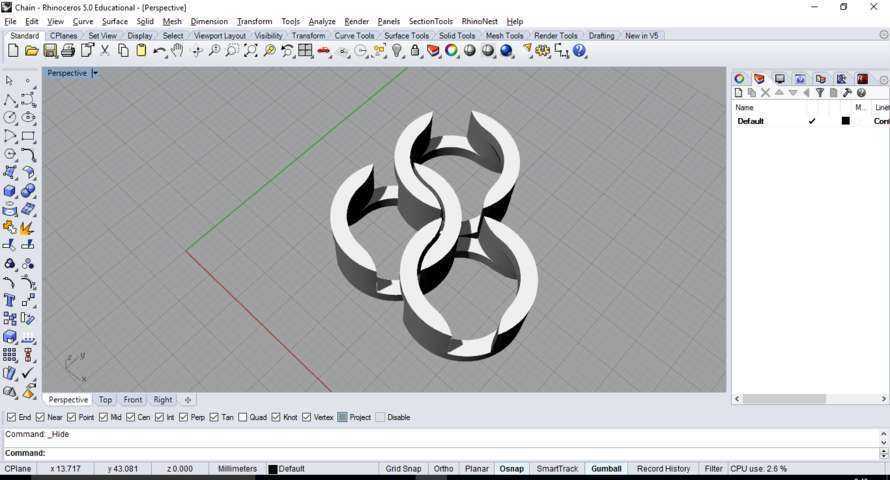
As we can see, the chain is welded and it is not flexible. The space amongst rings is 0.5mm wide, and the nozzle size is 0.4mm wide. The machine should be able to print a flexible chain
I tried to scale the model x1,5 and to print it again and with my surprise the 3D print shifted the layers.
I then reduced the speed from 150 to 100 and it actually worked better as no layer was shifted, still chain was not separated.
Source Files
Chain.stl
Test the rues for our 3D printer
We worked in a group for testing the rules for the 3d printer here in the lab
Here you can find all the 3D-printing design rules we have discovered before the final 3D print chain.
This is the test I did after the work group for understandin better the specific of our 3D print
.jpg)
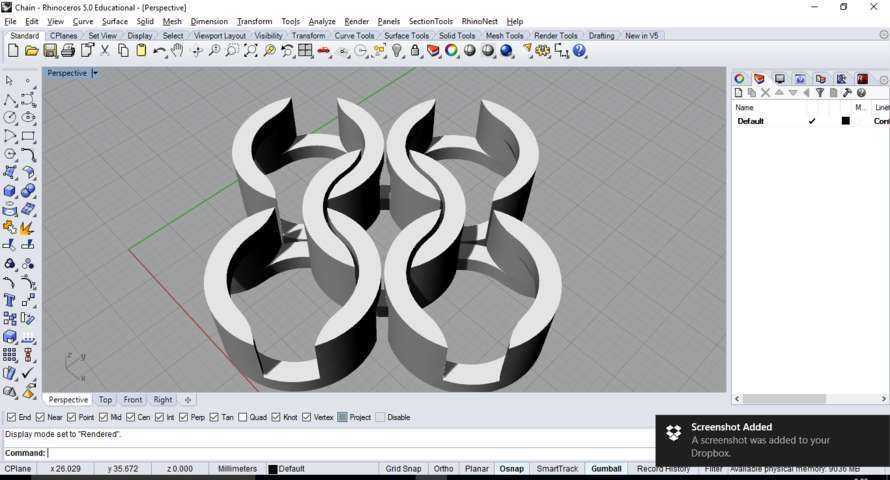
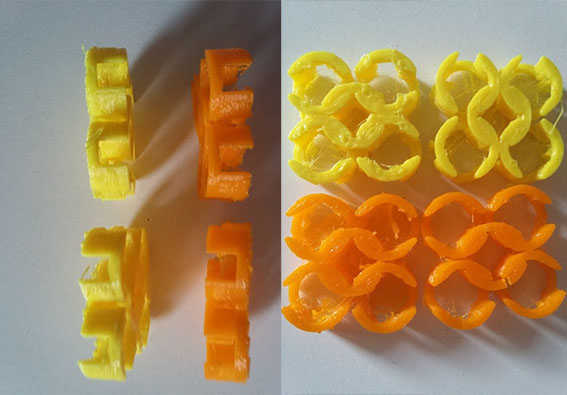
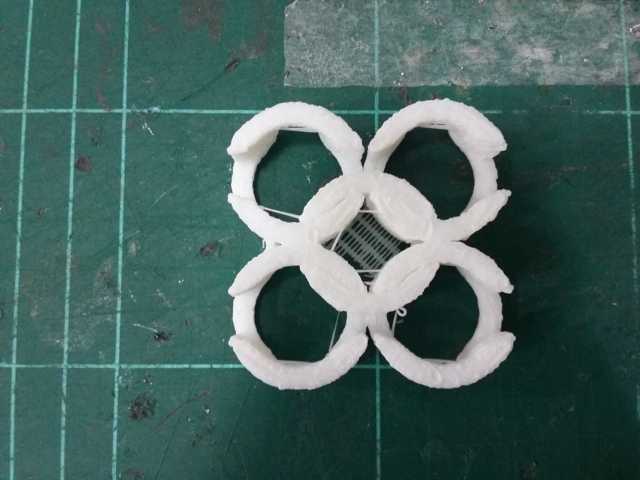
After the rules test here you can find the result of 3D print chain.
.jpg)
.jpg)
.jpg) Chain in unwelded!
Chain in unwelded!
Mesostructure
During the workshop I also discovered mesostructure, which are more interesting and complex to print.
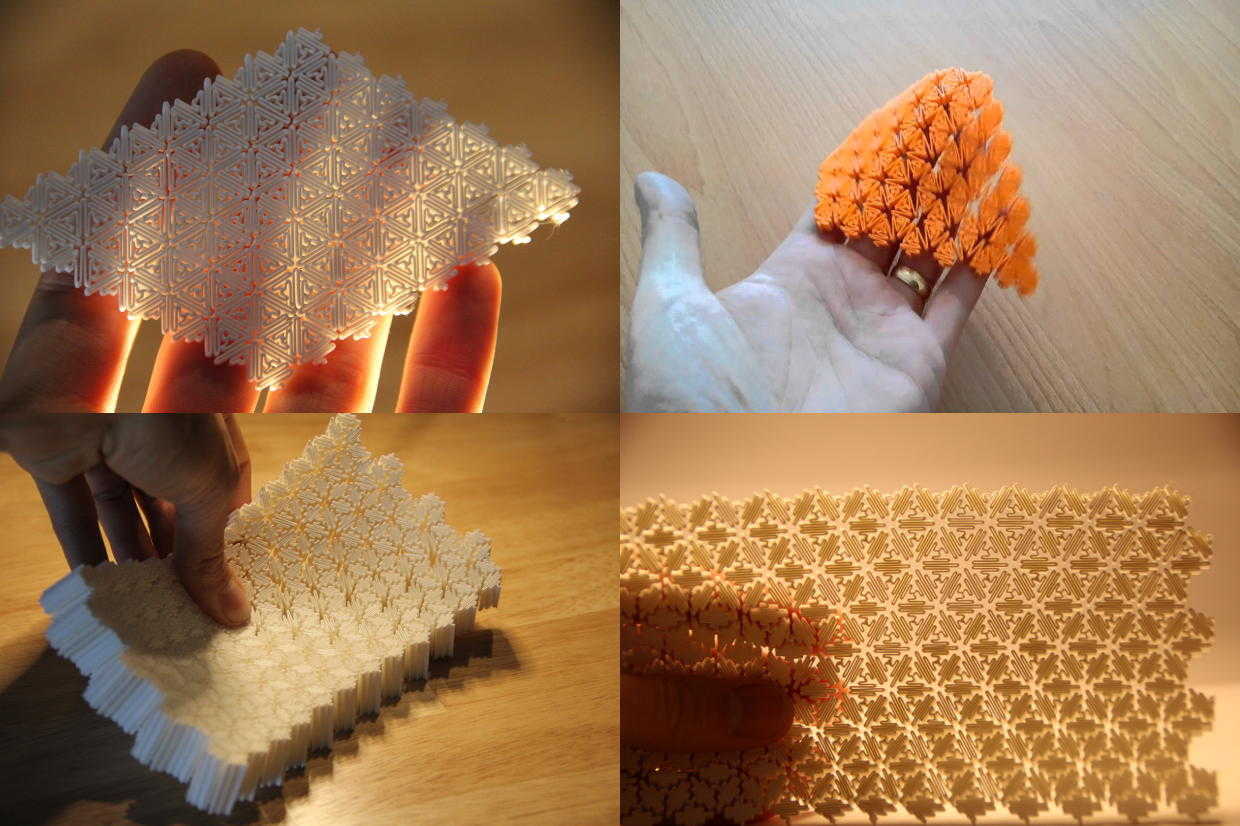
I just did a simple test to understand the feasibility in PLA.
I will do some other experiments in next few week whit different patterns and materials such as flexiPLA and Nylon.
Unfortunately, my previous experience in 3D printing doesn’t seem to be enough... even this chain pattern was not very well printed!!
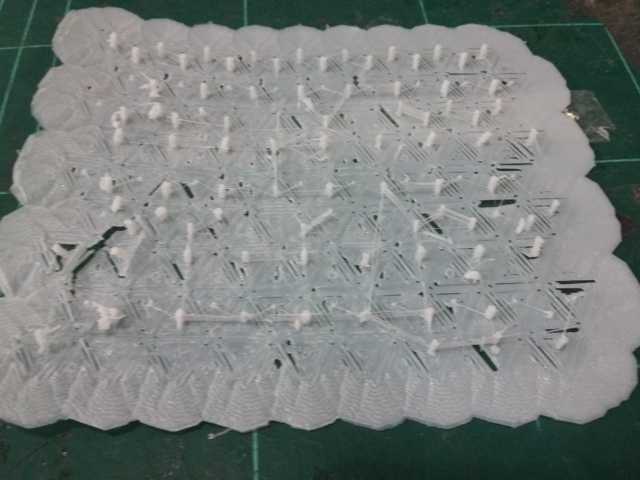
 here the result well printed!
3D Print Parameters
later height 0.2
shell thickness 0.8
bottom / Top 0.8
Fill density 100 %
print speed 80%
temperature 195 C°
support type > none

noozle 0.4
Source Files
Mesostructure.stl
Scan with 123D Catch
I decided to scan my classmate Janaky using 123D Catch. My other classmate Donato was using a ISense connected to an Ipad. We tried different things with the same subject and in the same light conditions. Very interesting!
I took 32 photos of all sides of the subject paying particular attention in overlapping them.

The work with the Structure Sensor is on Donato’s Page.
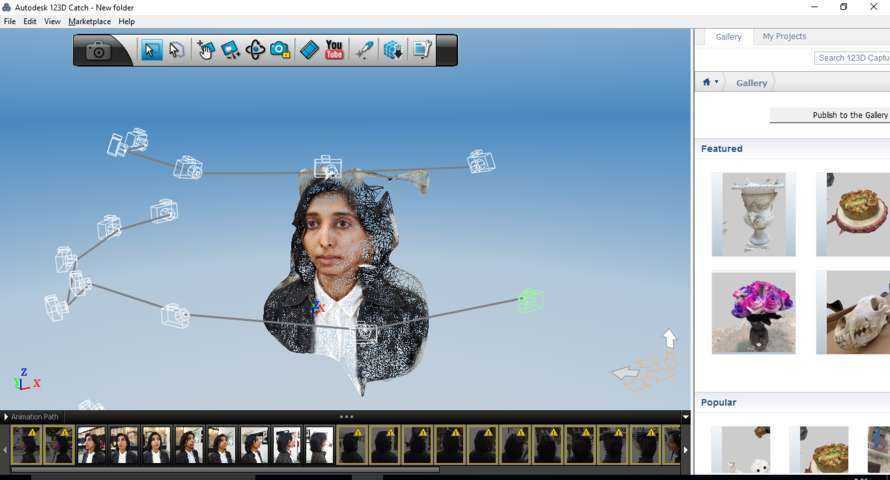
Unfortunately the pictures of the back side were not recognized by the computer, maybe because I moved too fast, skipping some pictures in the middle.
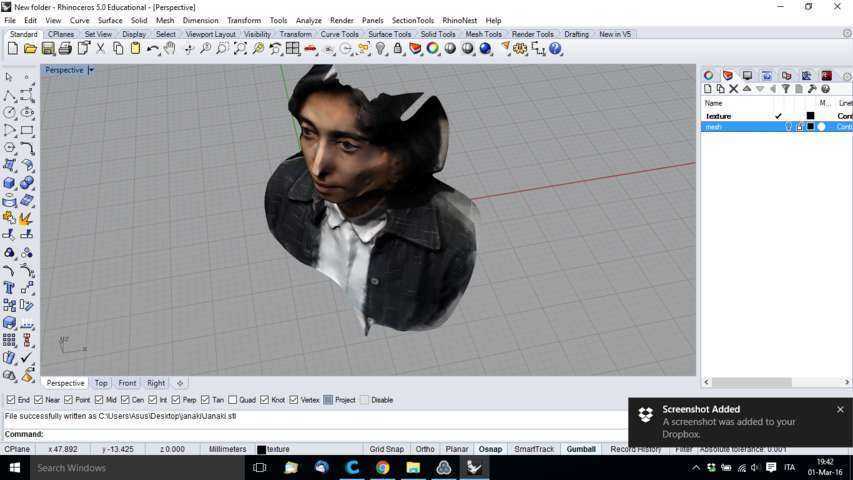
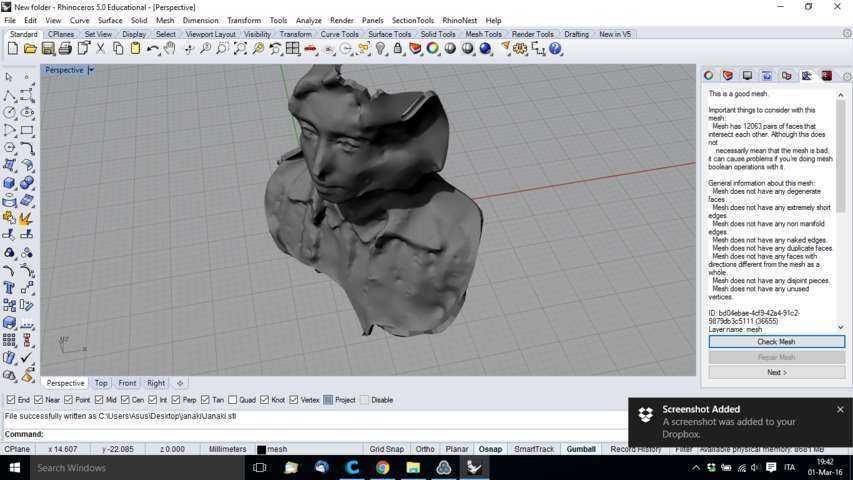
For such reason I had the front side only, but it is still enough to 3d print Janaki’s face. I made an offset of the mesh and I saved it in .stl format.
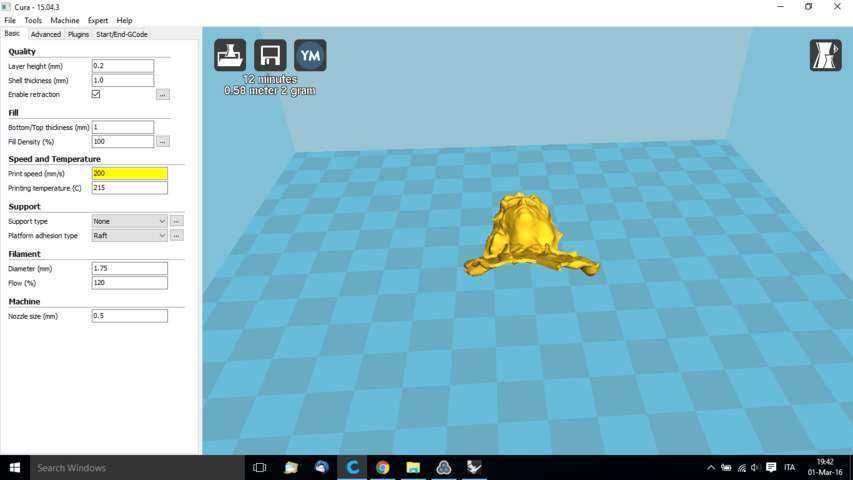
3D Print Parameters
later height 0.2
shell thickness 1.0
bottom / Top 1.0
Fill density 100 %
print speed 100%
temperature 195 C°
support type > Touching buildplate
Platforma adesion Type > Raft
Source File.slt
 Janaki 3D model.stl
The foot scanning
1)Test specific App SUN Feet.
I also tested an app called SUN Feet. This app needs 4 pictures of your foot on a white paper that allows it to recognize the foot shape.
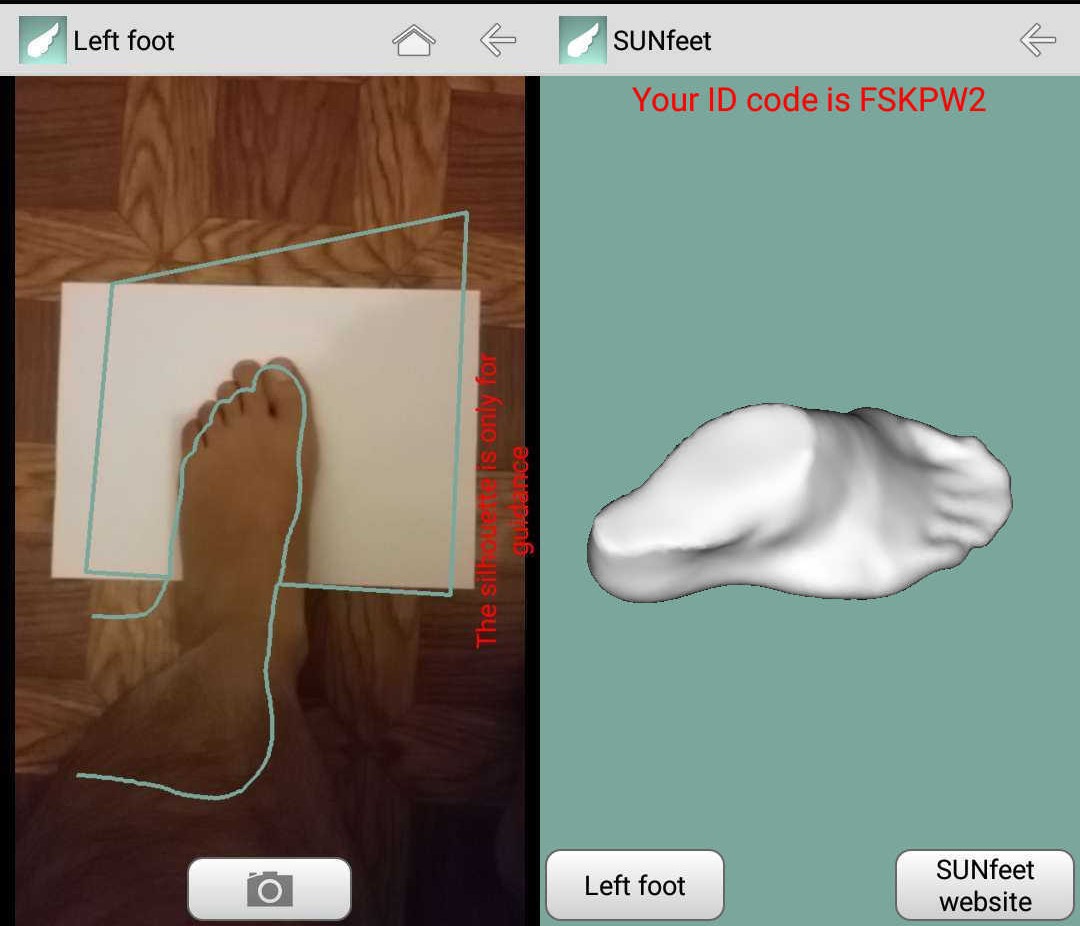
After the photoscan, app is able to reproduce a 3d model of the foot.
The experiment is nice, but the result is not enough for my standards. The 3D model is not exportable and obviously there is a need for a direct link to an online shop of customized soles.
It is a good idea though, and it provides interesting inspiration for my final project, in particular it is interesting how they use a device to acquire information and how they use a computational pattern to create a sole.
Player Footballino
For further 3D scan e 3D Print visit Final Project page
In collaboration with my classmate Donato Polignone we assume that this assignment is really done! ;)
 3D Scan e Print of 14 classmate for Footballino Final Project
Copyright © Elia De Tomasi 2016