CNC Cut
TASK: design, make, and document a parametric press-fit construction kit out of cardboard.
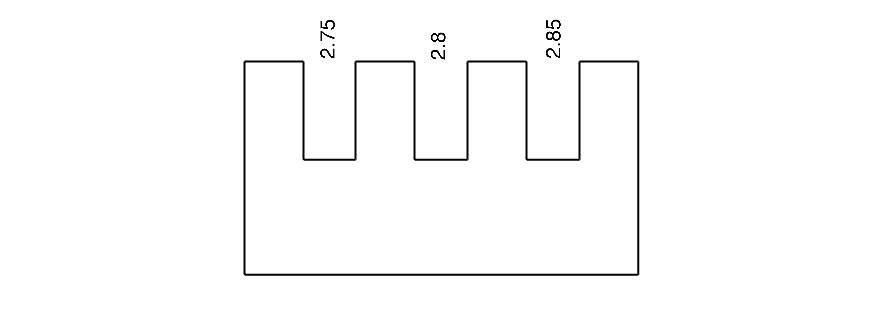
As the connection was one of the main priorities the first tast was to create a small test in the form of a comb to see what the best connection dimension would be after measuring with calipers.
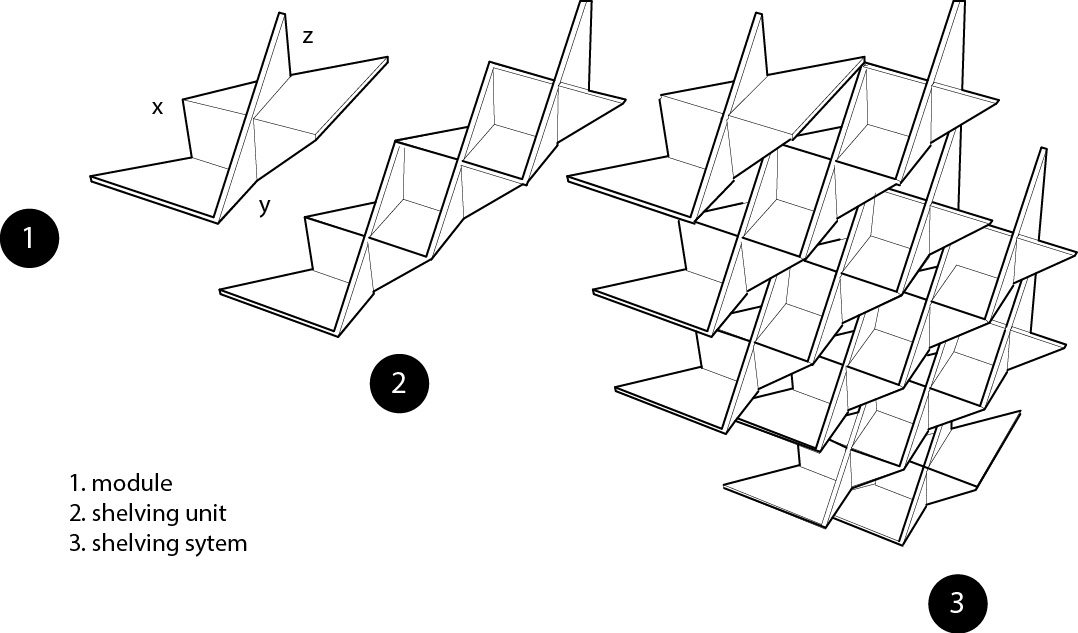
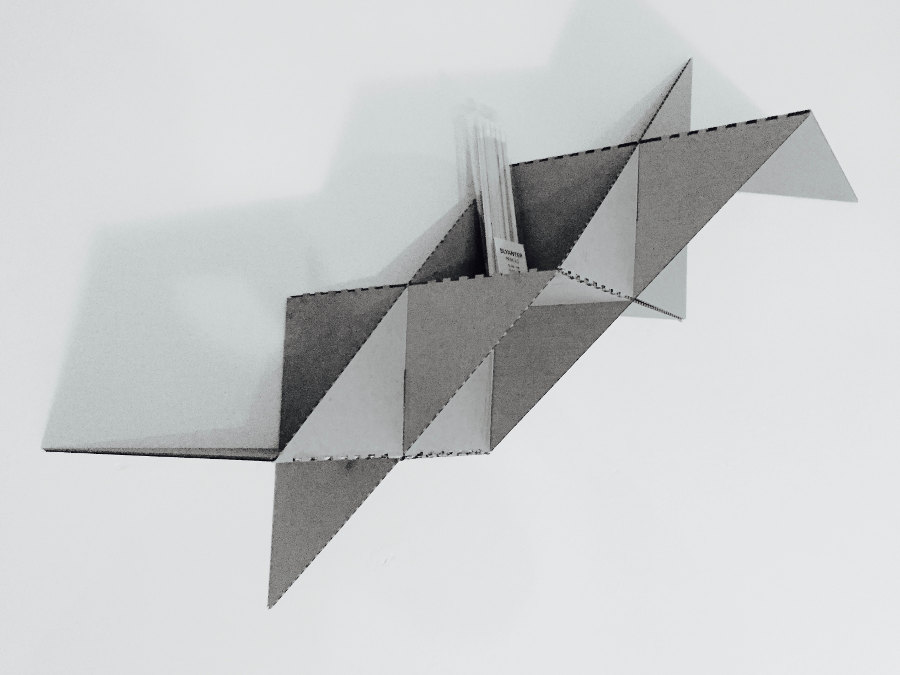
 I decided to work on two exercises as a loop project management process in case i got stuck on one of the ideas. The first exercise is a shelving system using modular triangular cuts. I used grasshopper3d to apply logic that i figued out by modeling in rhino. The definition is process of transformations. I.e rotate flat triangle on its y-axis; then on its x-axis from the middle (where the joint would be created) and move in the z-axis to the middle.
The cuts were also programmed into grasshopper in the middle of each section with a thickness of 2.8mm.

Although the structure had support from the middle, as a whole it was still weak and therefore i added some 'tooting' as seen in the image below using rhino3d.
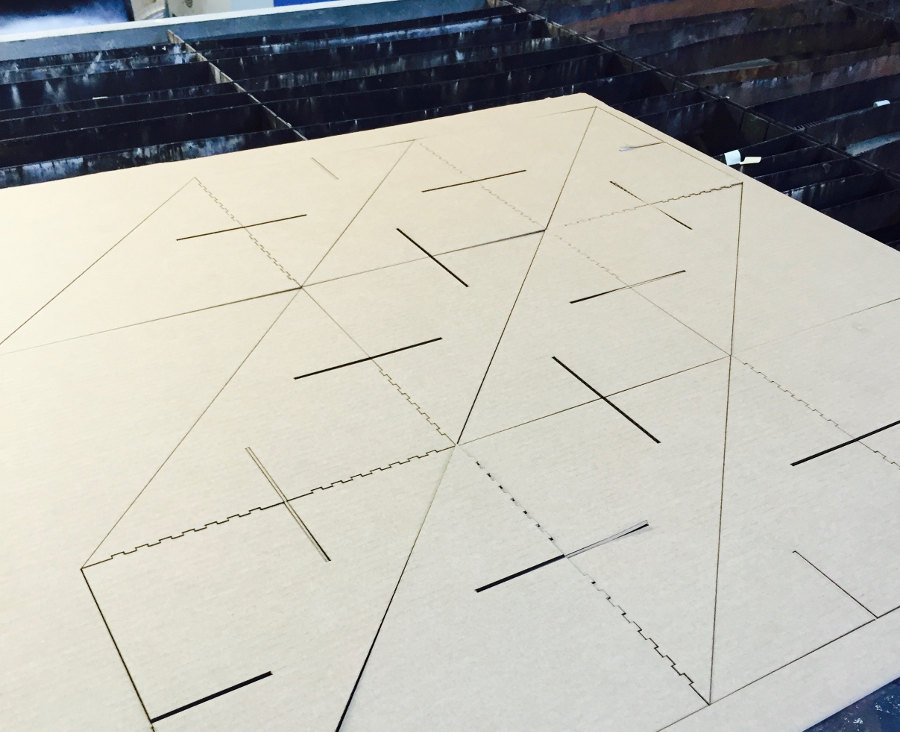
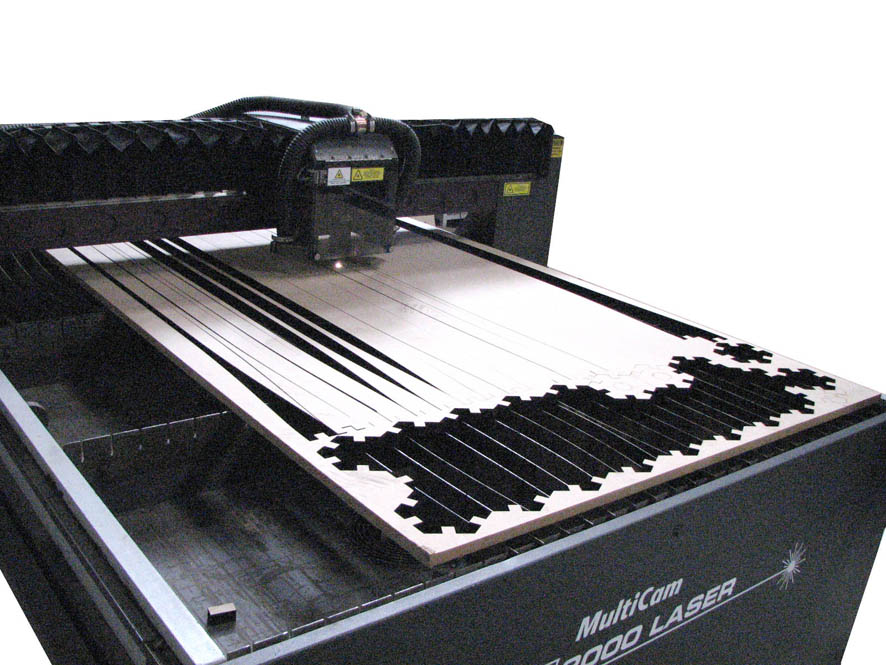
In the process various cuts were made using two different machines by sending dxf files. One was a Trotec speedy 400 in Valldaura labs and the other was a Multicam2000. Speed and power varied drastically on both. The Multical best worked with power 120 watts and speed 40 with a frequency of 500 (this is a relatively low value when compared to what you would use for other materials such as wood). While on the Trotec power 35 and speed 80 with frequency 200.
In the end; over all the shelving system worked quite well with cardboard. However this system would work much better with a more rigid and stable material like wood.
In this second exercise i attemped to create a skin which would allow the cardboard to be more predictable; and act as a fabric in parts and more solid in others. To do this i created a grasshopper definition which would map various clear meshes and create geometry according to the curvature of the surface. To do this i used a MeshDual component by Daniel Piker.
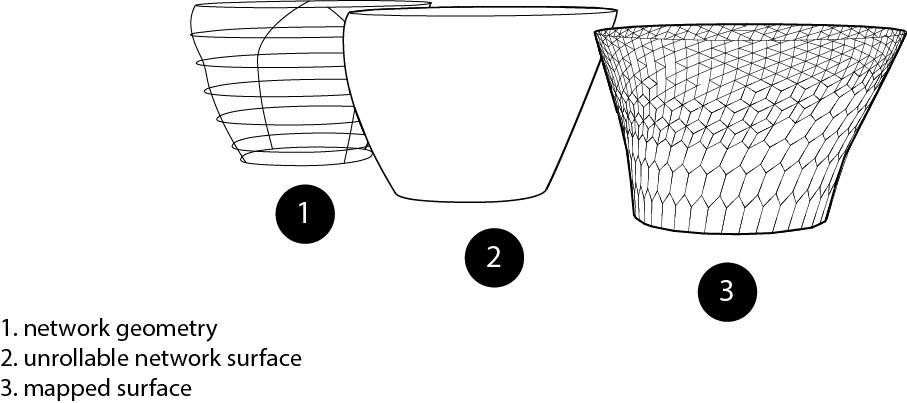
The lengths from the hexagons in meshdual have different sizes according to the curvature. The smaller the hexagon the more curved the surface is. I took this information to separate the geometry into three. More curved= triangular; Less curved= diamond shape; less curved= hexagonal. This created interesting shapes and gave the flexibility required
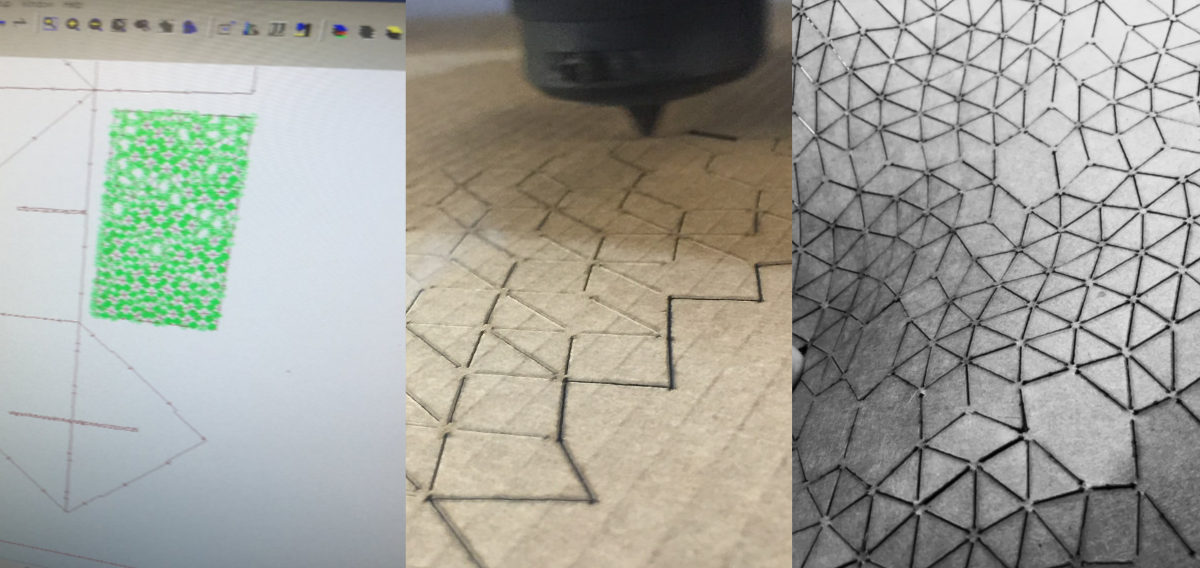
In fact to test the algorithm i created a much needed paper basket with a pressfit base and flexible morphable body. The press fit connections had to be cleared from folding cuts as this would create weak joints.

Although this system worked quite nicely; i still need to perfect two issues; one is with creating 2d from 3d. Depending on the geometry unrolling is a big issue and i am sure that some kind of relaxer like kangaroo3d could help. The other issue is the connection detail which closes the loop. As there is pressure on the joints; a tidy press fit connection would not suffice
I also attempted using the vinyl cutter this week using Fab modules (Download). The vinyl cutter works best with png files and great for making stickers, banners, labeling, diy sticker circuits and more.
The computer at the lab controlling the vinyl cutter is a rasberry Pi which uses a linux interface (i bought and booted one myself in week15)
Cutting process:
1. Use terminal to find Usb port: type 'ls dev/ttyU*'
CUPS printing interface needs to be installed on the rasberry pi; if not
a. type 'sudo apt get install cups' and go to website http://localhost:631)
b. to identify which USB-port is connected type: "dmesg"(to search); "sudo dmesg -c" (to clear msgs) (make sure to plug in vinyl) and port should come up as e.g. /dev/usb/port
c. go to Cupps interface add printers and classes; add printer and password ('sudo passwd root' allows you to reset the password and then login with 'root'.
2. Fab modules (fab command in terminal); choose your machine and upload the png; set material to vinyl..
3. set up the vinly cutter- press menu twice to get to 'un set up' the printer head homes (far right); the stock placed in from the back left. Move vinly into place; select "piece" instead of "roll." place measurements of piece
|BRIEF FROM MIT
|DOWNLOAD FILES