Wk5: 2016/02/24
3D SCANNING AND PRINTING
0. Assignments for week5
The assignments for week5 were as below;
- Test the design rules for your printer(s) (group project)
- Design and 3D print an object (small, few cm) that could not be made subtractively
- 3D scan an object (and optionally print it)
1. Testing Design Rule
The first assignment of this week was group assignments, which tests design rule, possibility and limitation of 3D printing. For instance:
- How sharp a corner can you make?
- How thin a wall canyou make?
- How do the detentions you made relate to the detentions you set to the printer?
- How close a clearance can you make to release the parts to turn
We downloaded the printing test model from Thingiverse, and printed them. The software which we used for printing was Cura, which is open source priting software.
Machine set up of 3D printer
Below is the set up process of vinyl cutter:
- Prepare the STL file on 3D design software and read the data by
CUra, which is the software to controll 3D printers. - On Cura, select the
sizeof the printing,printing speed, which is around50-100,temperatureof the extruder, which is around220, and finally addsupporting layerpreventing the object to move during the job. - On 3D printer side, select a material which you want to make.
- On Cura, open the
controll windowand raise the temperature of the extruder. - If the temperature reach the number you set, you can start to print.
- You have to do trial and error to find out correct
printing speedand other settings;size of supporting partsand such. In addition to that, you have to choose correct machine to print your work because expensive printer can print more precisely and quickly compared to reasonable ones.
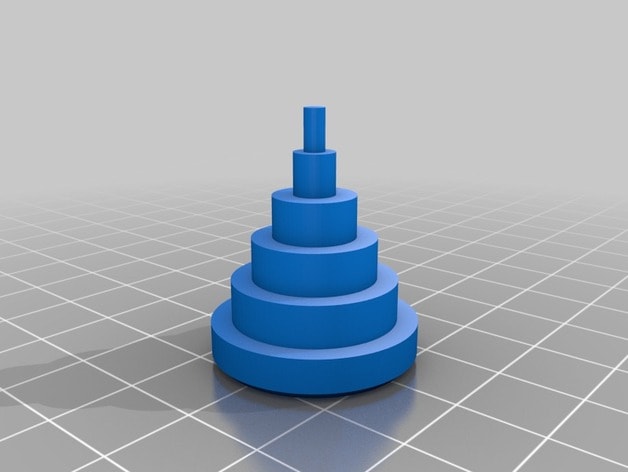
A) Shoot Out Test - Tower
First, we printed a cylinder pyramid, which had five layered structure. As the picture of printing output below, the top os the structure was not printed clearly, because;
- the printer we used, Ultimaker Original, is the one of reasonable 3D printers so that it could not print detailed parts precisely.
- In addition to that, we set the size of printing object around 1cm*1cm*1cm, which was a bit small to print.
- Furthermore, priting speed;
100, was too fast to print in detail, we suggested.
 |
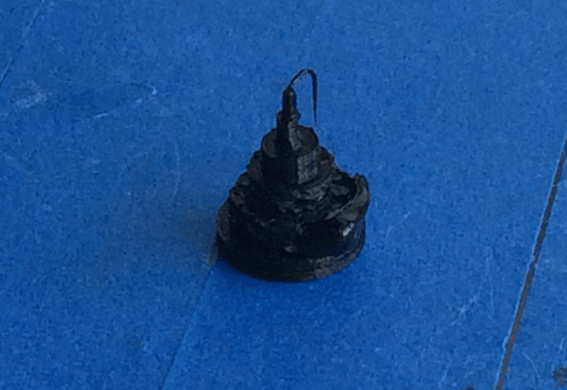 |
2015 3D Printer Shoot Out Test Model
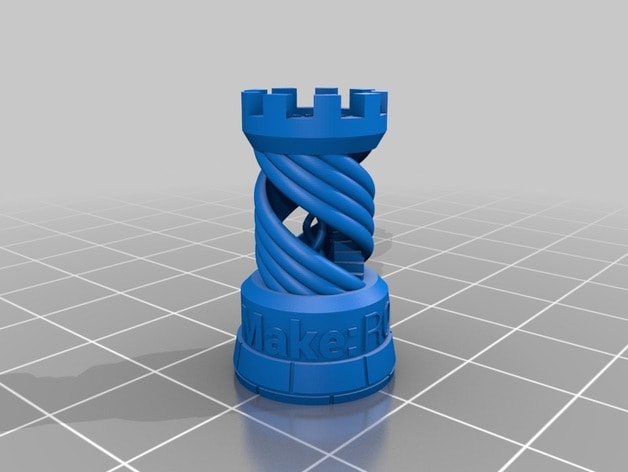
B) Shoot Out Test - Rook
Reflecting the result of previous test, we printed the Rook as below, setting the size of the object: 2cm*2cm*3cm. The output was satisfying because of the appropriate priting size and appropriate printing speed.
 |
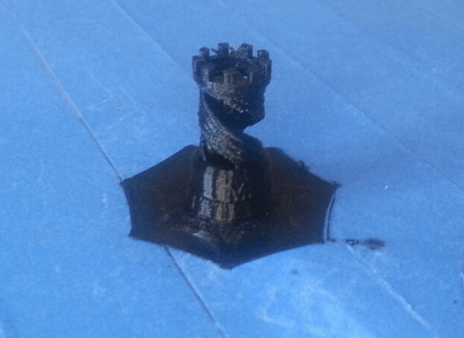 |
Rook - 2015 3D Printer Shoot Out Test Model
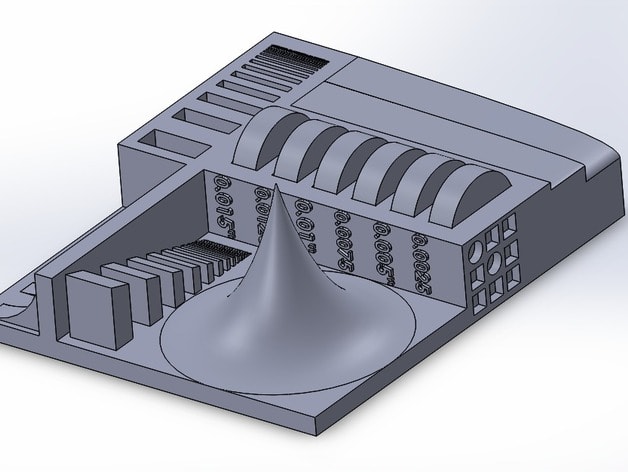
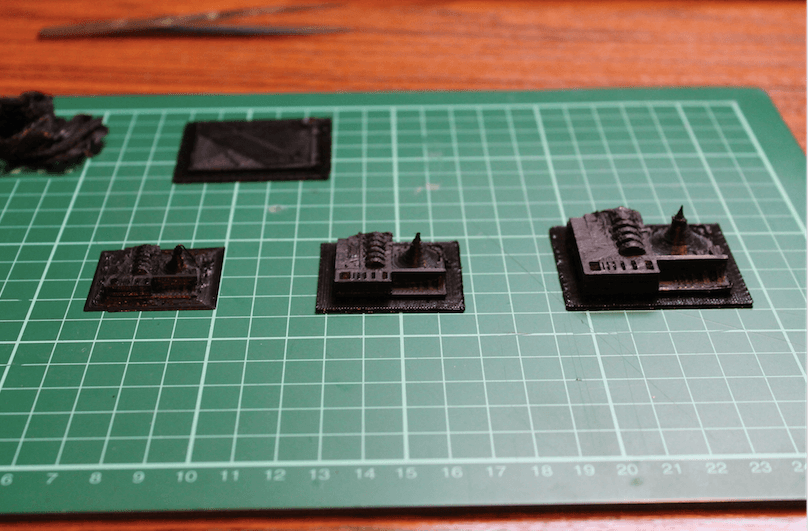
C) Tolerance Test
Another group working team printed tolelance test object, and the result indicated the appropriate size to print the detailed object. Looking at the top of cones of each size of models, the largest one is printed clearly compared to the others.
 |
 |
3D Printer Tolerance Test Model
This result shows the limitation of preciseness printing for grooves and brows. Acttually, it is difficult to print the tiny characters which we can see on the side of torelance test model, however, other parts are generally printed clearly.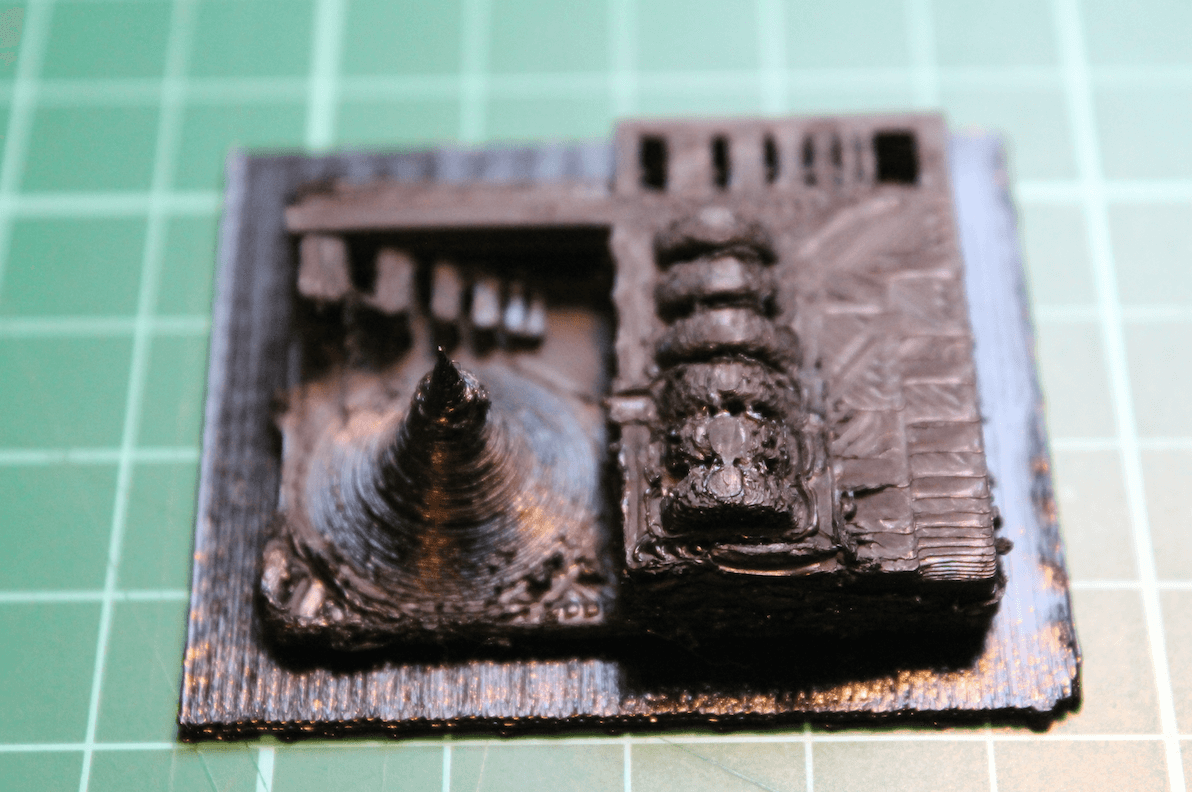
Largest one of the printed test objects
Advantages and limitations of 3D printing and scanning technology
From results of these test, I think that the advantages of 3D printing is
- Quickness:
this is vital for digital fabrication and rapid prototyping. Without 3D printer, we have to order the prototype of our work to other manufacture companies or such, which will take 1-2 weeks. On the other hand, 3D printer can print the material at maximum within 1 day. - Widen the way of expression:
For instance, my output on this week is a really complex parametrical object, which seemed to be impossible to produce by otehr machines. 3D printers can broaden the ways of creators' expression and creation.
Also, there are limitations of the technology as below:
- Strong limitation of spec:
As the test above and the output this week shows the preciseness of the priting strongly depends on the speck of each 3D printer. These technology is sitll on the way, so reasonable models of 3D printer are not so good actually. - Slower compared to other approach
If you think 3D printning not as prototyping tool but as production tool, the 3D printing is a bit slow compared to other mass production ways. For instance in other Fab Academy approach, molding and casting can make many objects at the same time by using the mold.
2. Practice - 3D Printing
After checking the limitation of our printer, which was group assingments, I enterd the practice for designing an object (small, few cm) that could not be made subtractively.
First, I researched what designs cannot be modelled subtractively as below. The image below indicates that the objects like;
- the hole and space which is totally closed
- deep grooves
- complex grooves
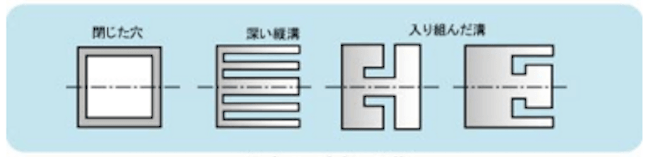
Designs which cannot be modelled subtractively
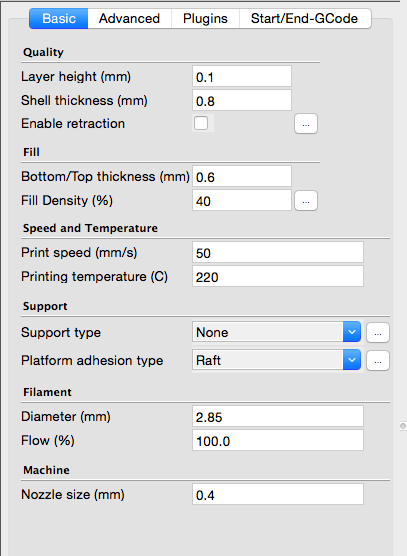
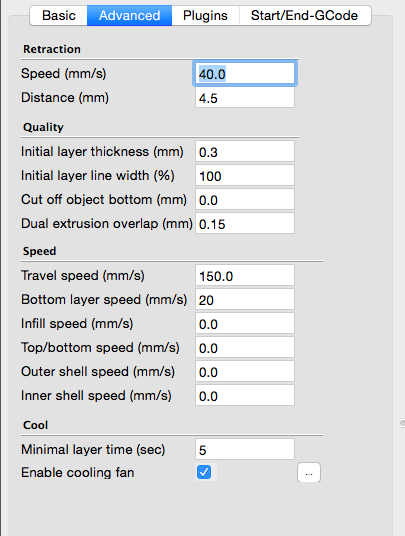
In addition to that, below is the setting I used for printing. Mainly, speed and Support Type / Platform adhession type is very important to print as you want.
|
|
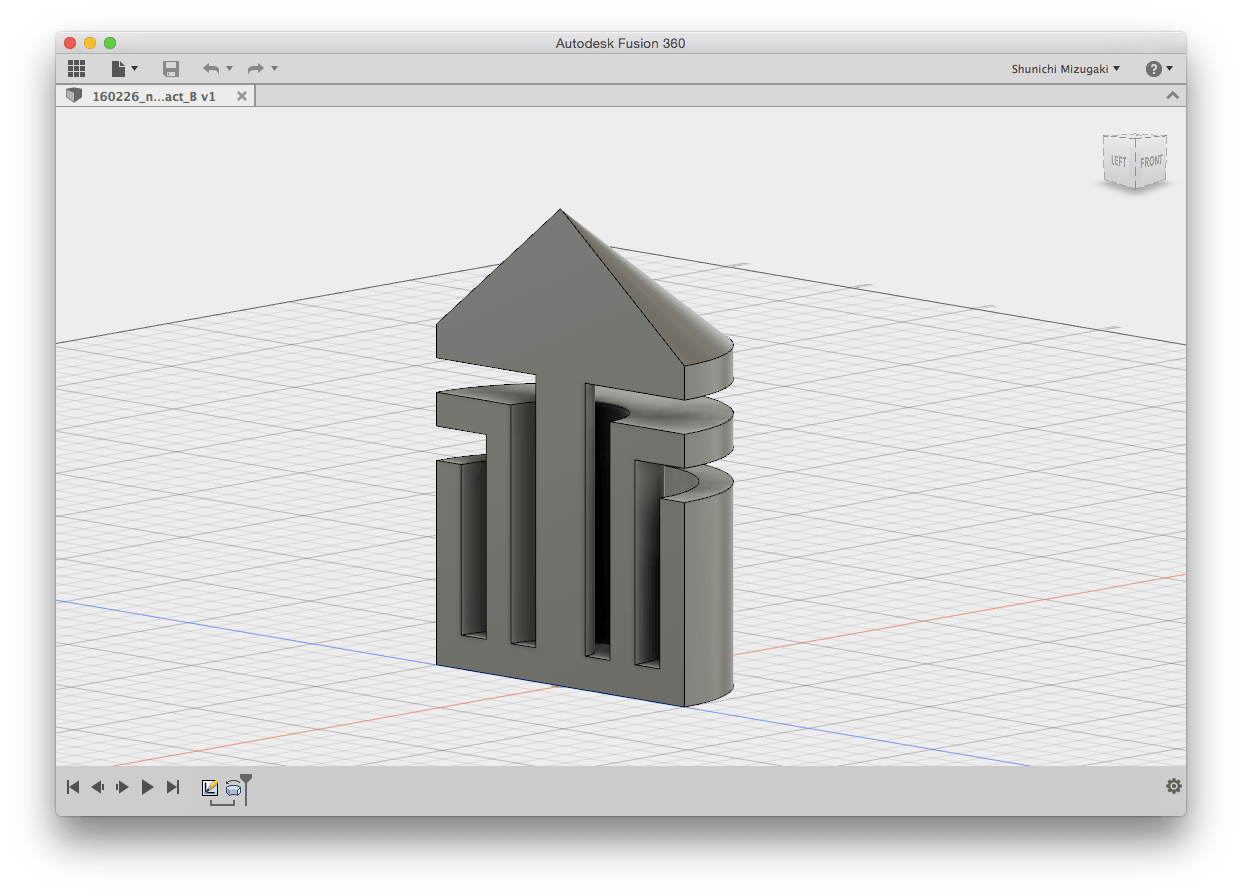
A) Simple Test - Grooved Cylindar
At the beginning, I made simple object, which the image above lists as example using Autodesk Fusion 360. I drawed the model and printed it, and was able to do it without failure and mistakes thanks to the testing above.
 |
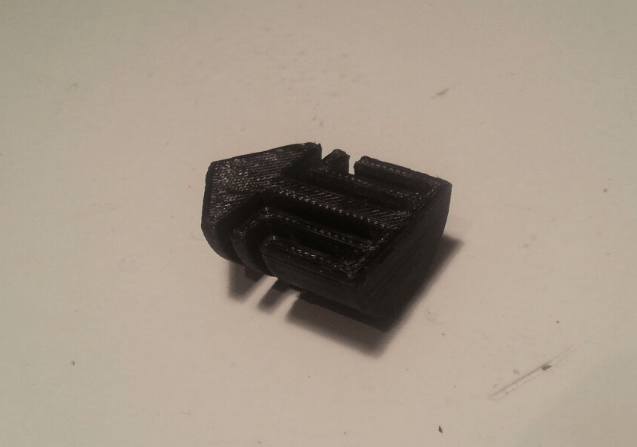 |
Grooved Cylindar
Download STL
B) Sphere with wave on its surfase
Next, I used Antimony to draw parametric models. To tell the truth, I would like to make the hollow polyhedoron with honny-come structure, and reasearched a bit. However, I gave up it because 1) the drawing complex parametric model by Fusion 360 was a bit diffucult for me, 2) I thought it was impossible to print the tiny structure by our 3D printer.
I made a sphere with wave on its surfase as the picture below by Antimony. I drawed two spheres and subtract the space of smaller one from the bigger sphere, then inverted wave patterns to it.
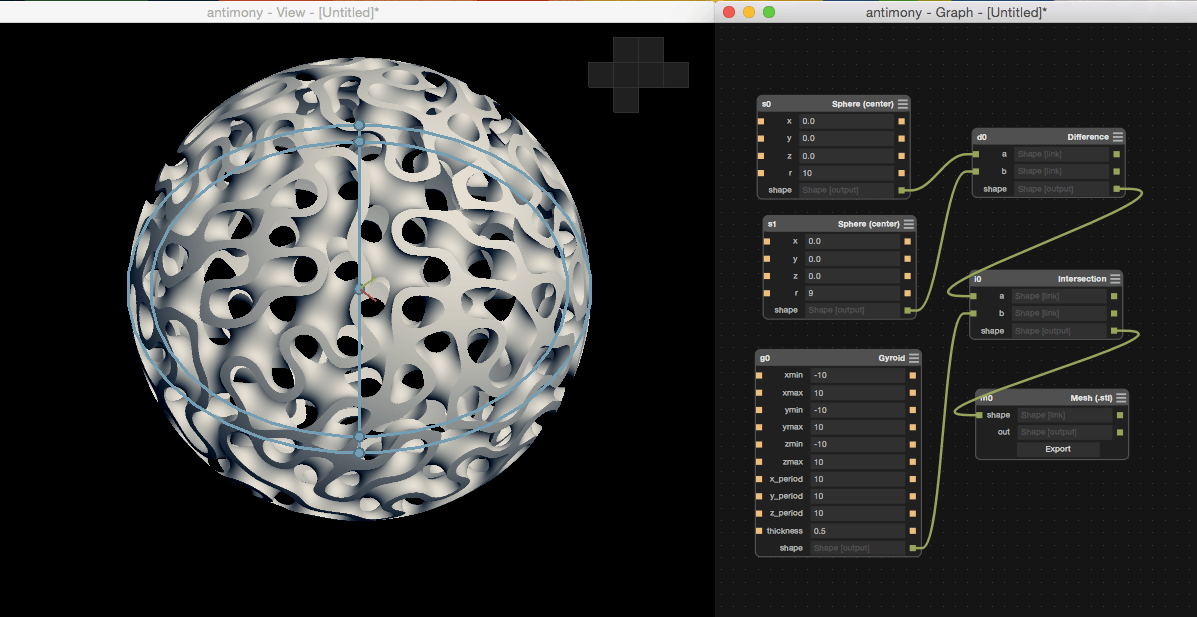
Sphere with wave on its surfase on Antimony
Download STL
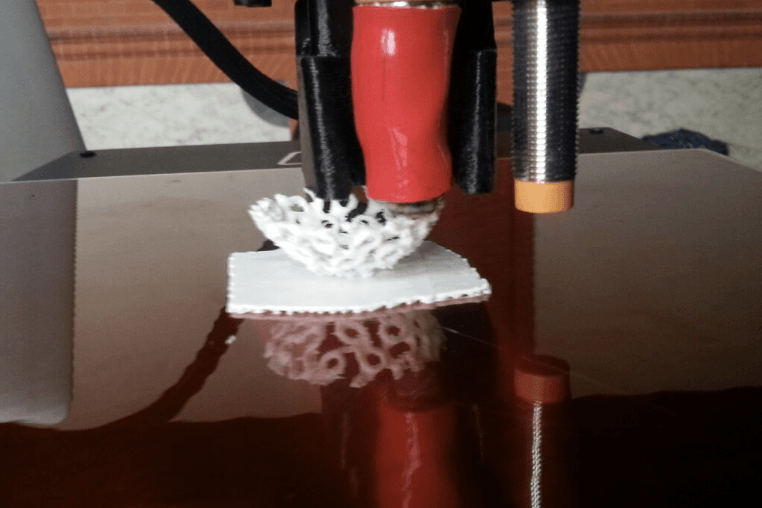
On printing process, I did trials and errors. In first trial, the sphere could not be printed appropriately because there are no base. Then in second trial, I set the base to the objects, however, the printing objects started to slide after reaching the certain height, so I cancelled printing.
 |
 |
Printing Process
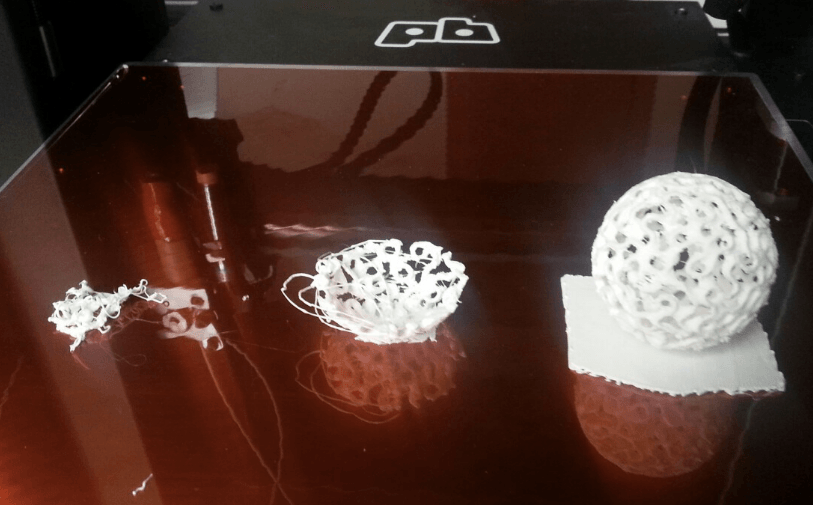
Reflecting those failures, I set the big base enough fix the object during printing as below, and successfuly printed with pricise detailed. Owing to using Printbot Metal Plus, which is higher speck 3D printer in Fablab amsterdam, I could print to detailed parts in spite of its complex design.
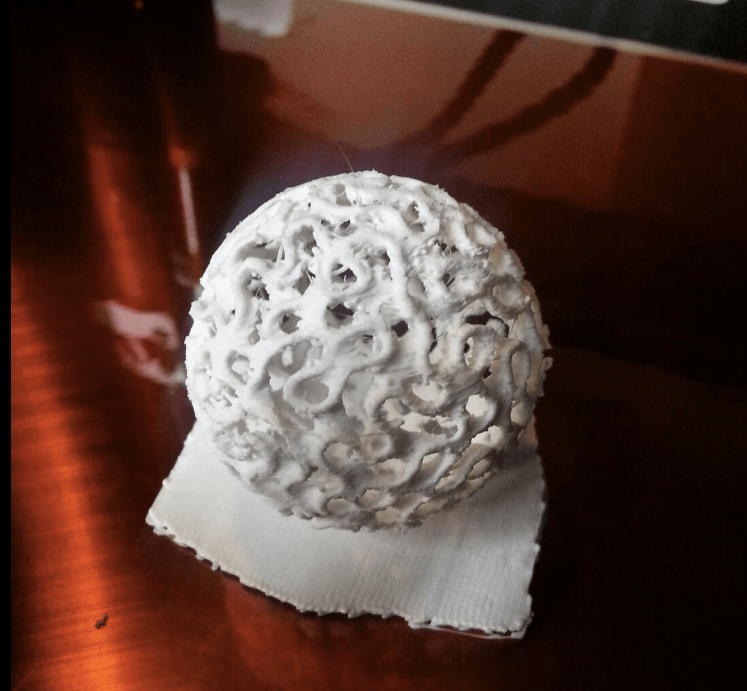
Sphere with wave on its surfase
C) Pipe structured object
After that, I tried to make another model by Antimony as below, which was a object something like piped pattern. Thanks to Antimony, I was able to draw the pattern very easily, however, Antimony has only three patterns of dedault volume designs, so I wish there were more patterns.
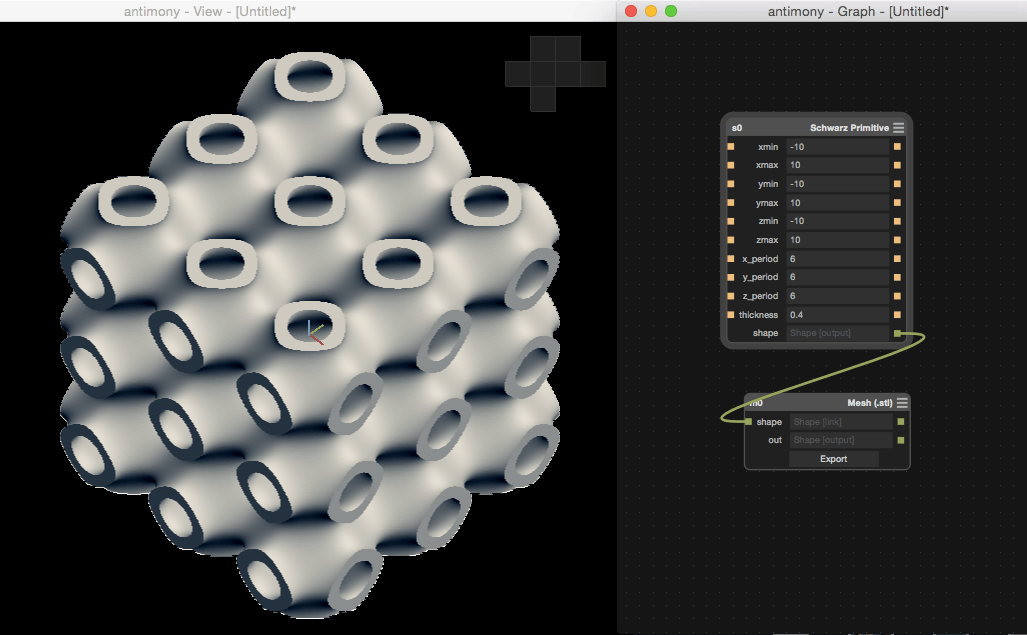
Pipe structured object
Download STL
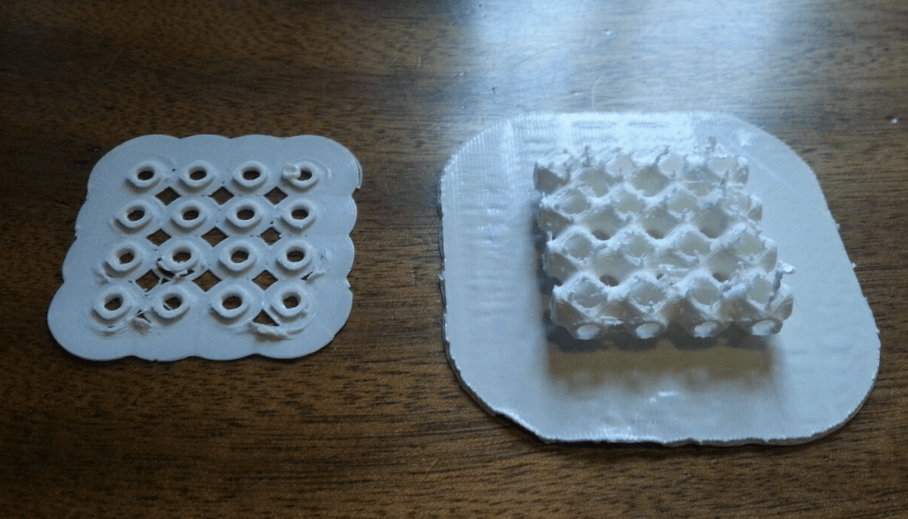
Printing result
3. Practice - 3D Scanning
Next assingment was trying to 3D scanning. Prof. Niel introduced us several scanning tools and we could tried several scanning methods which were open ource apps and facilities of Fablab Amsterdam.
A) Skanect
First, we tried Skanect, which was open source scanning software using Kinect as scanning device. Skanect can capture a full color 3D model of an object, a person or a room.
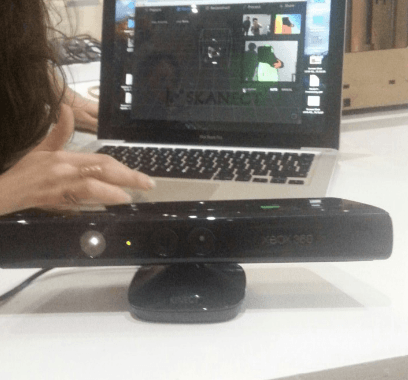
Then we scanned our self potrait as below. It was a bit diffucult at first because we have to revolve with appropriate speed for scanning. The picture below is scanning scene in our class.

Scnanning Scene in class
After several trials, we could got understand it and successfuly scanned us as below. Though the obj file was full colored, it was banished after opening by Fusion 360 and converted OBJ file to STL file.
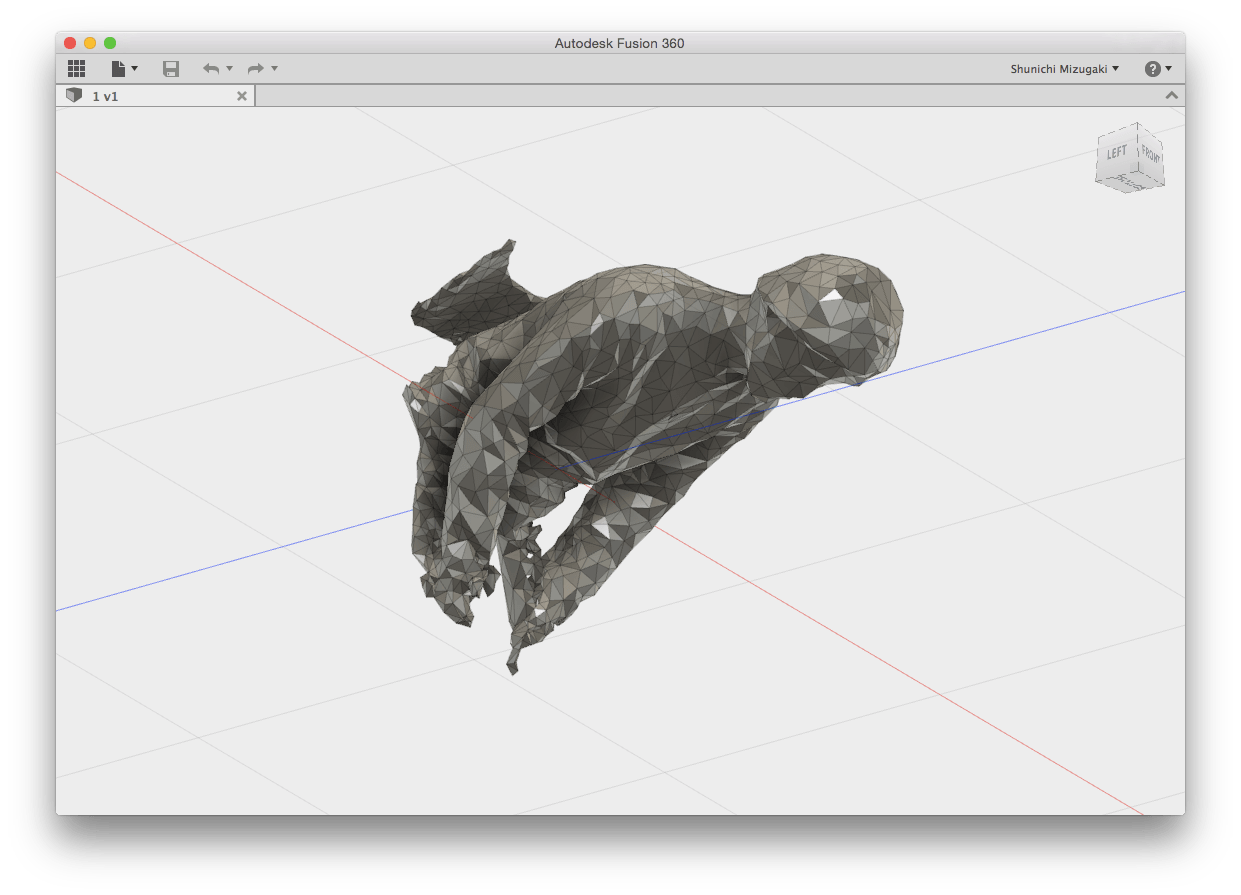
Self portrait object by Skanect
Download OBJ
B) 123D Catch App
Next, I used Autodesk 123D Catch, which is open source application on smartphone enabling us to scan the object by smartphone easily.

However, differently from my expectation, it took so much time to convert taken pictures to 3D model, which was around 3-4 hours. After waiting a lot, the scanned object was generated as below. It was fortunate that it enable us to share and embed the object on website very easily.
C) Roland Modela MDX-20
Next, we used CNC milling machine: Roland Modela MDX-20 as scannning tool. It was very surprising for me that it can be used as scanning machine. Mainly, it was used to scan very tiny object pricisely as below.
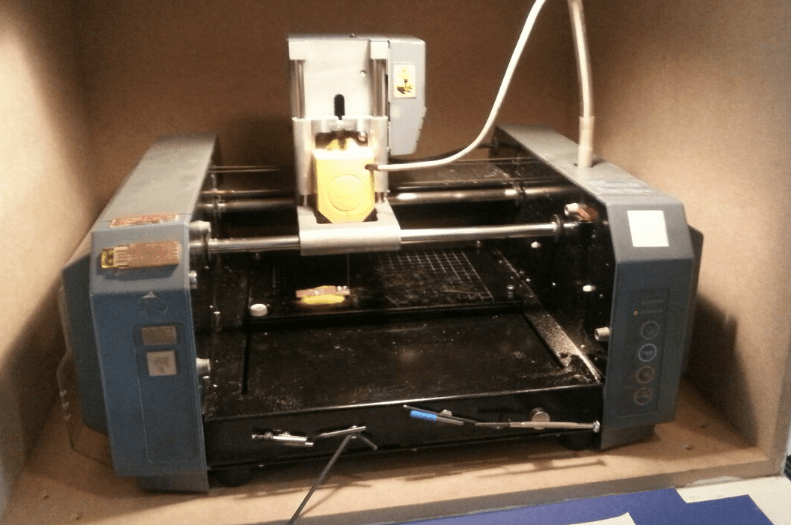
CNC milling machine: Roland Modela MDX-20
This time, we scanned FabTiny ISP, which we made just last week. We used clay to attach the scanned objects to base board as below. Because of the scanning preciseness, it took us around a half hour to scan a tiny part of FabTin ISP, which was just 1cm*1cm.
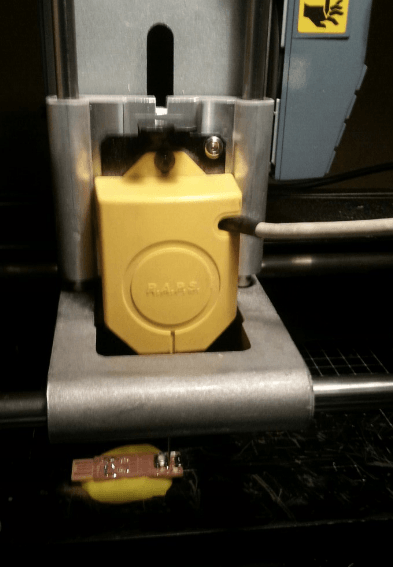
Scanning scene
As a result, the mesh was generated by the software, and we could import and edit the object to CAD software and convet the mesh to 3D modeling data.
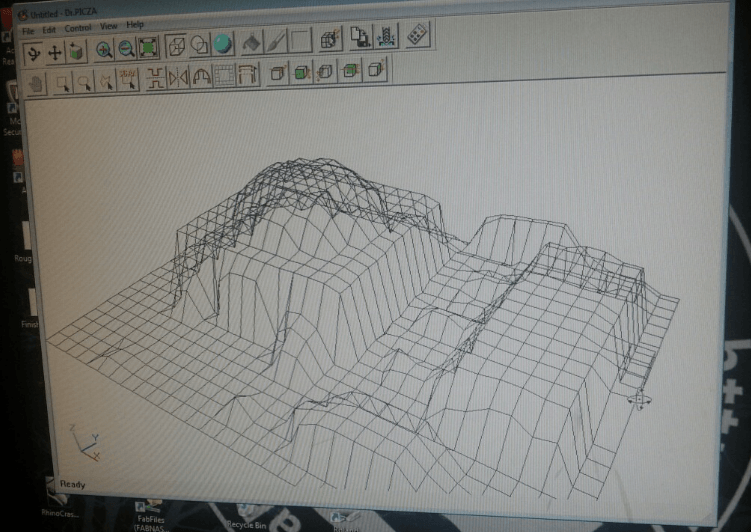
Result of scanning FabTiny ISP
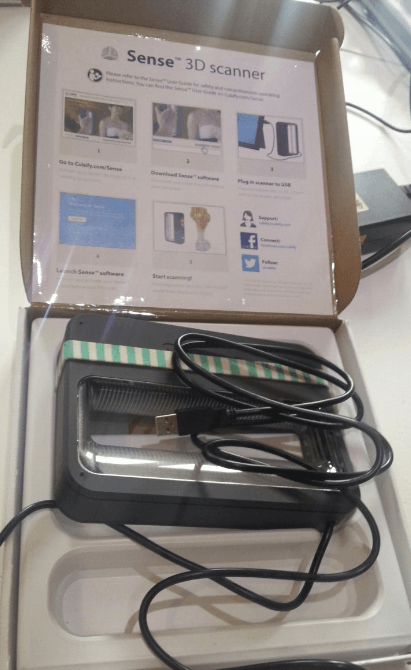
D) Sense
Finally, we used Sense, which was the handy scanning tool as the image below. It can scan objects with color quickly. Unfortunately, I did not test this tools enough because of lack of my time.
Outline of this page
1. Testing Design Rule
2. Practice - 3D Printing
3. Practice - 3D Scanning
Download output of Wk5
Here are my output files for week3:
Lecture Material for Wk5
Lecture Note
Tools
(3D Printing)
(3D Scanning)
Learning Support
Videos of Wk5
Here you can find this weeks's lectures on VIMEO:
(2016.02.24)
(2016.03.02)
Checklist for Wk5
Assignments:
- Test the design rules for your printer(s) (group project)
- Design and 3D print an object (small, few cm) that could not be made subtractively
- 3D scan an object (and optionally print it)
Learning outcomes:
- Identify the advantages and limitations of 3D printing and scanning technology
- Apply design methods and production processes to show your understanding.
Have you:
- Described what you learned by testing the 3D printers
- Shown how you designed and made your object and explained why it could not be made subtractively
- Scanned an object
- Outlined problems and how you fixed them
- Included your design files and ‘hero shot’ photos of the scan and the final object