Computer-controlled cutting
Assignment: Design and make a corrugated cardboard press-fit construction kit | Use the laser and vinyl cutter
Learning outcomes:
- Demonstrate and describe parametric 2D modelling processes
- Identify and explain processes involved in using the laser cutter and vinyl cutter
- Design, develop and construct the final prototypes
Vinyl and Laser cutting!
The task for this week was to use the vinyl and laser cutter and create a press-fit construction kit. A press fit (also known as interference fit or friction fit), is a fastening between two parts which is achieved by friction after the parts are pushed together, rather than by any other means of fastening. This means fitting together without using glue, nails, screws or other fasteners. Consequently, making and adjusting joints to fit together was crucial to the design.
Enjoying joints...
This week involved a lot of tweaking and exploring. I started with looking at the material I already had. Having led a couple of workshops and projects around interactive physical model making (such as technology enhanced dollhouses and architectural models for co-creation), I noticed that I had a surprising amount of existing material.
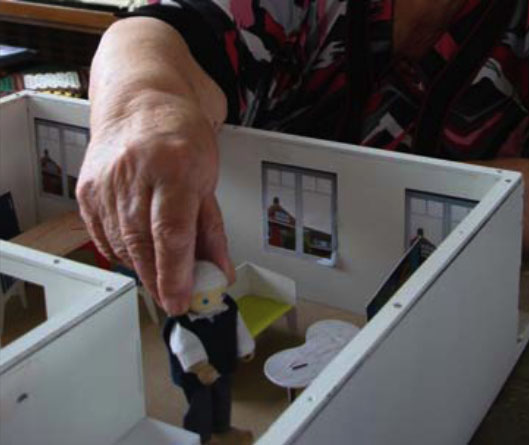
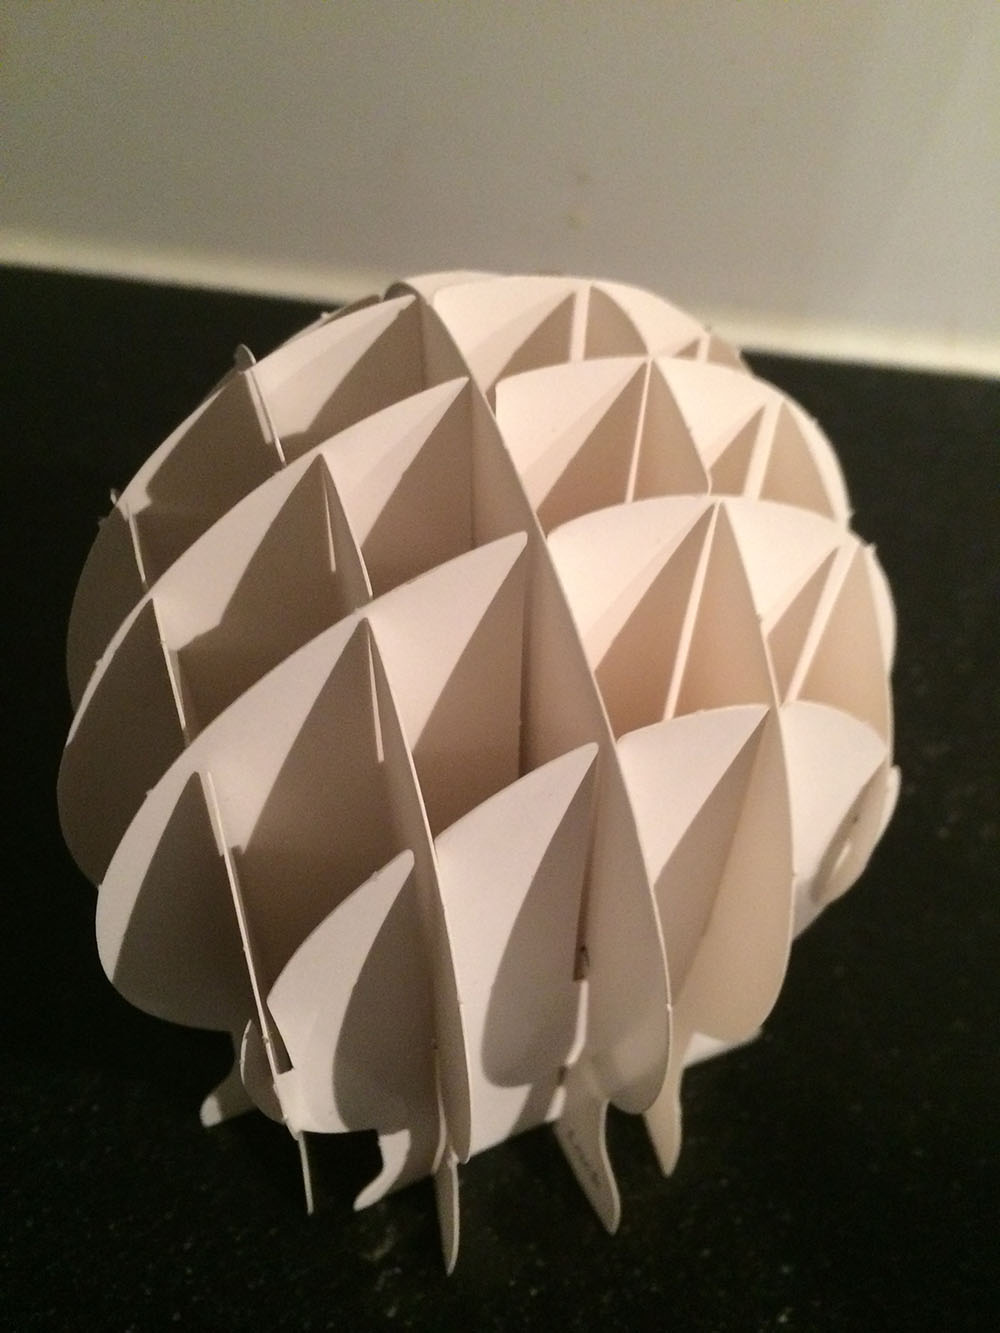
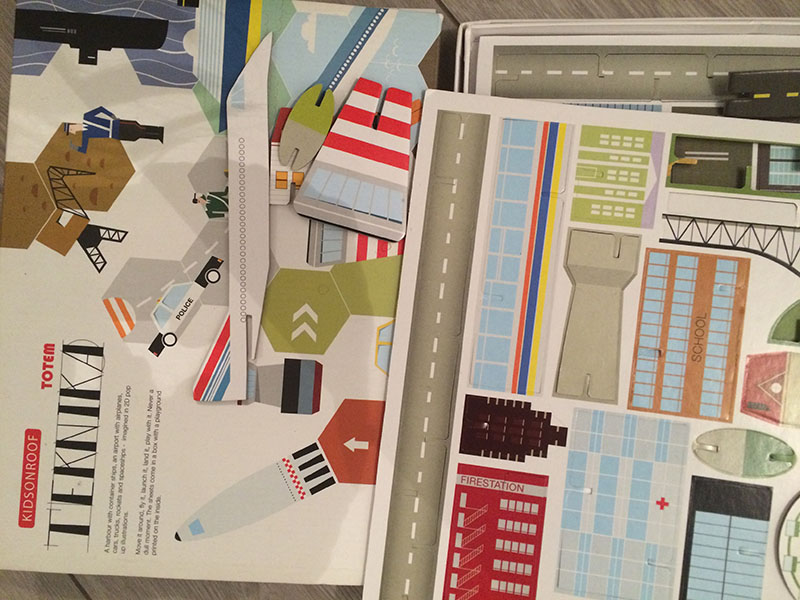
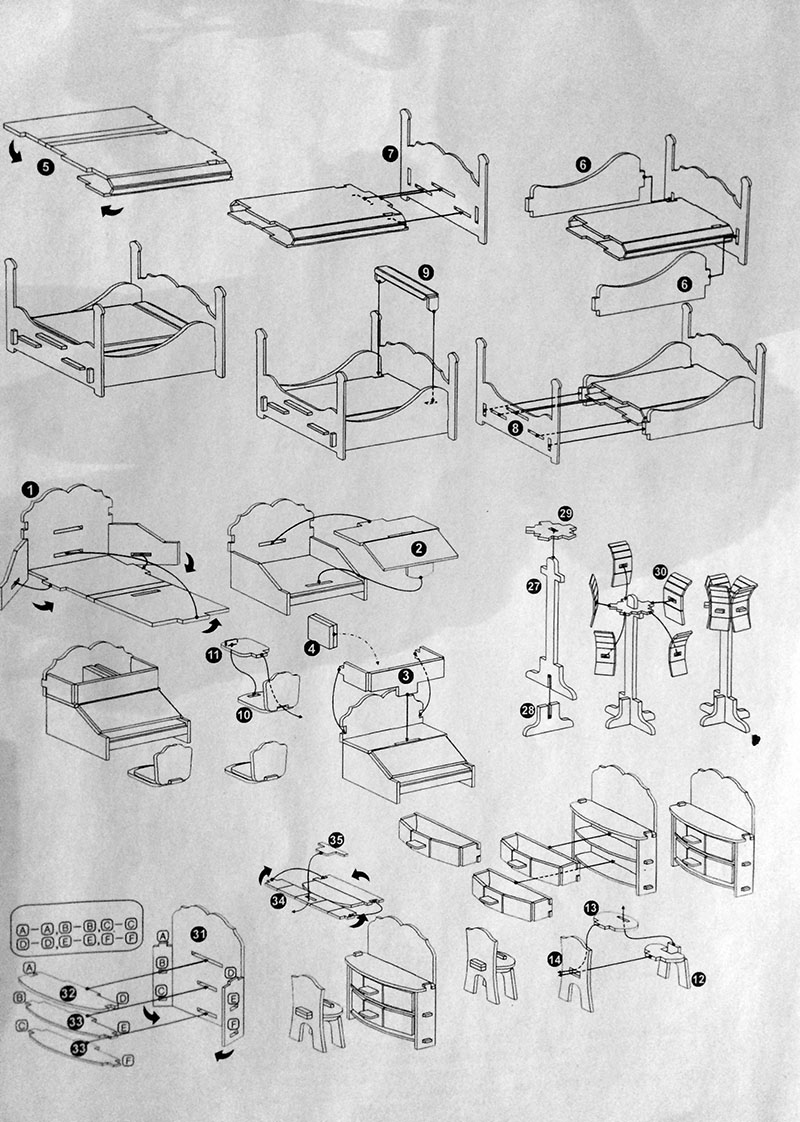
 Putting different kits together (from Teknika by Kids on roof, Dollhouse kits from Tiger and Denmark, Moma modern playhouse and a sphere from the book Paper engineering for designers by Keith Finch), worked well in terms of inspiration and understanding what (simple) joints and type of constructions work well.
Vinyl cutting
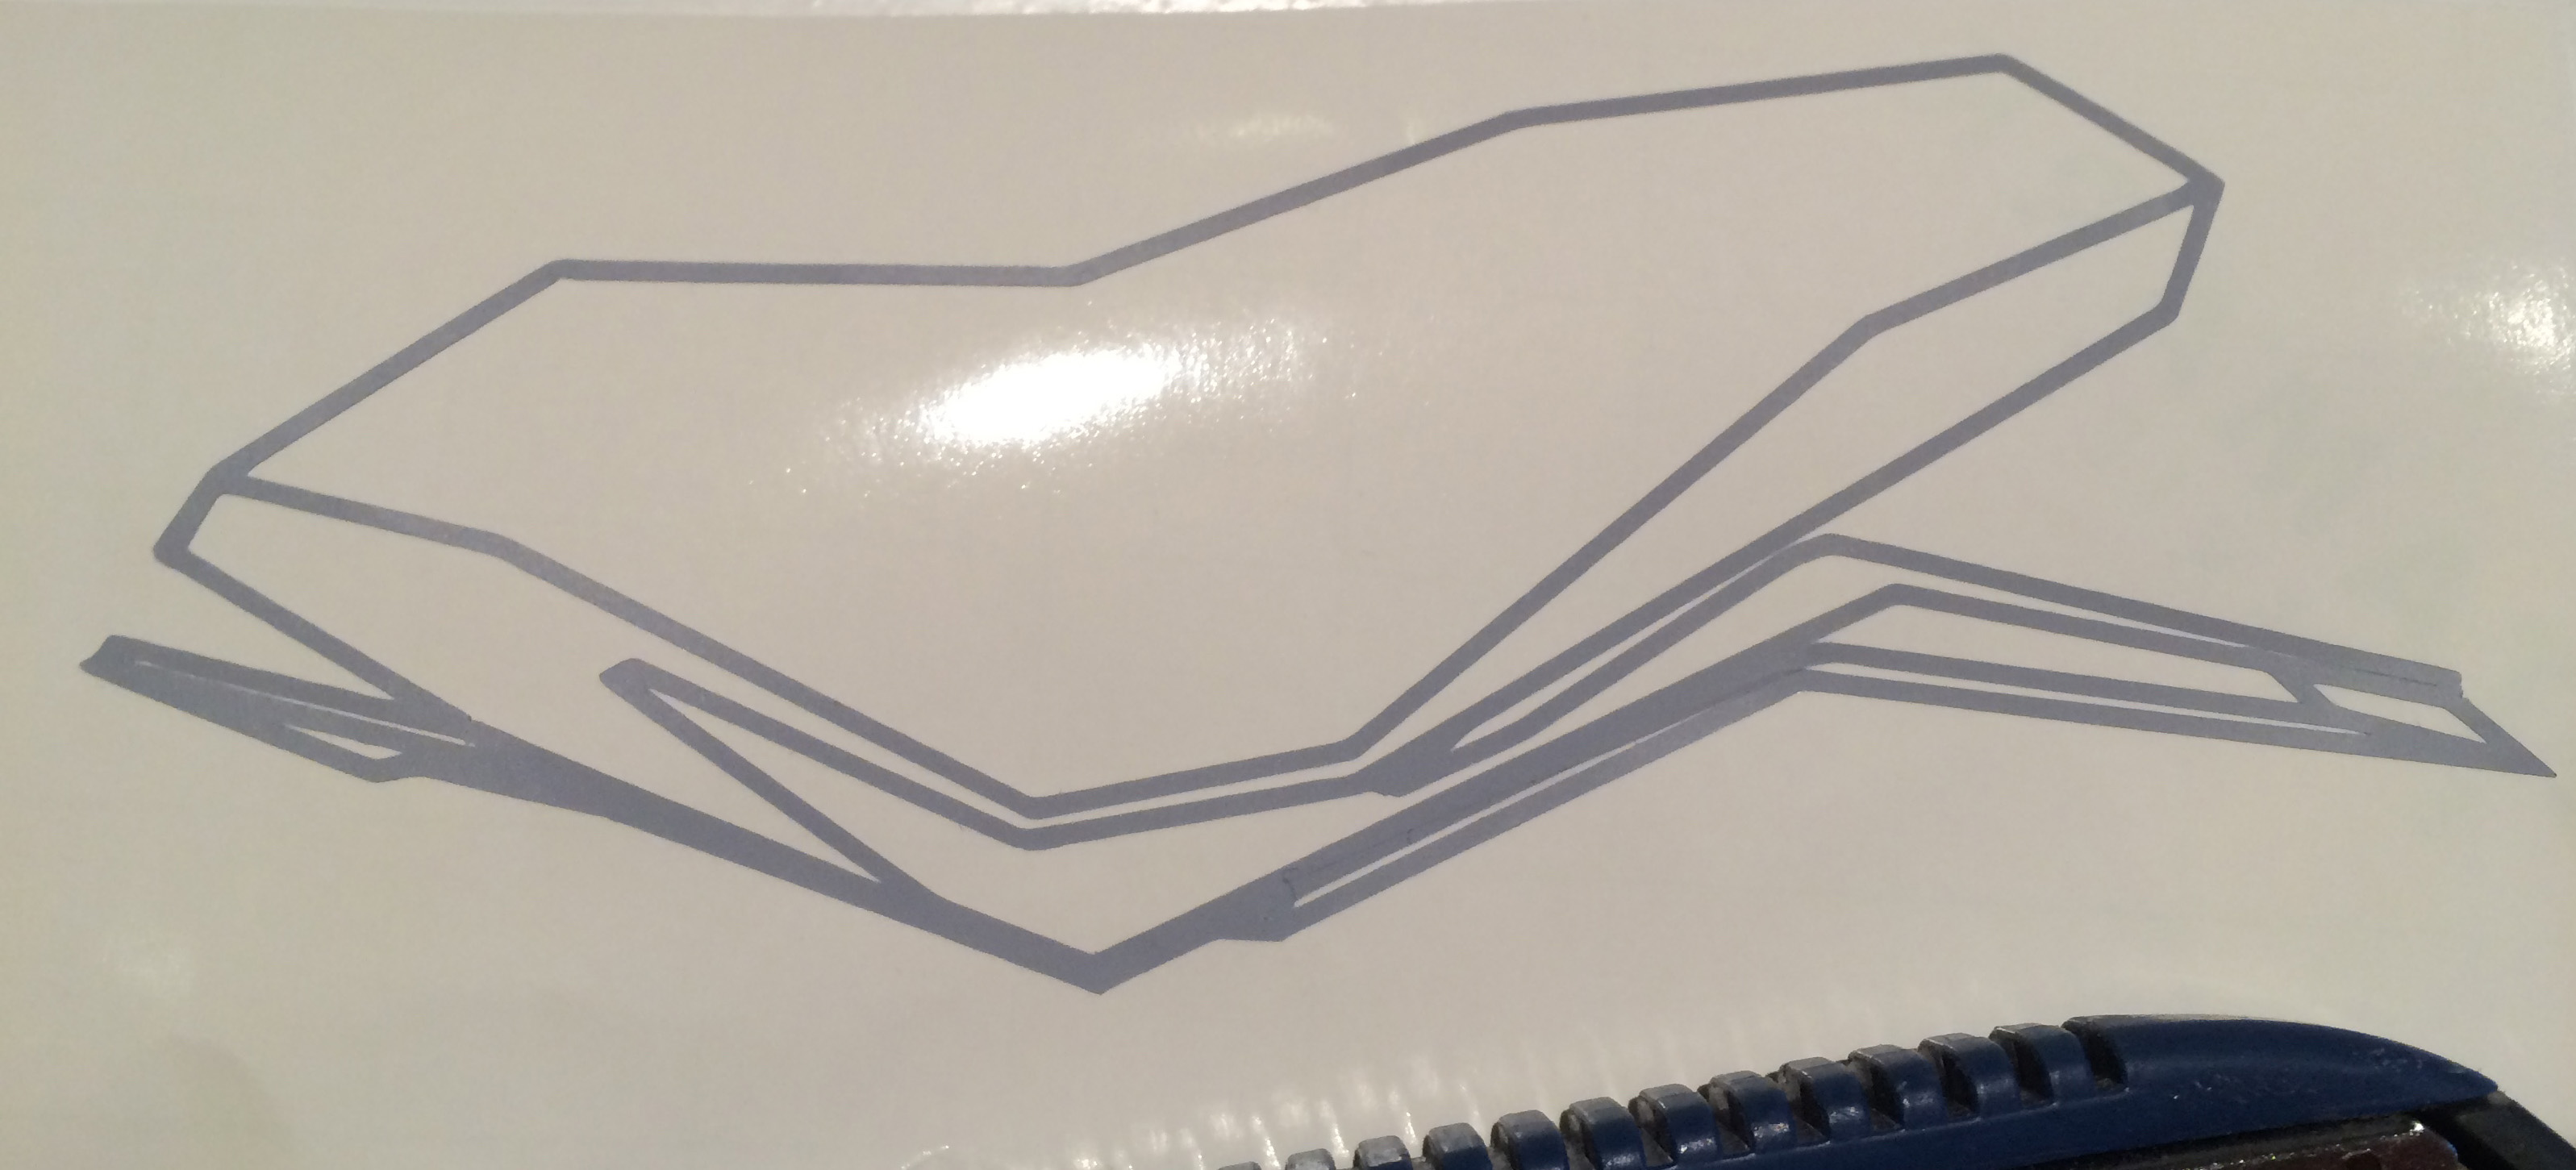
After instruction of the laser and vinyl machines, I did not want to let myself get intimidated by the machines, so I was the first one to use the vinyl cutter. Continuing with the graphic of the EYE from last week, I used the vinyl cutter and Adobe Illustrator to create a nice looking sticker (Vinyl cutting speed: 20 cm/s, cutting force: 100gf, pen force: 0). This involved a bit of tweaking with the material and cutting strength. The test and pause button were very handy in this process. Important lesson in our situation: always make sure and double check that your border lines are set to 0.001mm. After cutting, you put it on an adhesive layer, and, there you go, a sticker! Now all I need to do is to find a nice place to stick it.
 Important steps
- Consider working area: 50 to 584 mm wide, up to 25.000 mm long
- Turn on the (Ronald) vinyl cutter (make sure it is connected to the computer with -in Waag's case- Illustrator software)
- Put piece of vinyl in the machine holder
- Make sure to fasten material (from the back) using the (white taped) indications on the cutter
- Measure and Select Piece (or Roll if that is the case)
- Run Test from the machine, this will cut a small circle with inside square for making sure to have the proper settings
- Set the Origin by pressing this button and arrow keys on the vinyl cutter (the right side cut the material better in my case so moved it there)
- Open Illustrator file for cutting (Set line width to 0.001 - if needed, consider available Font types, or create outlines from text)
- In software, choose Properties > Sizes > Get from Machine so machine automatically calculates the size
- Click OK and cut!
- (if it is not cutting well, you can still adjust the strength manually on the machine)
- Transfer (use adhesive sheet, pressure, scissors and tweezers), stick it and done!
 Interesting potential: A vinyl cutter can also be used for other purposes than making stickers, such as drawing patterns or stencil sheets. The first is handy for fashion pattern making. I think that the latter would also be interesting to try in combination with conductive paint, as -from what I heard- using the viny cutter for copper is a fragile process.
Laser cutting
For the laser cutting, I explored a lot of different directions and settings. What became really clear troughout, is that material and conditions are very changeable so that you need to be flexible in your design and making process (which can also be time-consuming). This for example meant dynamically designing width of slots and notches of the press fit kit parametrically. For this, I used the 'dynamic symbol' functionality in Adobe Illustrator. A bit similar to instances in Adobe Flash, the symbol functionality lets you create multiple instances of a master symbol that retain their link to the master symbol, even when their shape and visual attributes are altered. The advantage of using this is that it enables you to make fundamental changes to the master symbol (such as notch sizes) that are automatically applied without undoing any previous changes to the individual instances of the symbol.
For our type of laser cutter and situation, these were some points to keep in mind:
- Save in .Dxf format (you might need to re-set the size format again -saving in Illustrator 2.5 can sometimes help to prevent losing the format)
- Anchor-set the position on the laser machine
- Make sure to check the starting orientation point in the software
- Test!
- You can put heavy blocks to better fixate the (card board) material (but make sure the blocks will not hit the laser)
- Turn on the ventilation
- Turn on the laser (and turn it off when you do not need it)
- It is sometimes handy to laser cut a border around your work, so to have a box, framework to put in back the pieces (otherwise these can easily get lost and mixed, especially when using a common big cardboard)
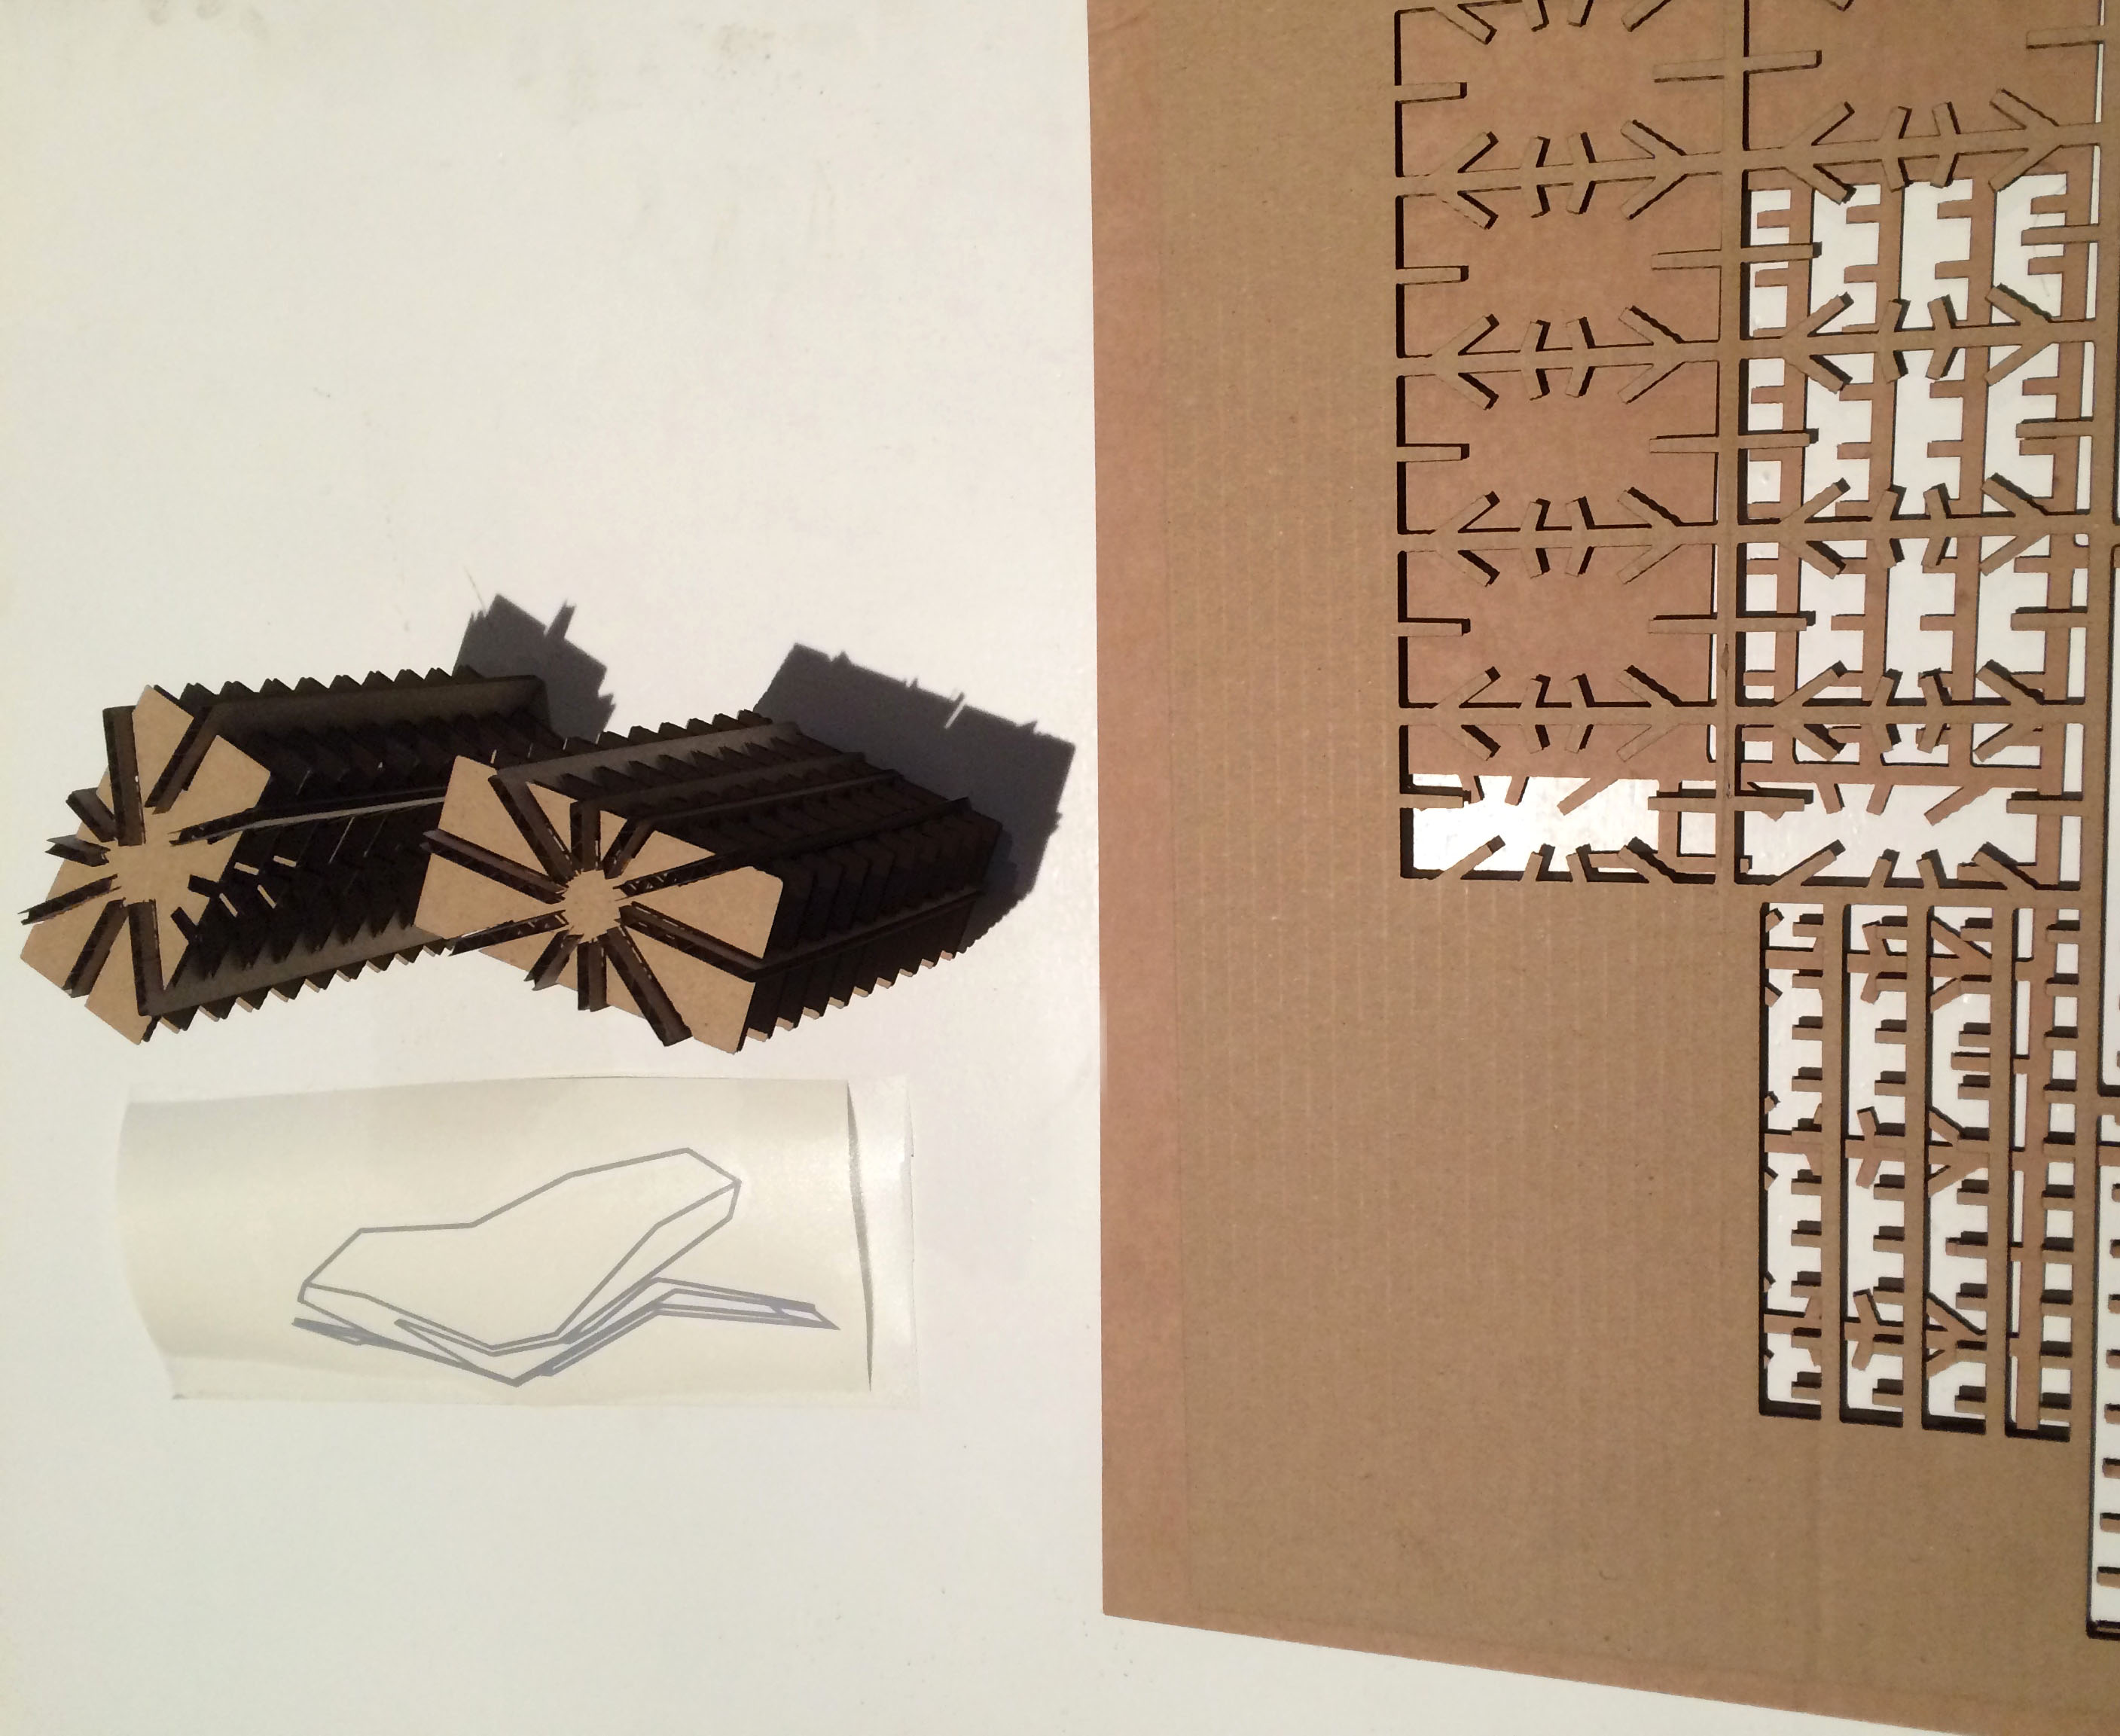
For my first laser cut, I started with the illustration of the EYE. This came out great, so I luckily did not have to change the settings. With different, thicker material, e.g. using coark, this will be a nice coaster. Although I prefer the horizontal flat version, adding some joints, I imagined that this iconic object could also become part of an interactive physical model of Amsterdam North (that then could be used for co-designing and discussion of local issues, such as supporting the debate on how to cross the EYE river -tunnel, ferry, cable trail or bridge?). The second day, I had to do much more tweaking. Eventually, speed: 140, power: 50, corner power: 40 worked best to really cut through the card board. Also, a 2.6 mm notch worked best in my case for the 3mm thick cardboard.
 Design for laser cutting
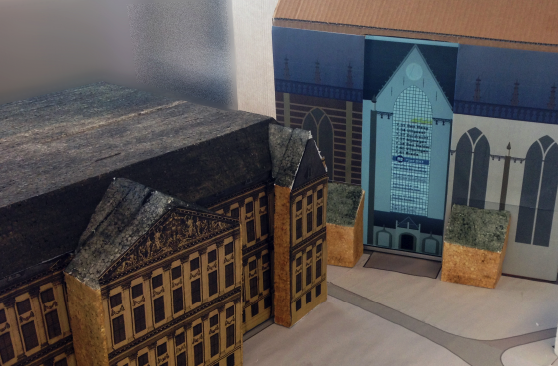
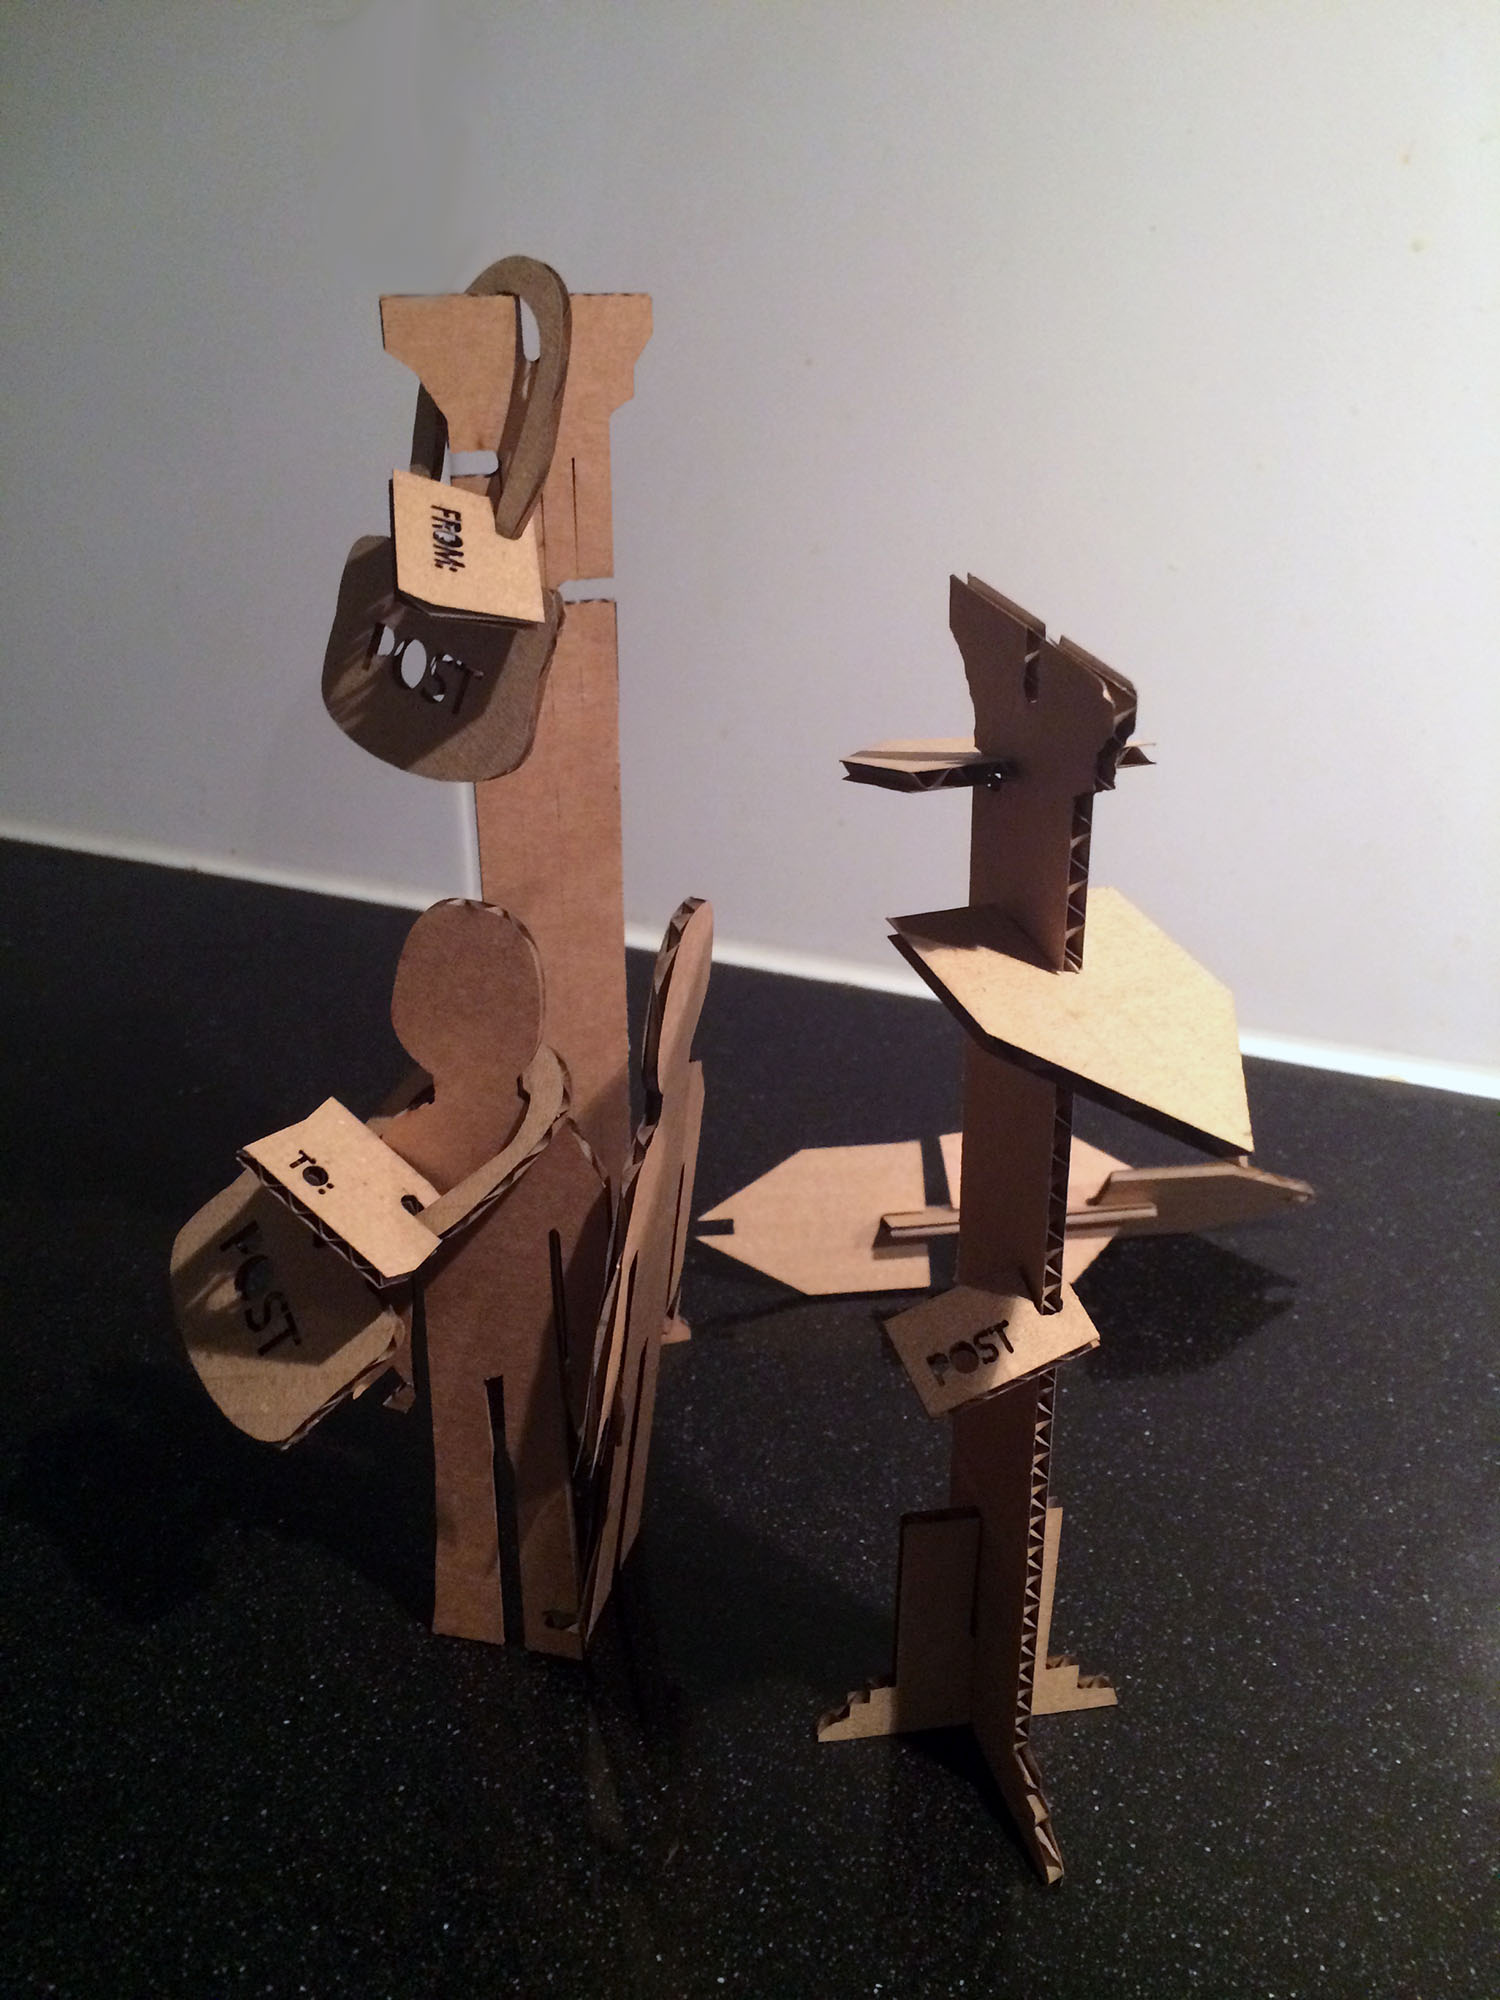
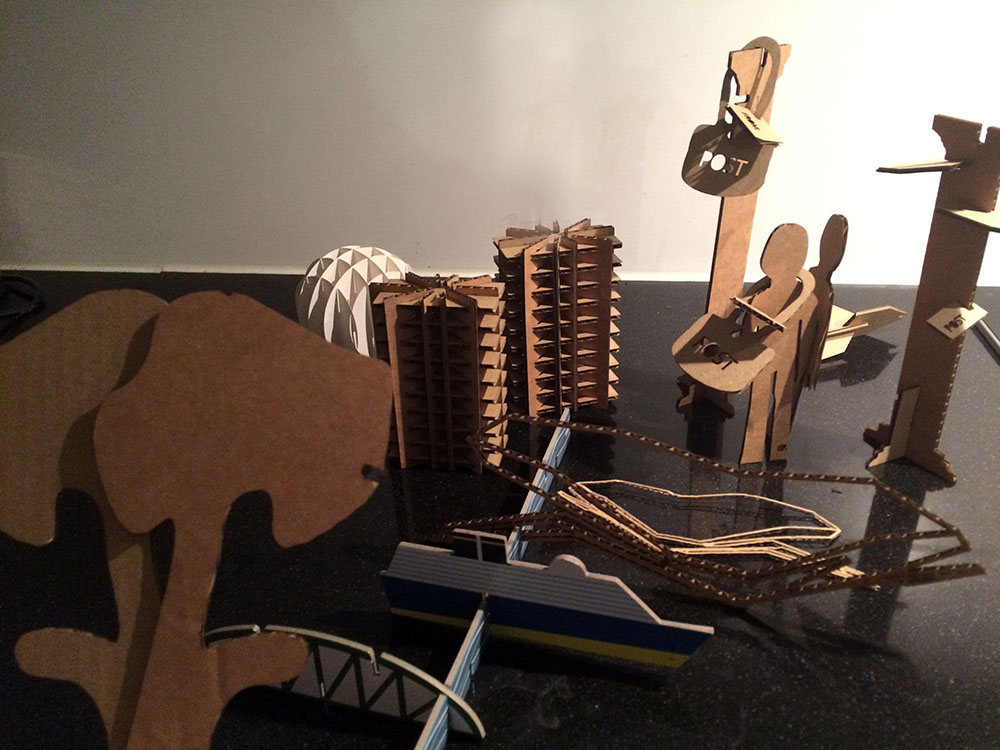
I designed a range of different shapes and forms with the ideas of interactive physical models and Bureau crazy in mind. The latter is based on the Dutch saying van het kastje naar de muur > From cabinet to wall, and translates to the English saying From pillar to post. The latter was designed in a free quick, dirty and crazy way, thus it did not really come out as the perfect press kit design. However, this less formal, procedural aproach made it more playful, making it a lot of fun putting and combining the different pieces together and creating various scenes.
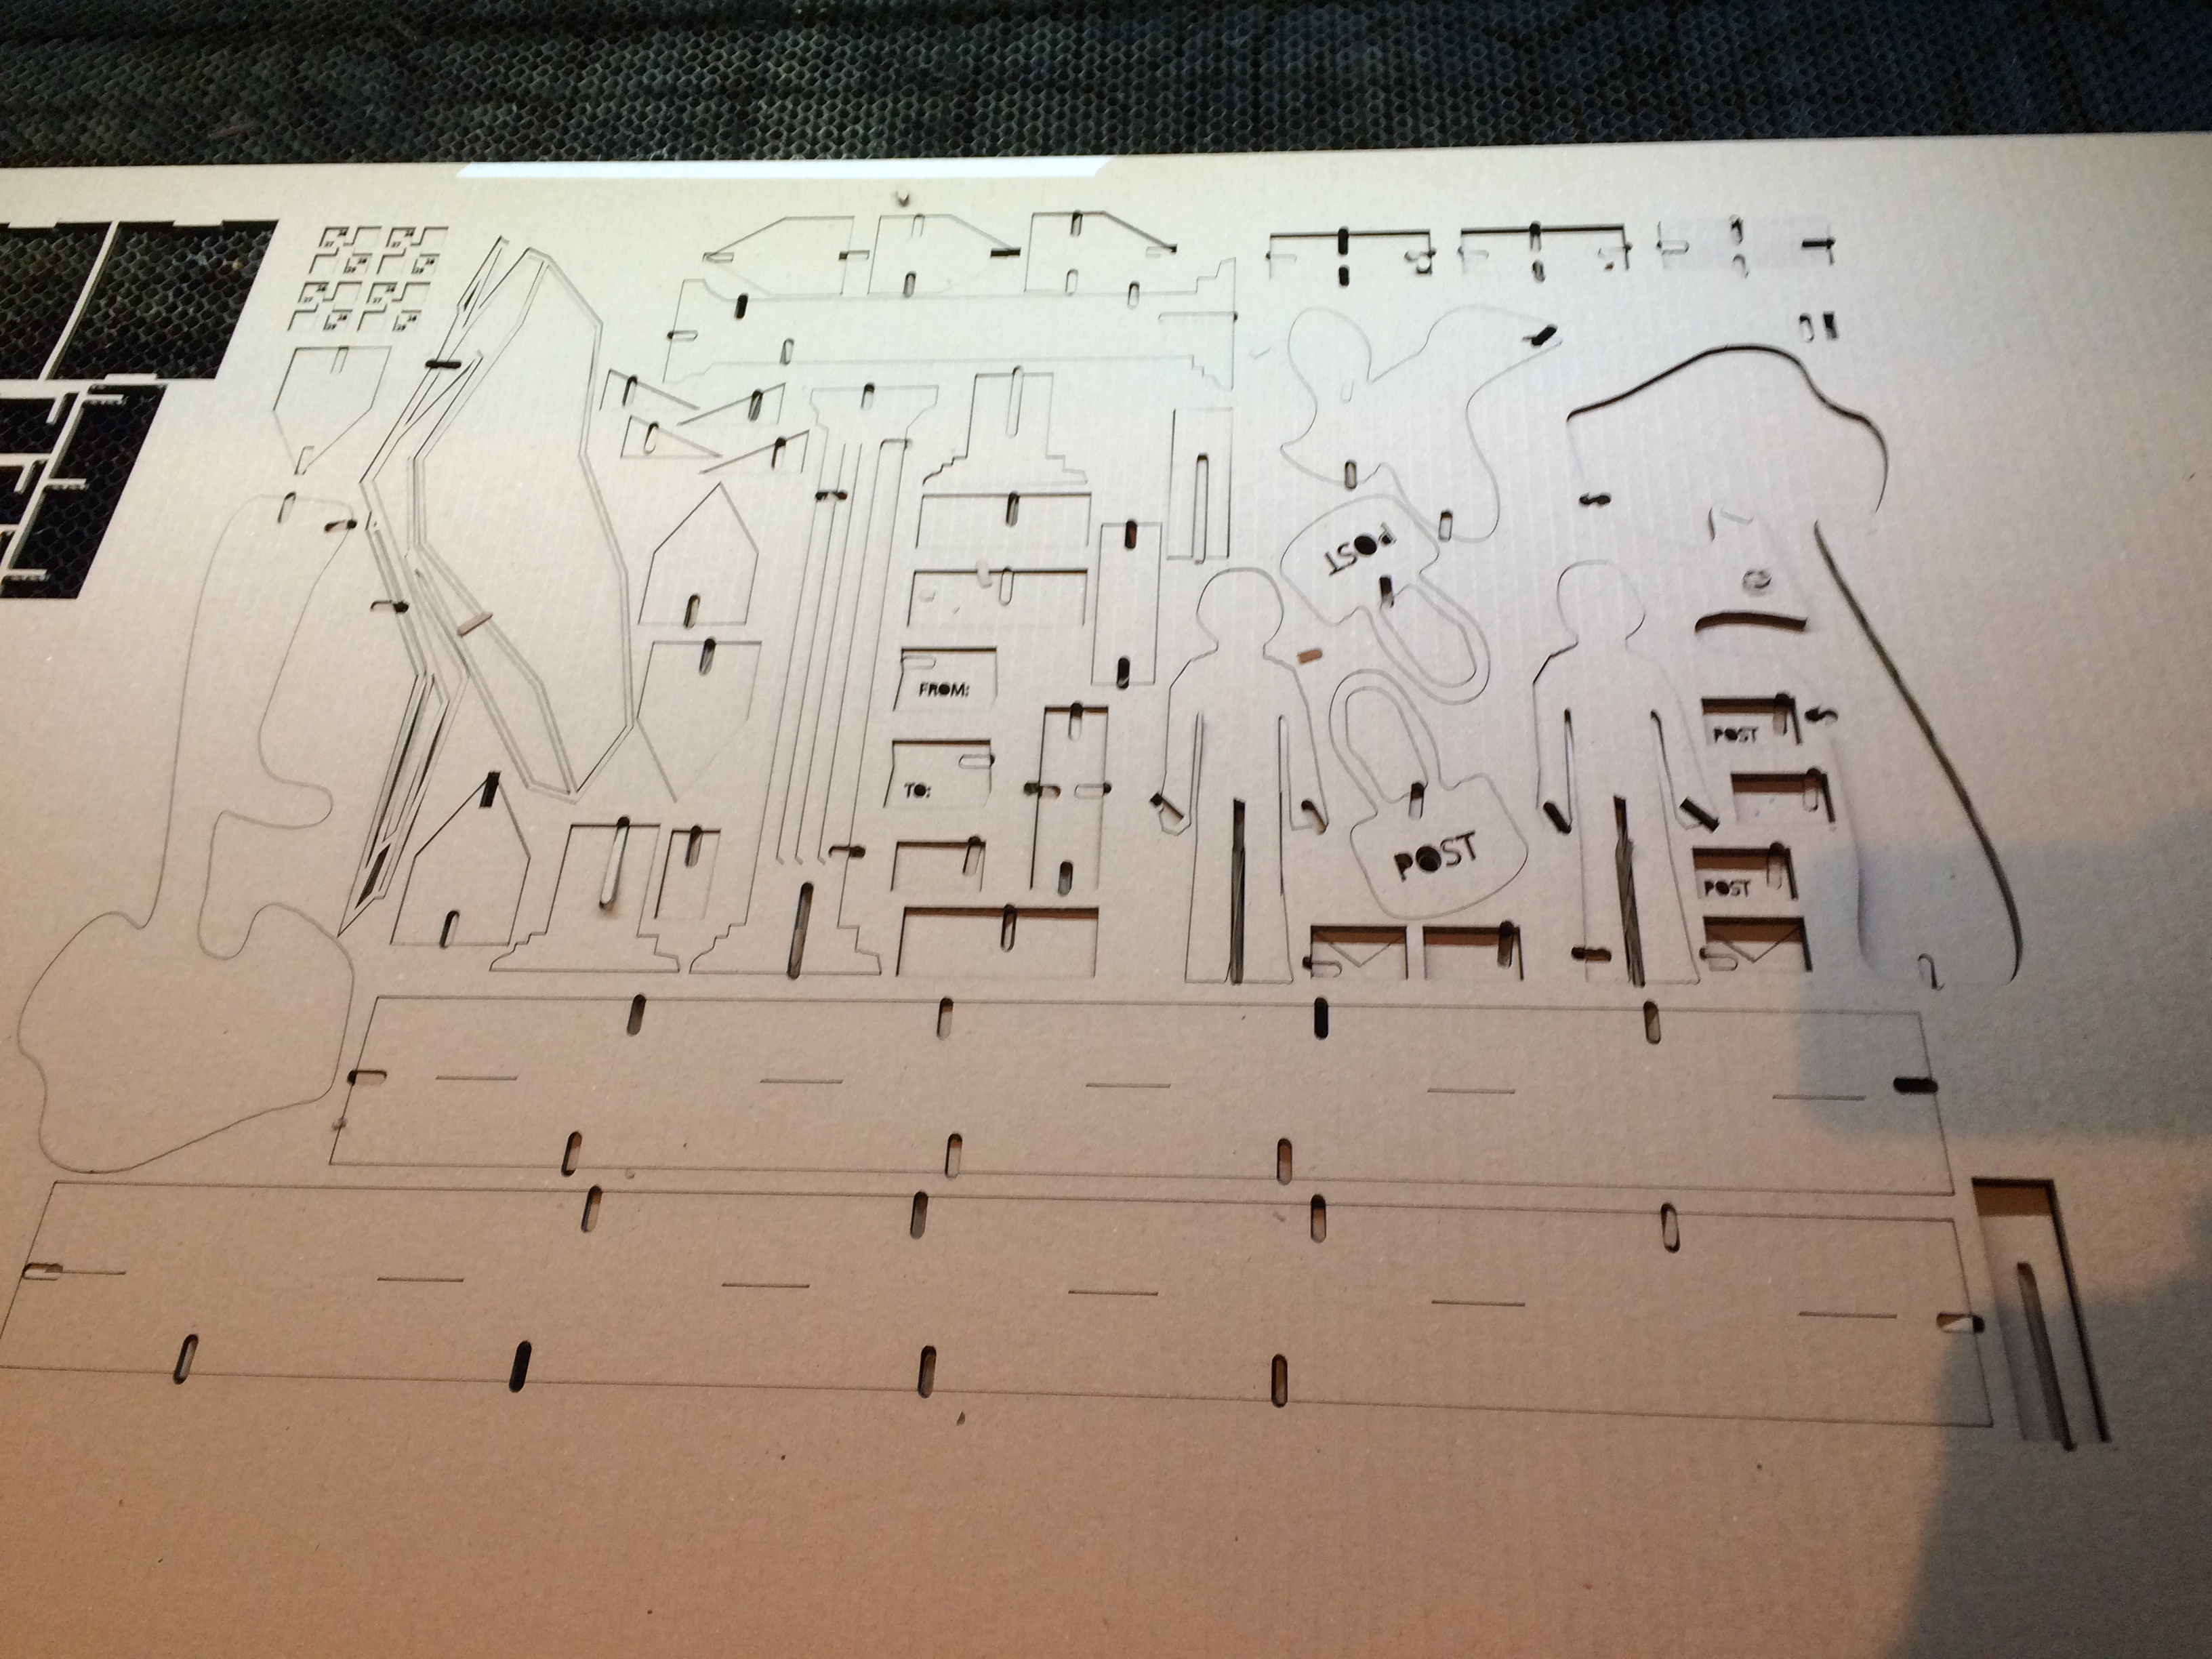
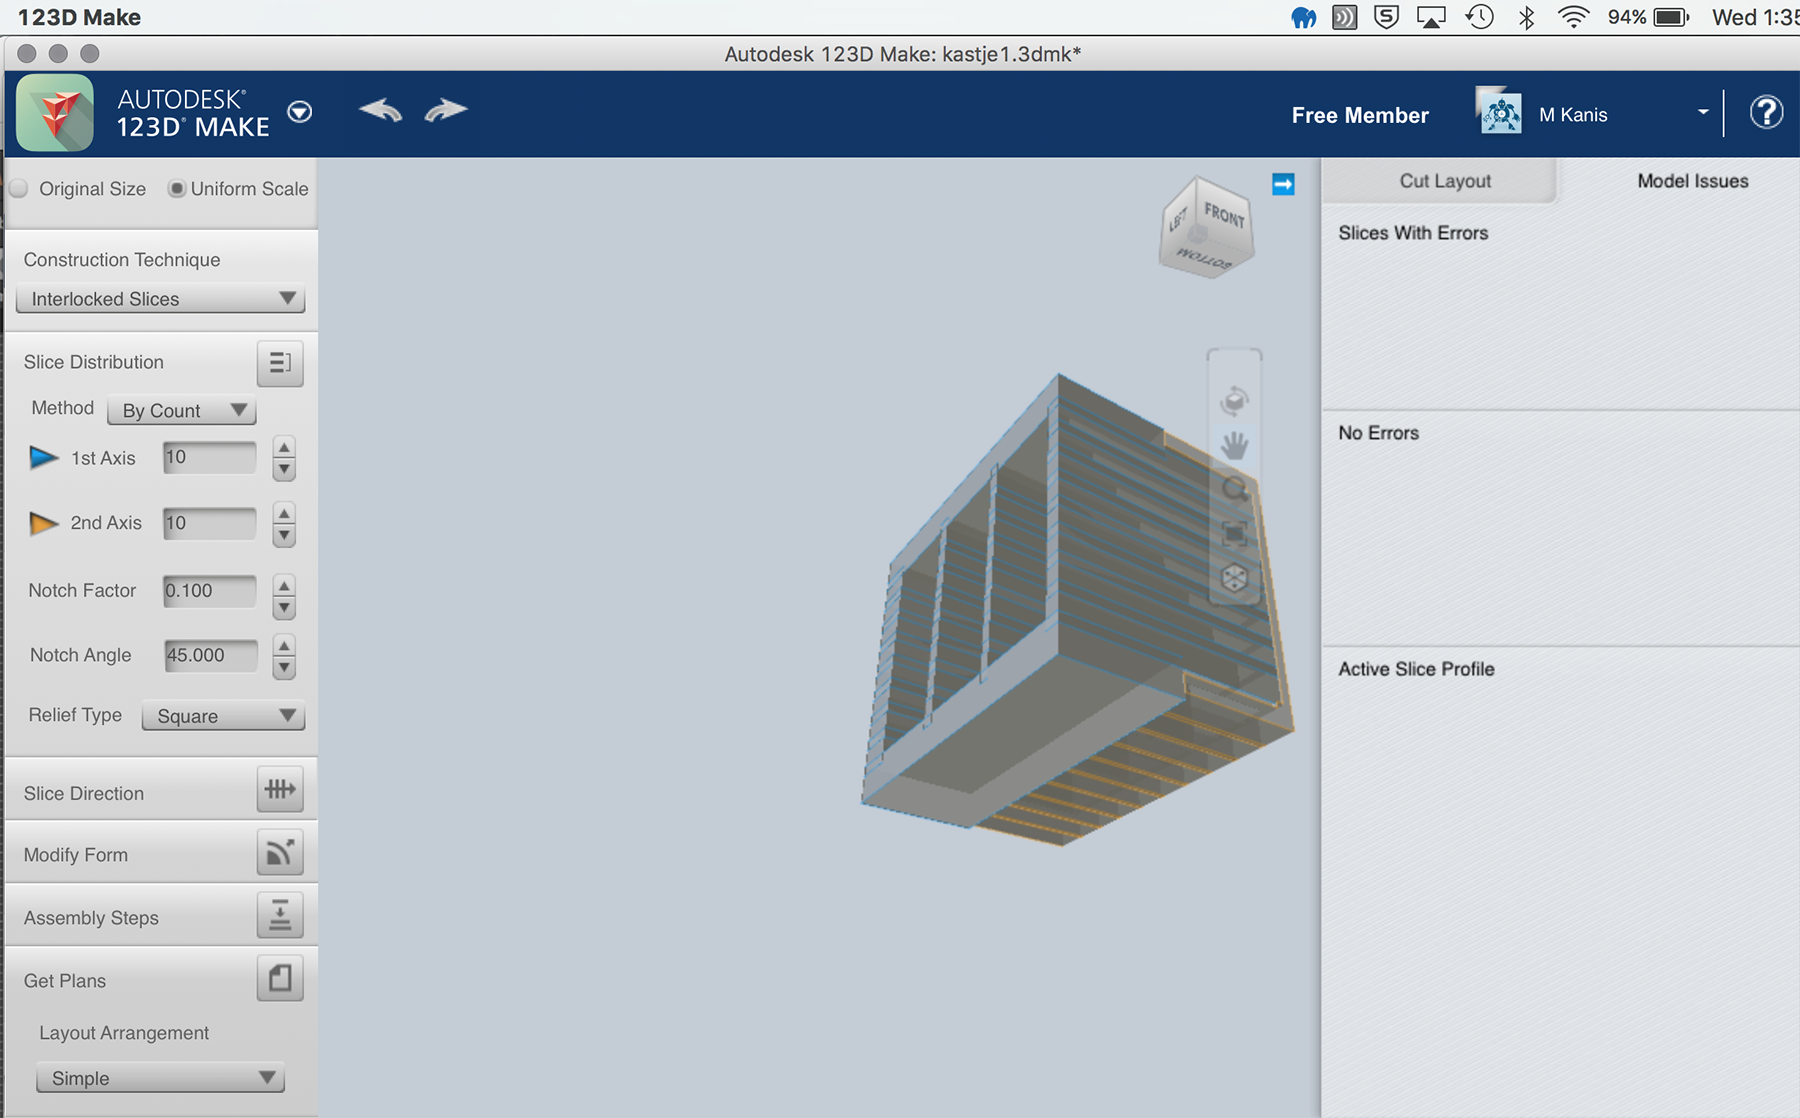
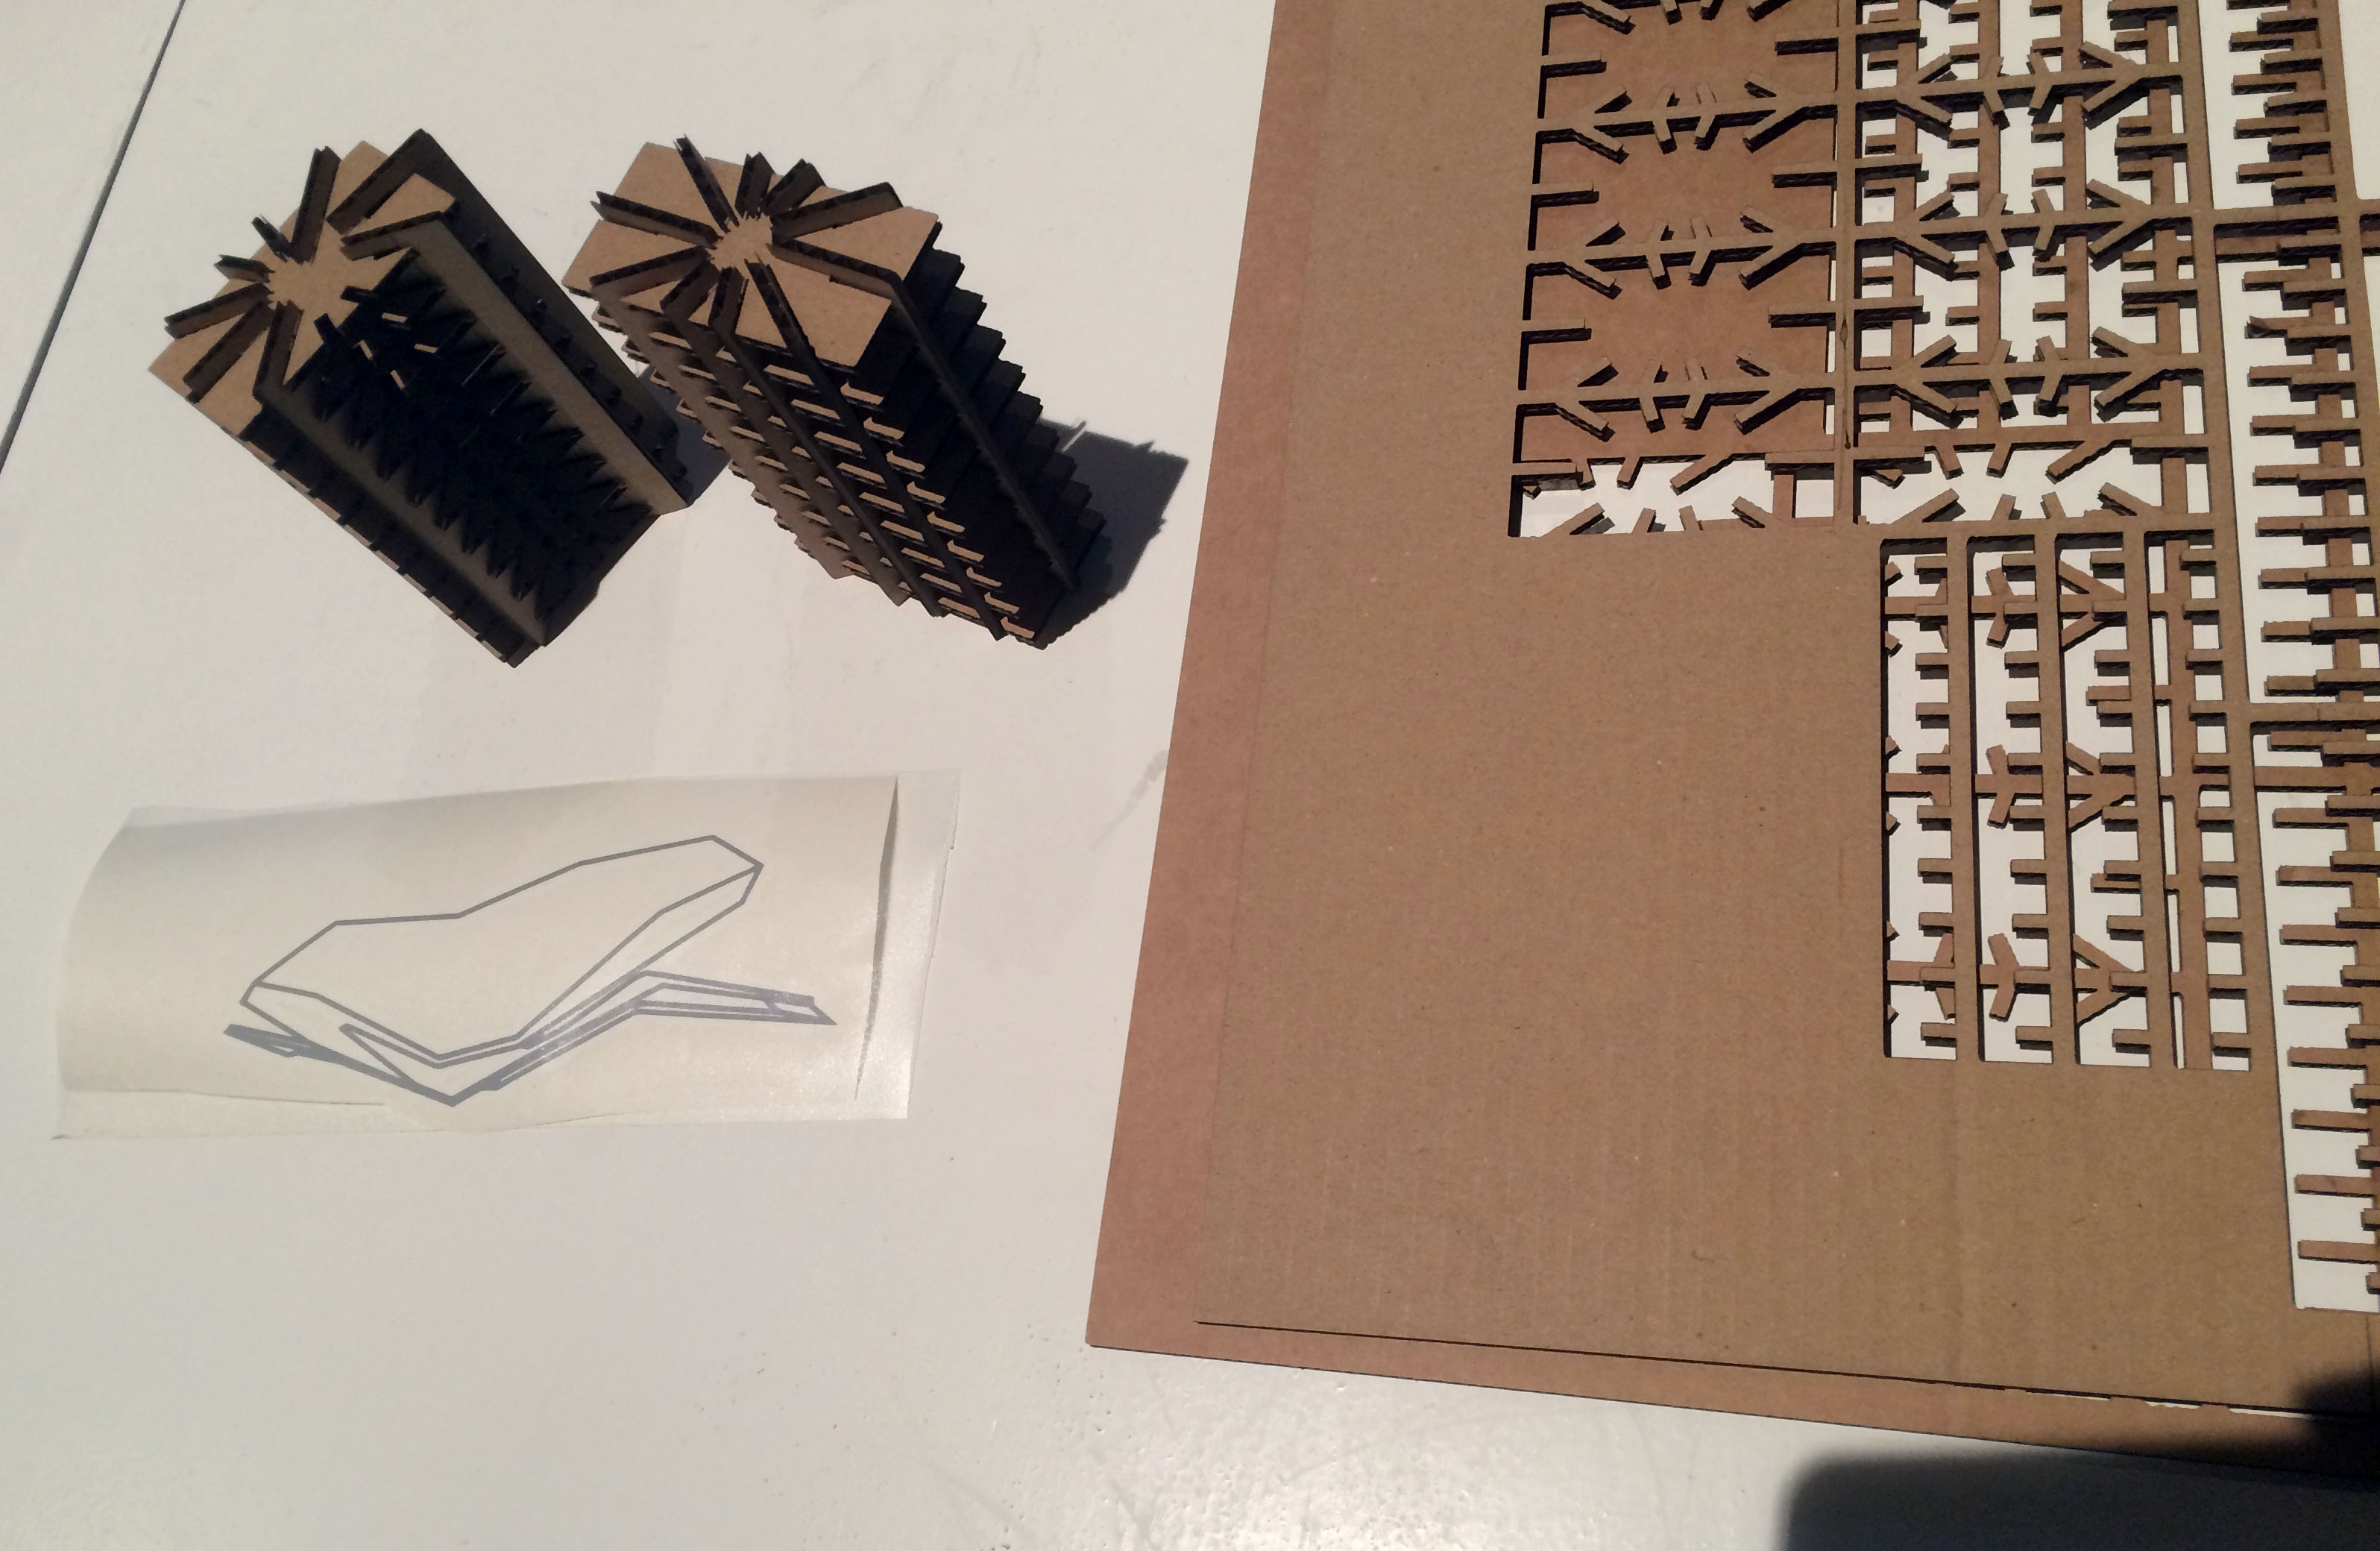
 Now for the 'From pillar to post scene', I used Adobe Illustrator. The online program 123D Make offers a lot of potential for automatically converting 3D models into 2D design for laser cutting. Having modelled various 3D models in Fusion 123, I trialled 123D Make to convert these. However, the program kept on crashing, giving 'model issues' and the plans for a 'cabinet' construction that I trialled, fell apart after being laser cut. The scale of the model was probably too small and even though no 'model issues' were given by the program, the plans for construction indeed looked a bit unstable from the start.
Tips
- If it looks too good to be true, it probably is
- Check out 123D Make's tutorial on how to fix (some of the) model issues
- On the Mac, you sometimes need to use a two fingers scroll (upwards) to view full menu items, such as Size
- The option 'Assembly steps' in 123D Make offers a nice way to see how your model will be constructed step by step.
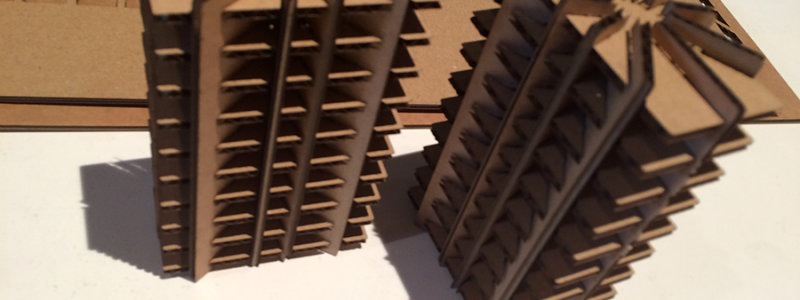
 Happily, I did not give up and restarted with a simple shape and construction (a wall) the next day, which turned out great in the end. I had many more ideas and designs that I did not have the chance to laser cut -yet. But what is good now, is that with my newly gained knowledge, it will be much easier to realize these.
 Point of concern
- Healthy fab environment. The fumes at the newly painted Fab lab Amsterdam (Waag Society), in combination with my allergies, namely for the isothiazolinone/ kathon preservative (a preservative often found in cosmetics and paints), make it really challenging to fully engage in the fab adventure.
Highlights
- Mastering the machines
- My constructions fit with the slots of my other existing (Kids on roof) kits, enabling even bigger and better constructions
- Watching the laser cutting (although you should not look directly in the laser, the process often even looks prettier than the result)
- CHI2016 papers I co-authored got accepted!
- The prospect of sleep.
Most important lesson learned
- Though trial and error you can learn a lot in one week.
I have
- Explained how I designed my files
- Shown how I made my press-fit kits
- Shown how I made my vinyl project
- Included photos and files of the results
Files (for review*)
- The illustrator file for the EYE sticker
- The crazy, quick and dirty "from pillar to post" scene for laser cutting
- The wall / design bookcase /tower flat for laser cutting
*You can use these files, as long as you put these to really good use and credit me.


