Embedded Programming (Mar. 23)
Process
Below you will find my dictation, notes and documentation about the processes I went throught with regards to completing the Embeeded Programming exercise. Each of the step and processs will be covered in seperate sections. A link at the bottom of the page will take you to all of the files that I created for this exercise.
Reading the Data Sheet
I first read/skimmed the ATMEL microcontroller data sheet to become familiar with the ATTINY44 8-bit microcontroller. This was a interesting process due to the time it takes to review 286 pages and having a beginners understanding of the information as a whole. Granted there are a lot of charts, diagrams and schematics through the document, especially pages 273-286. I did gain a basic grasp of the interupt process, general information on memory, and how code can be used to access main different features of the chip.
Arduino IDE
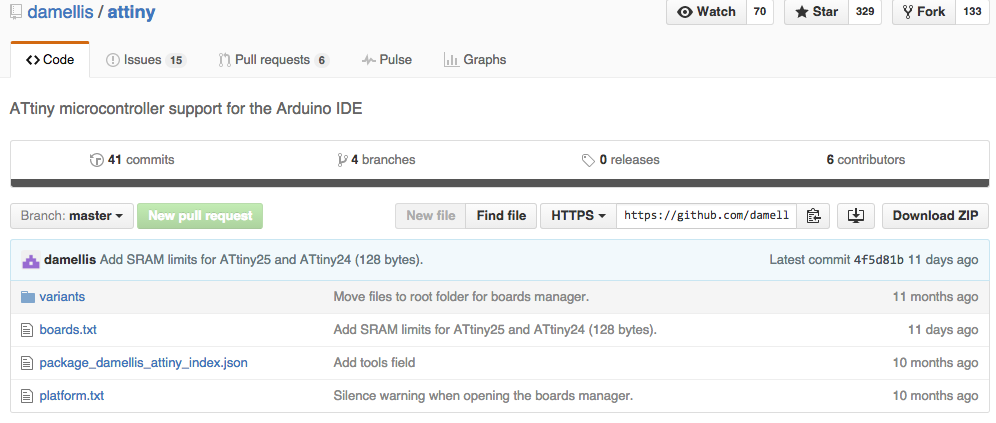
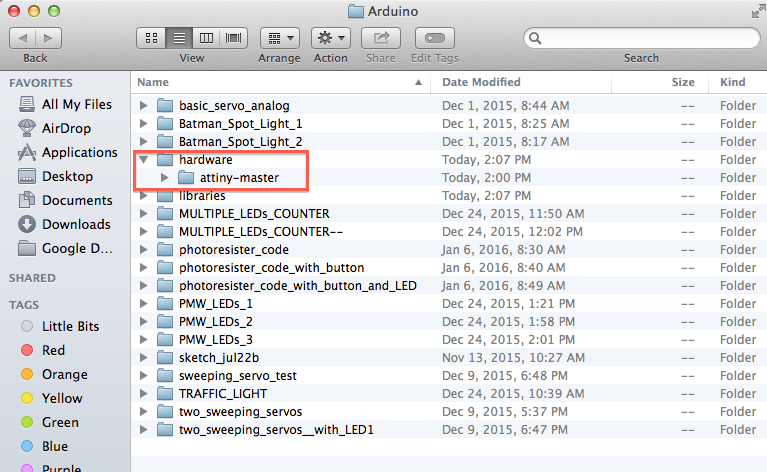
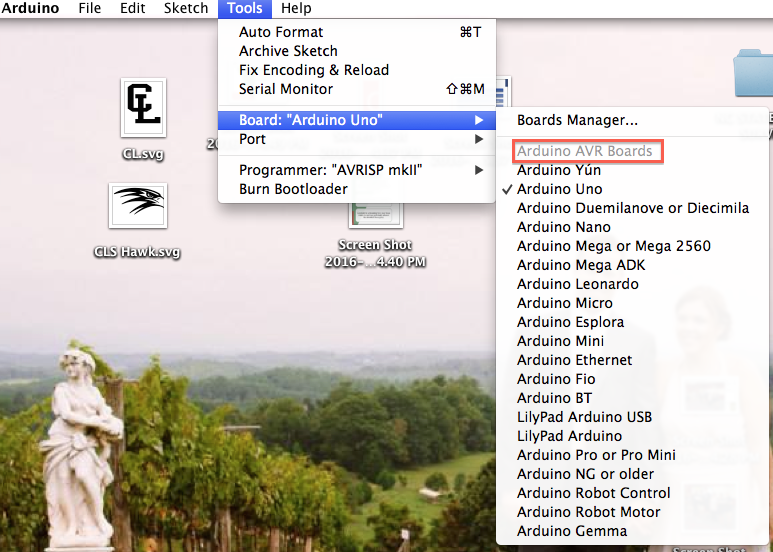
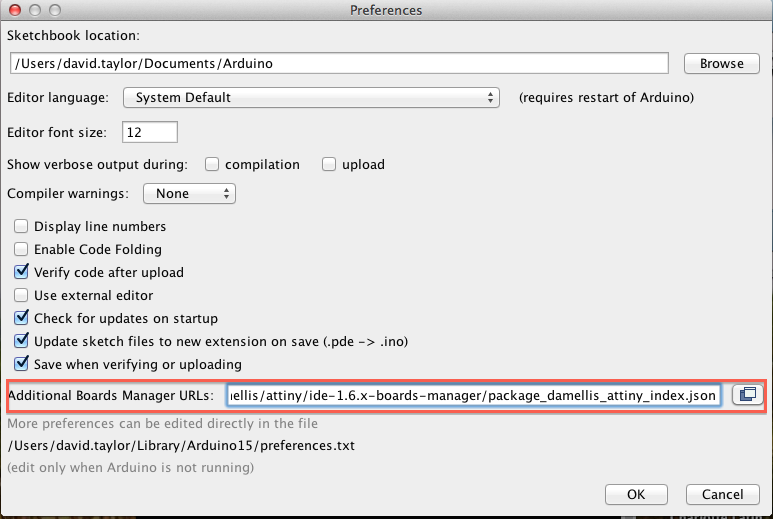
I already had the Arduino software installed on my computer, but you can get the download and install the Arduino software from their website. I than download the attiny library and unzipped the folder. Next,I created a "hardware" folder in the Arudino documents folder. I than placed the unzipped "attiny-master" folder into the "hardware" folder in my Arduino documents folder, which is the Sketchbook folder. I than closed and restarted the Arduino software. I went to Arduino>Preferences and pasted "https://raw.githubusercontent.com/damellis/attiny/ide-1.6.x-boards-manager/package_damellis_attiny_index.json" into the Additional Boards Manager URL area. I than went to Tools > Boards > Boards Manager > Attiny. I completed this process using a Mac.
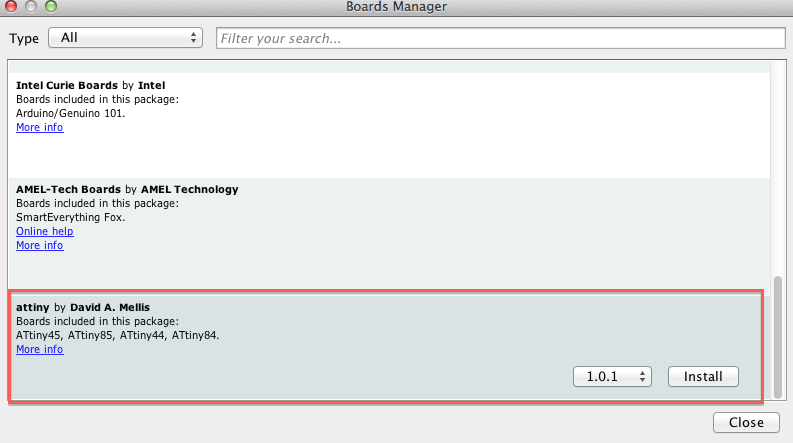
I used High Low Tech site as well as Mariona A. Ciller and Denis Britov exercise 8 from Fab Academy 2015 for support with this process.
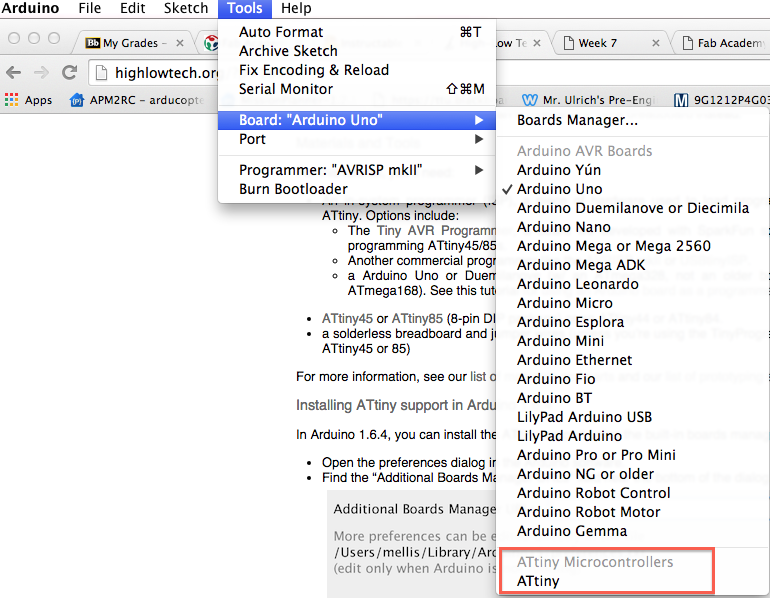
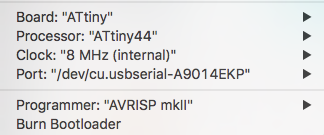
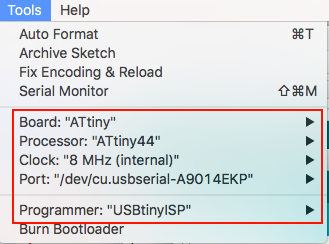
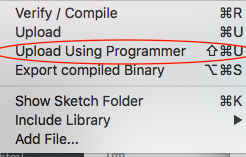
I setup my Arduino settings using the the information in the following images as well as uploading the code as well it is important to use the correct programmer option:
Coding on the Arduino IDE
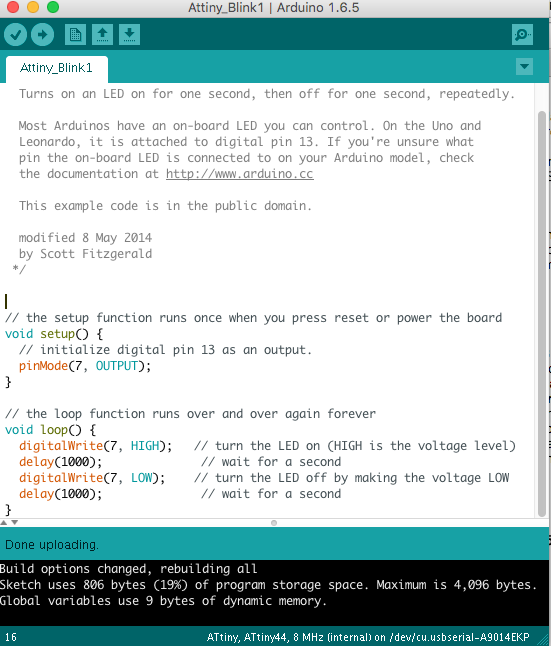
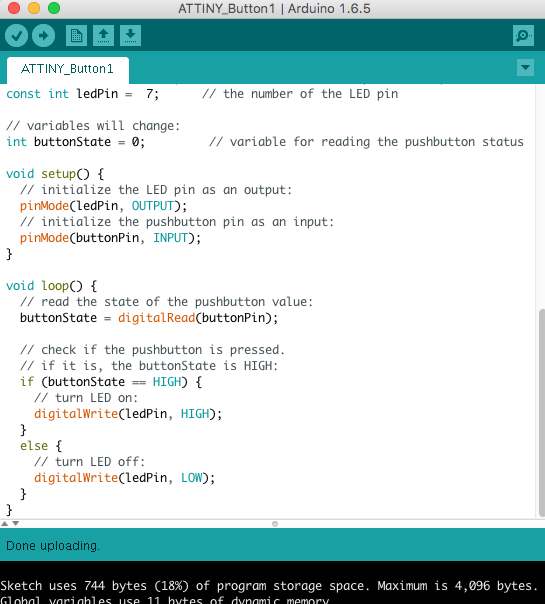
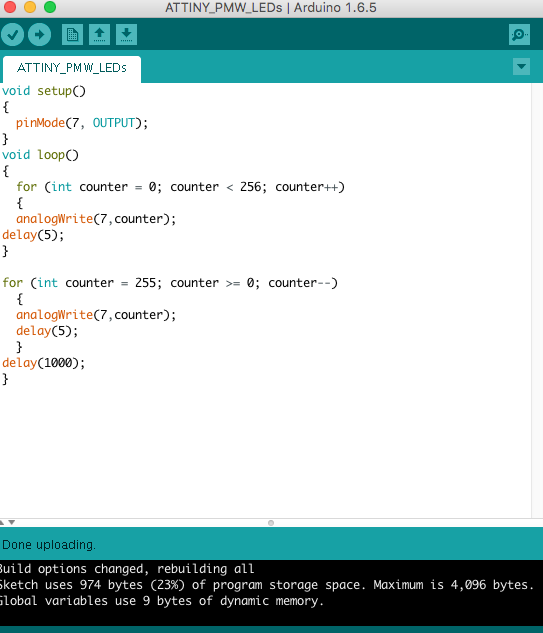
I than began experimenting with the Arduino Example codes and making changes to them, so they would work on my attiny. I made changes to the Blink code by making the lights blink faster as well as I made changes to the Button code to control the LED on my board. In preparation for the class, I used the SparkFun lessons to help with learning C in an Arduino enviroment in Janruary because of my novice understanding. I than created a PWM code to make my LED fade up and down in power. You can see the following three codes below:
mBlock
I installed mBlock and its Arduino zip file from GitHub. As a middle school teacher, I wanted to find something that I could use with students that would help them learn C through having middle step from a icon language like Scratch to an Arduino IDE. I found mBlock this past Christmas and it gives you the ability to do this in a way. You can choose the Arduino board as well as use theri robot board and a picco board too.I began experimenting with it for this exercise. I created a blink code in mBlock, which is like Scratch. It give you the ability to use an Arduino look to code while youa re using the mBlock code. Plus, it gives you the ability to than edit the mblock-Arduino like code in Arduino IDE. You can see this in the images below. The first pciture is the blink code in the mBlock software. The second images is the code in the Arduino IDE. The last image is the board selection process.

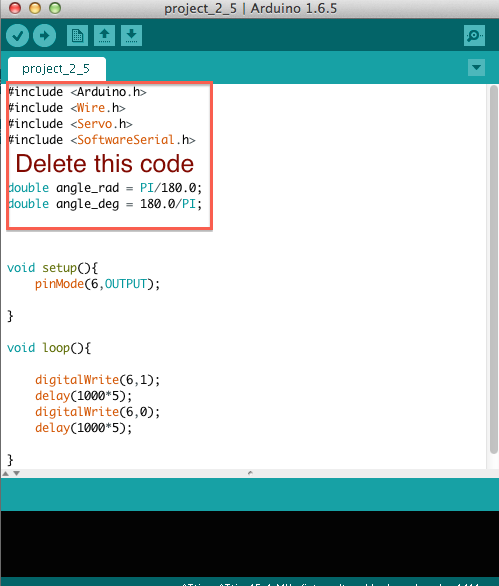
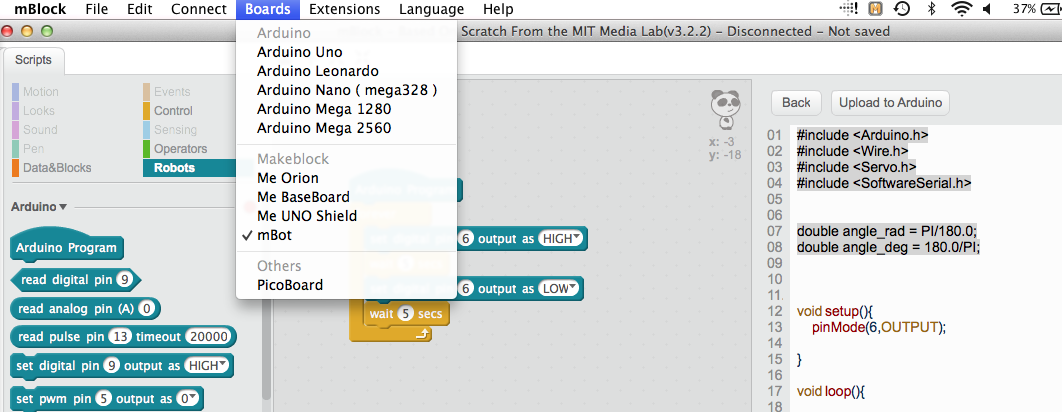
The down side of using this process is that you need to delete some extra code because at the begin of the Arduino IDE. You will also need to switch the board in the Arduino software to the ATTINY. During the coding process in mBlock, you need to know the pin that you are usign so you can change it. Lastly, you will need to do a little bit of editing in the IDE, but it is a nice way of transitioning to C from Scratch. For more information on please click: mBlock.
Cross Pack AVR
I isntalled the Cross Pack AVR. Next, I began reading the isntructions that comes with the Cross Pack. I than downloaded Text Wrangler, which Cross Pack recommended.
I tried installing XCode onto my Mac, but I kept getting error explaining that XCode wouldn't work on my 0SX because it was to new (10.9.5). I tried following a instructables on how to fix this problem. This involves you using a Apple Devlopers version of XCode 6.3.2. I could never get XCode to work on my Mac. It end up causing problems with my SSH process, because, it would not pull due to the XCode software not being a registered software with the user's permission. I ended up deleting all traces of the XCode software. I ended up not using CrossPack after speaking with Terence. Terence recommended using Sublime.
Sublime
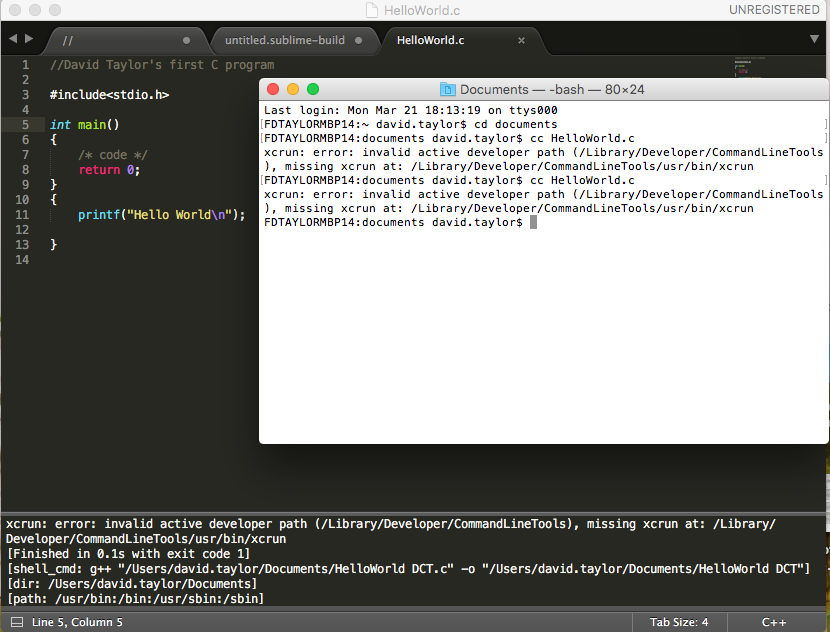
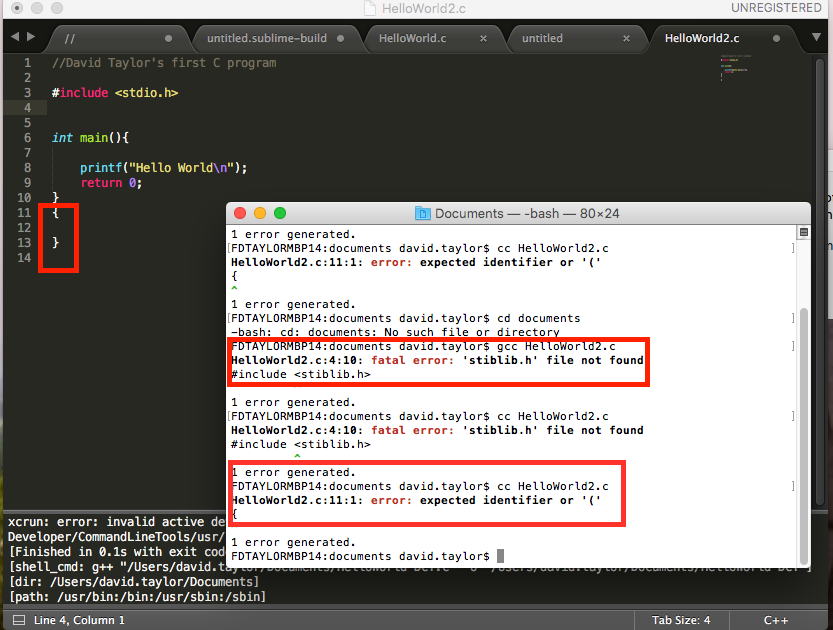
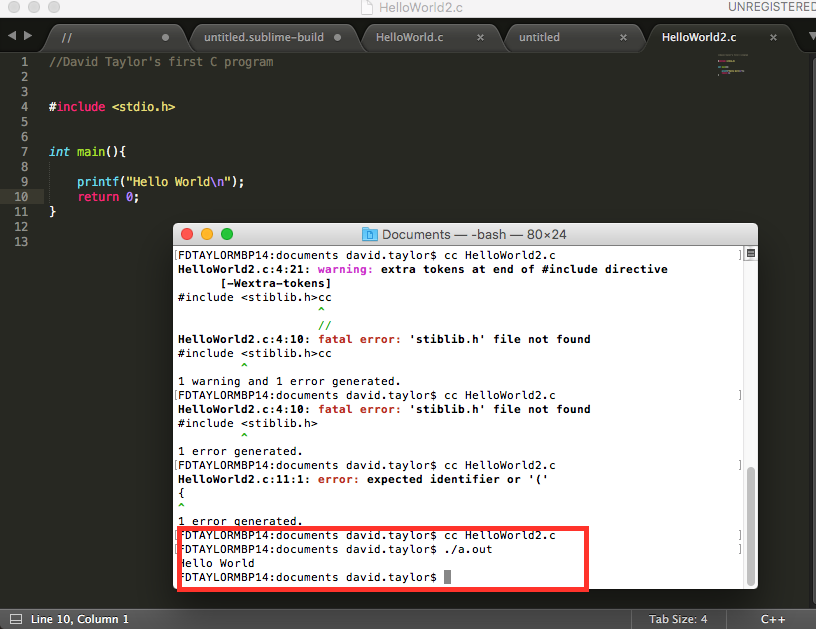
I installed Sublime. I than begin watching videos to use Sublime, such as How to Print HelloWorld on a Mac. This helped me with doing some basic C and using the sublime software. I did run into a library problem in the terminal. I did learn how to run and compile my code in terminal usingcc HelloWorld and ./a.out. I used the Begineer video which showed me how to downlaod from the apple developer the command line tools for XCode that need to be downloaded and installed. This fixed my first error issue of not being able to identify the helloworld code, but the next error I recivied would not identify the the command of cc HelloWorld2.c which provided the emssageHelloWorld2.c:11.1: error: expected identifier or ')' as well as I had library that I have not isntalled. I than deleted the extra {} and the stib.lib.h library from the program. When I did this and ran it again, my program wored!
C Learning
I have been doing Alison's C learning. I have been doing the practice lessons as well as looking thorugh hello.ftdi.44.echo.c code to help learn how it works. I copied and pasted it intoText Wrangler to do this process. I did the same thing for Sublime too. Than I continued using Sublime. Next, I learned how to add the AVR library and the Arduino library to Sumblime using a sublime to arduino video
as well as to GitHub sites AVR lib and Robot Will for Arduino.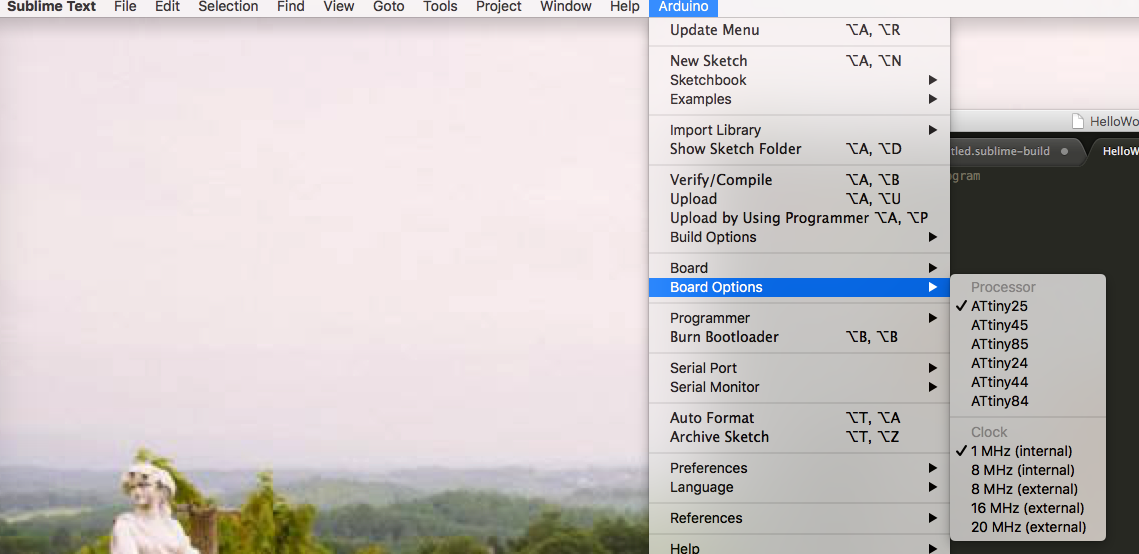
Below is a list of resources I used to learn C: C++ Programming/Examples/Hello world from WikiBooks,Alison's C learning, I met one-on-one with Terence for tutoring
Coding
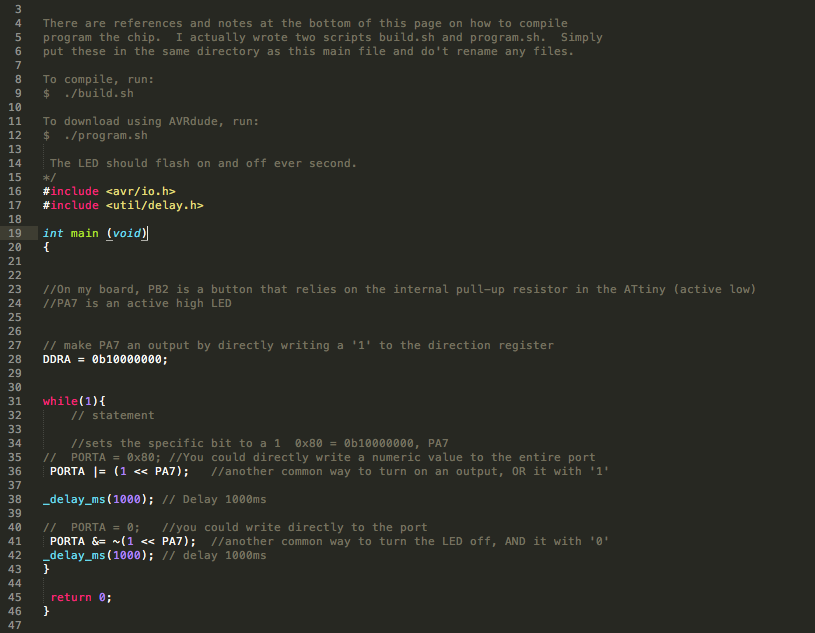
I first started off with code from Terence's page providing Adam's C code files Next, Terence walked me through the code to gain an understanding of it. I learned that all the ports on the chip by defult are set to "O" as inputs. You need to turn the ones you are using on from O to 1 as outputs. This looks like PORTA |= (1 << PA7). I also learned that while(1){} is for looping code as well as to intallize everything use#int main (void). I also used the -delay_ms(1000) to create delays. Also, turning off the the outputPORTA &= ~(1 << PA7)
. I created a basic blink code in C using sublime. When you run the code in the terminal, you will need to follow the steps below from Terence's page which will create a hex file as well as run the code: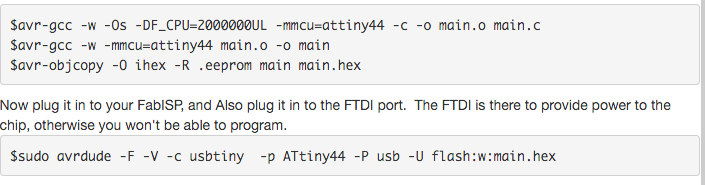
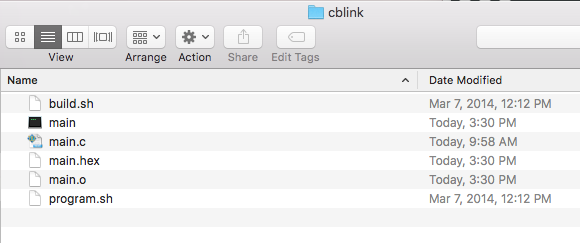
The image below is my C code in sublime. I saved it to a folder called cblink with a main.c, build.sh and a program.sh files that were based on Adam's files. You can access my files at cblink.zip.
A helpful terminal command for identifying the usb connections for making sure your computer is recognizing the chips through USB is system_profiler SPUSBDataType
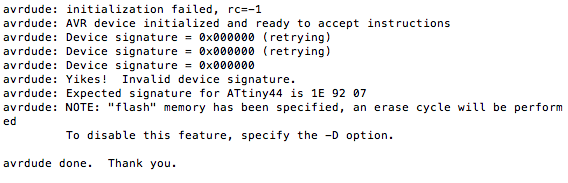
I did have problems with my board when compiling, hex and running my code. You can see the issue in the image below. After doing so research with Terence, we found that the board is either bricked or just not recieving power for some reason. I decide to make another board. After making a new board and hand soldering this new one, I still recieved the same error message of avrdude: initialization failed, rc=-1.
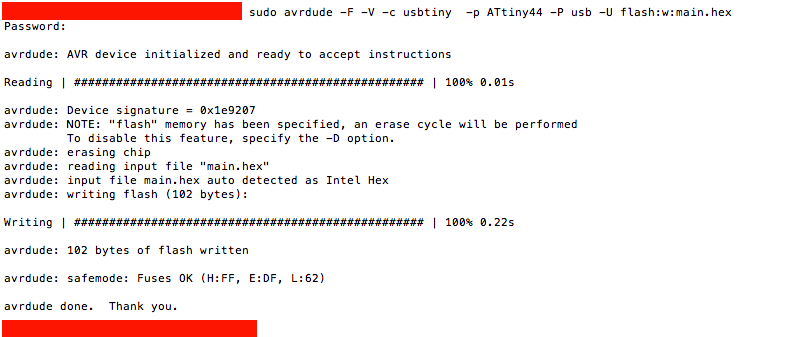
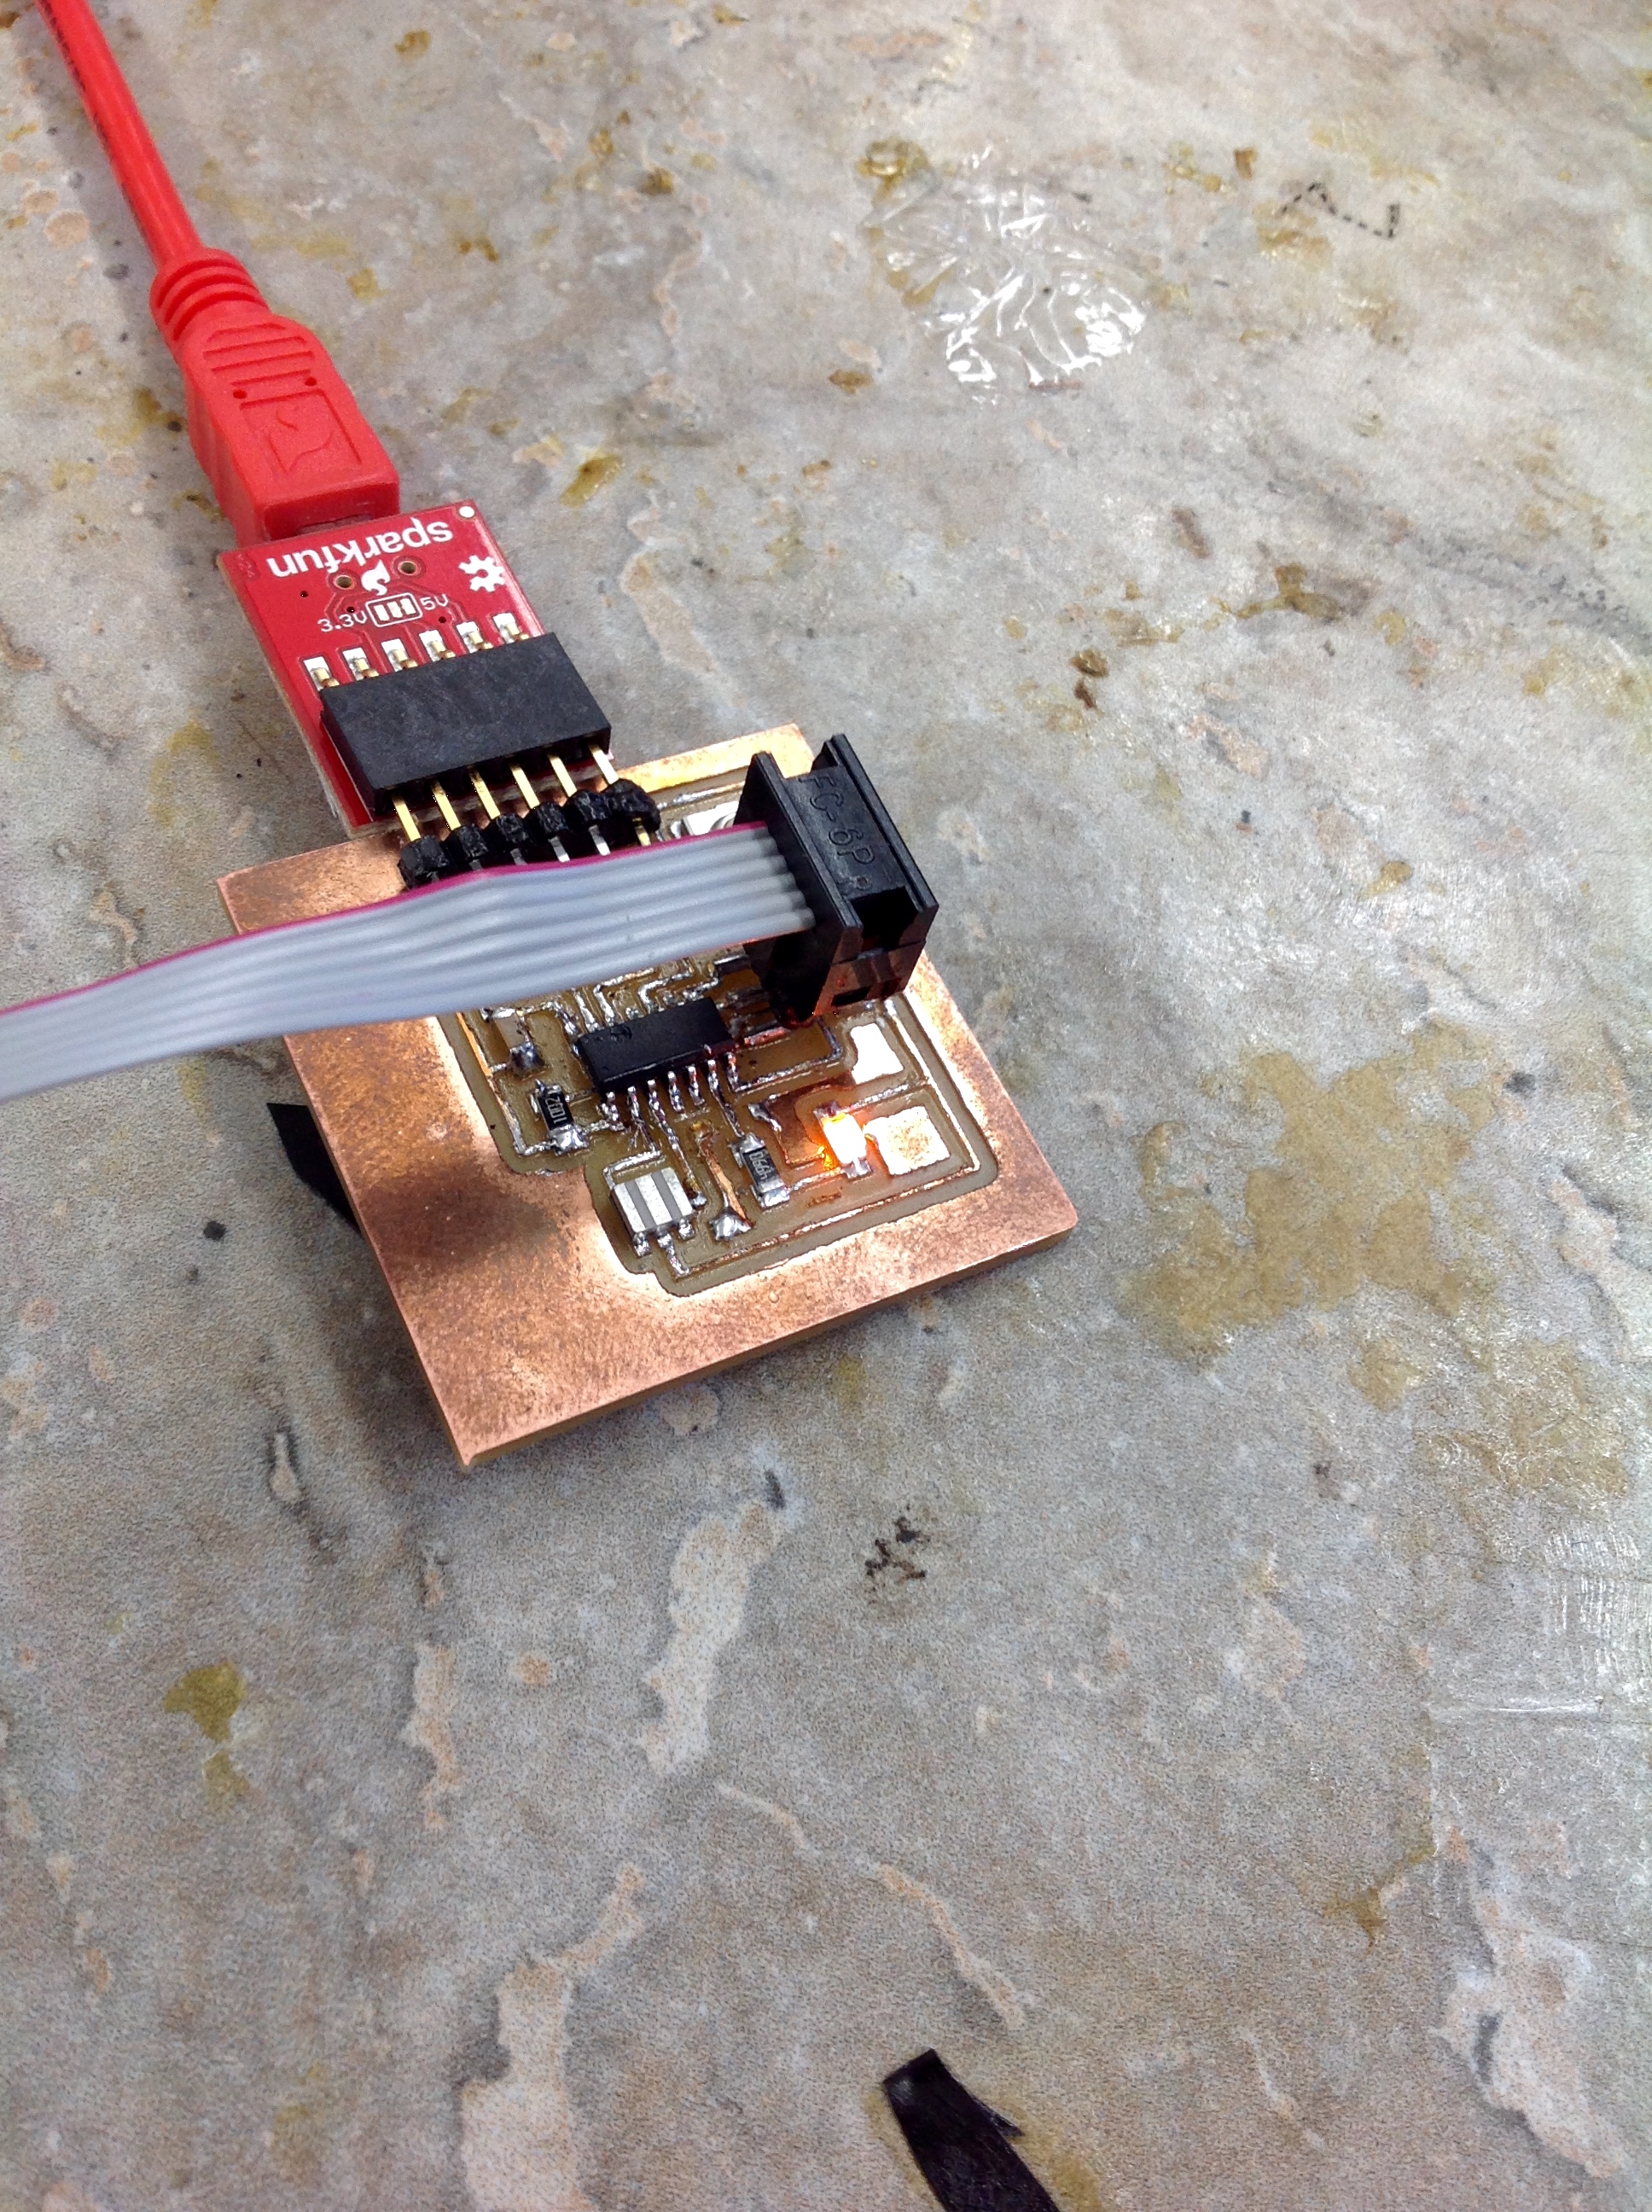
Success was found on the third board created, which was made by colleague. I ran the commands on his board and my board, and they both blinked. I ran it on two boards to double check my work. I learned that soldering your connections well is very important!

I did learn through this process the importance of taking your time, clean surface mount solder practice, and learn the foundations of C coding. Furthermore, I learned that it is important to create folders with your codes name but to keep the file name of the code to be main.c. It easier to keep folders organized with the neccessary files in them, than to have all these files with different file names codes the codes and commands, which can lead to more mistakes. You can see this in the image below:
Terminal Commands
Important to remember to compile and hex your code using the following commands:
<$avr-gcc -w -Os -DF_CPU=2000000UL -mmcu=attiny44 -c -o main.o main.c
$avr-gcc -w -mmcu=attiny44 main.o -o main
$avr-objcopy -O ihex -R .eeprom main main.hex
Use the command below to run your code:
$sudo avrdude -F -V -c usbtiny -p ATtiny44 -P usb -U flash:w:main.hex
Diagrams below are very helpful for identifying the correction pins when using the Arduino IDE and coding in C:
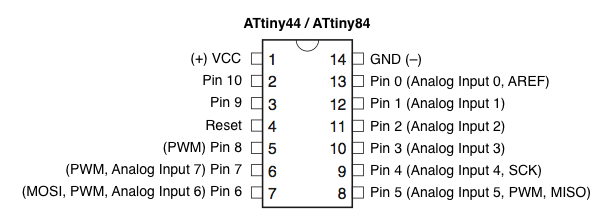
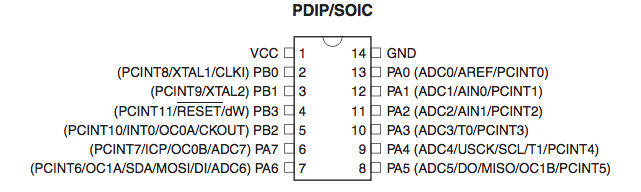
Corrections
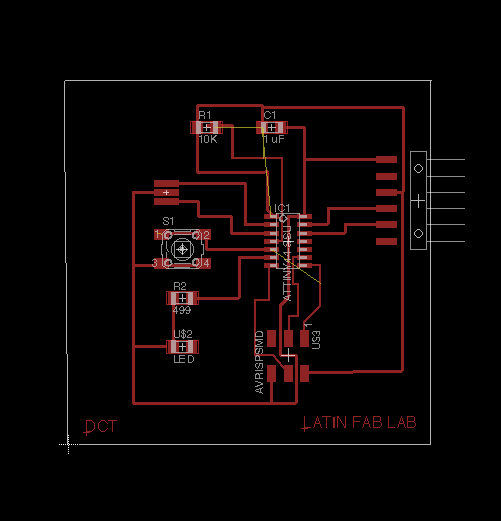
Using the diagram of the ATTINY44 is very helpful in lookign at how your code will work. I also made me discovery that I may need to change the schematic of the button due to where it is connected. I made a change to my board and corrected a new version all together due to the corrections I did on my button connections. I resdesigned it and you can see the change in my new board below:
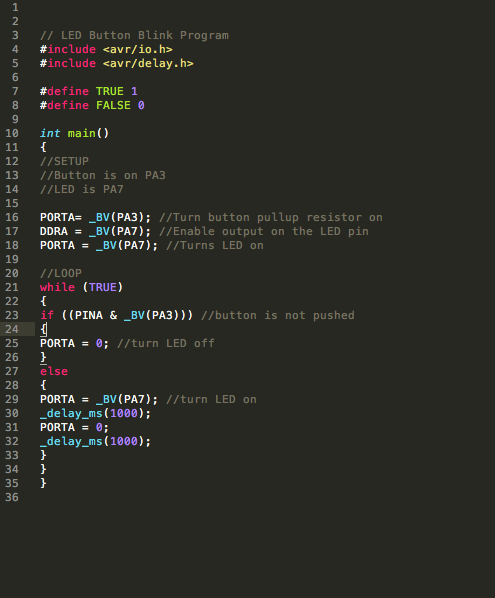
I learned that either the C code in sublime and the Arduino IDE button codes would not work. This is why I am going to build another board from the new design. You can see that in the code below:
Project Files
This is a button to access the files created for this exercise course for all of the above softwares.