Learning 3D printing has been really satisfying. I have taken a little time to reflect on the past five weeks of Fab Academy and it is an amazing feeling to finally have things 'click'. For example, I found it very challenging during the first and second weeks to document my progress and to use the 3D modeling programs. Now, however, I am much more capable and was able to create a 3D model last night for a print I made just a few hours later. It's satisfying to feel that I am making progress. I am learning a lot and applying that knowledge constantly.

For this week, we needed to create an object that could not be created using subtractive methods, such as the laser or the CNC router. I've been on a maze kick lately during Fab Academy, perhaps because I find the material challenging and I am not sure where it will lead, so I decided to 3D print a maze this week that could be played like a game in which the player moves a marble through the maze. This was an idea that I started toying with two weeks ago with press-fit construction, but found it actually ties perfectly into 3D printing. The maze cannot be easily constructed using subtractive methods because of the hollow tunnels within the covered structure that wind and branch off. Thus, 3D printing was necessary to make the hollow interconnected pathways of the labrynth.
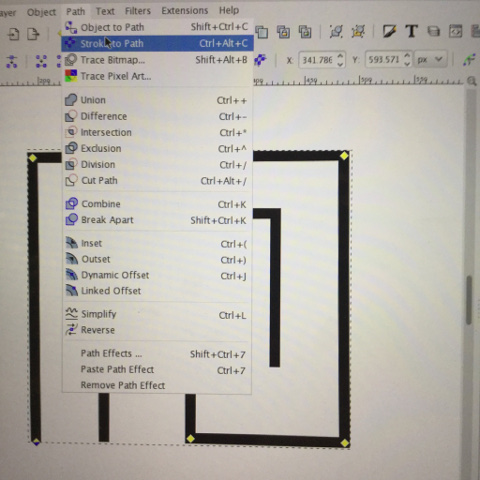
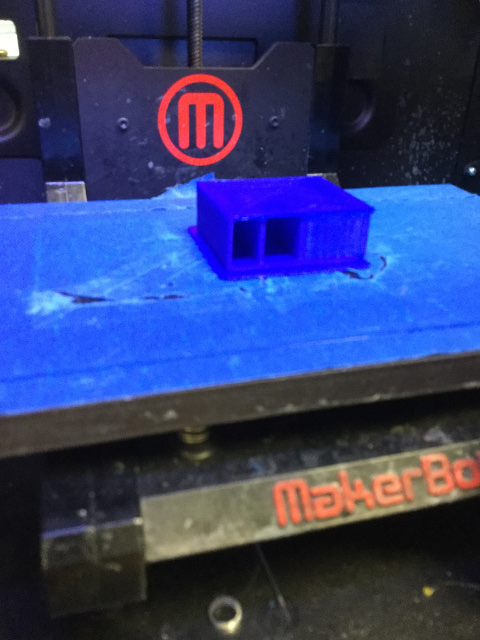
Interestingly, we were told to approach 3D printing with somewhat of a skeptical eye. It has been sensationalized, perhaps because of impressive recent advancements on fronts like 3D printing organs, but it also has its limitations. What more, other tools like the laser or CNC router are more effective in making an object. For this reason, we first ran some tests as a group to find the limitations of our 3D printers. We have a few here at AS220 at the moment, some of which are out on loan from Johnson and Wales University. It is good to note that the settings need to change depending on what type of material you are printing with, as well as what color. It seems that the 3D printers are most effective when all of the variables are in a delicate balance. The temperature cannot be too hot or else your structure will lose its integrity and the fibers become hairy. Conversely, the temperature cannot be too low, or else the material won't flow. The platform you print on must also be leveled, which we learned as well. I found that even preparing the file was a long process and that printing took longer than expected!
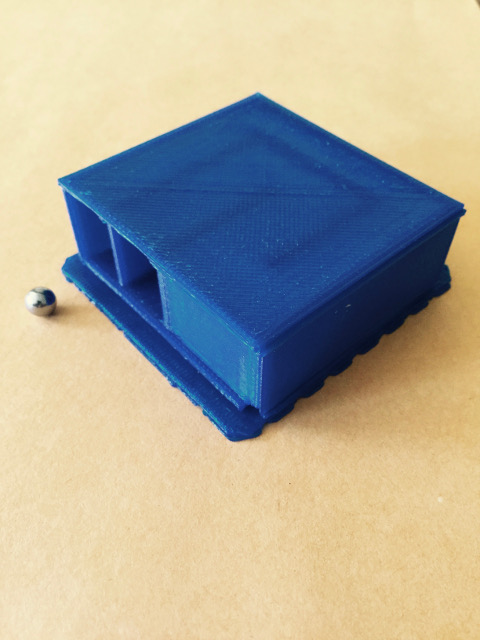
Making a maze was perfect for this project because it was much easier to construct with the 3D printer than as a press-fit object made on the laser. My friend Siron and I had been talking about making mazes that are like cubes, but I decided to start small, taking Neil Gershenfeld's advice of spiral development. With this in mind, I created a small, one layer maze approximately 3 inches by 3 inches, simply to get a feel for the possibilities. From there, it is more easily achievable to reach the end goal of a larger maze-cube.
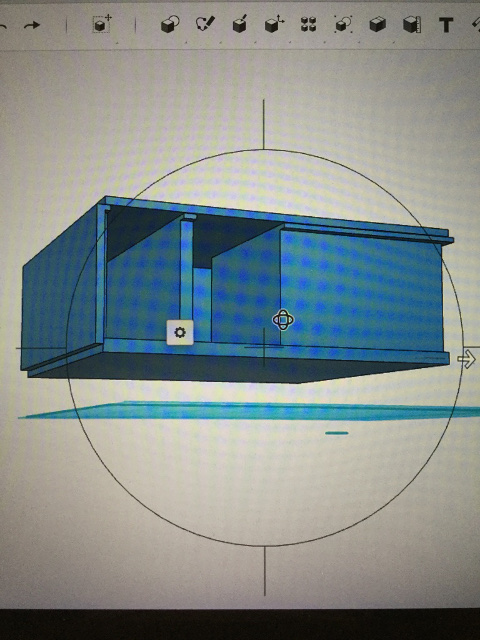
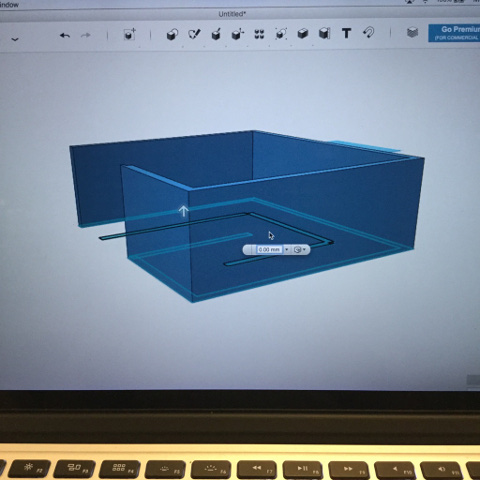
For starters, I created a small 2D maze in Inkscape. For this, I simply used the pen tool and created two forms, one around the other, leaving two empty spaces, one for an exit and the other for an entrance to the maze. It was important to convert the object to a path so that the design could be manipulated later in a 3D modeling program called 123D Design. After importing the file into 123D Design as a SVG sketch, I was able to push/pull the 2D lines I had made in Inkscape and turn them into a 3D form, resembling a labrynth. From here, I needed to add a floor and a roof to the maze so that the ball rolling through the maze would not fall out. This also prevents the player from viewing the maze, which would be too easy for such a small design. At first, I thought of making a rectangular box and creating a shell, but this did not leave any room for the entrance and exit. So, finally, I just created thin rectangles for the floor and ceiling, using the push/pull feature to line them up nicely with the maze.
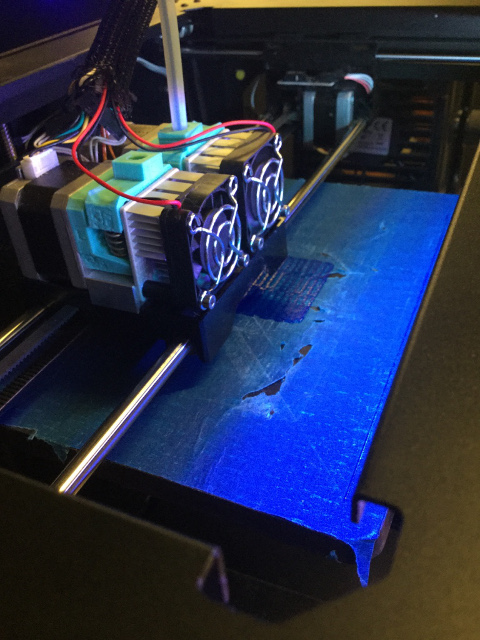
In order to get all of these pieces into the Makerware program, I needed to group them all before saving. It took me a few attempts before figuring this out, having seen only parts of my design translate into the Makerware platform. The file needed to be exported as an STL. From there, I also needed to change the dimensions, as my model was larger than I intended. After resizing, I chose the type of device I'd use, the Replicator 2X, since this would determine the process and settings. Afterwards, I changed the settings to 220 C degrees for both heads, as this is best for the blue PLA that we were using. The platform temperature was 60 C degrees. From there, I exported the file onto a disk as an X3G, so it could be read by the 3D printer.
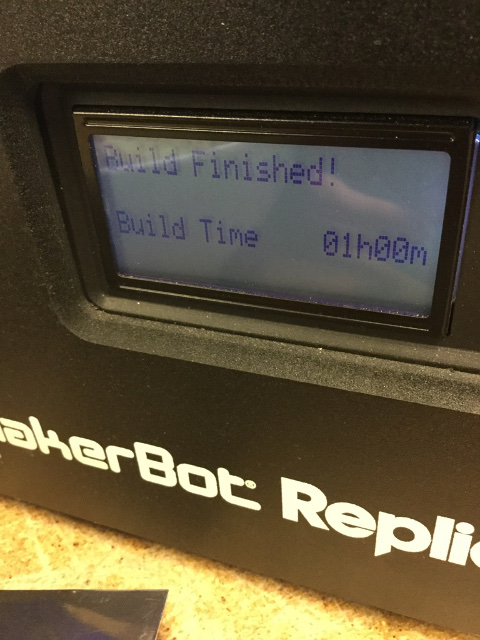
From here, I chose the file on the 3D printer and let it do all the rest! I was afraid at one point that my roof was going to cave in, but luckily it did not. I was left with a fully functioning labrynth. Although the structure is small, it is sound. If I were to do the project again, I would make sure the roof of the structure were thicker so the player could not see hints of the underlying structure, making it much more challenging to navigate.
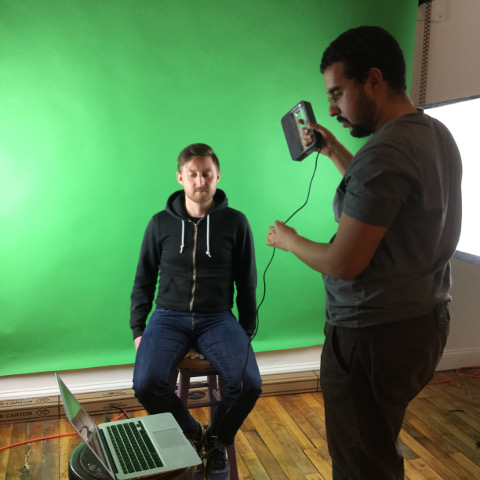
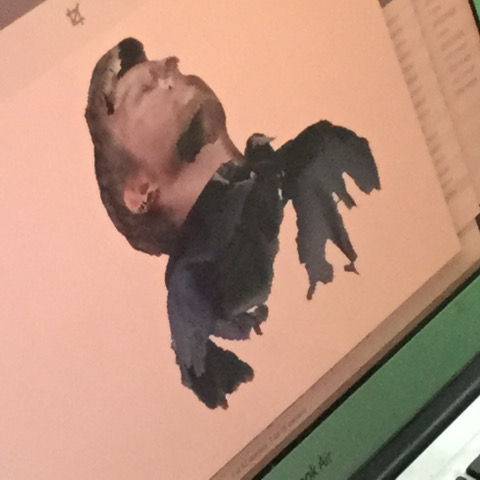
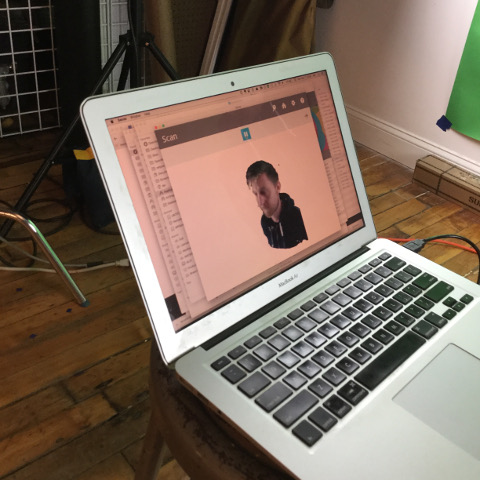
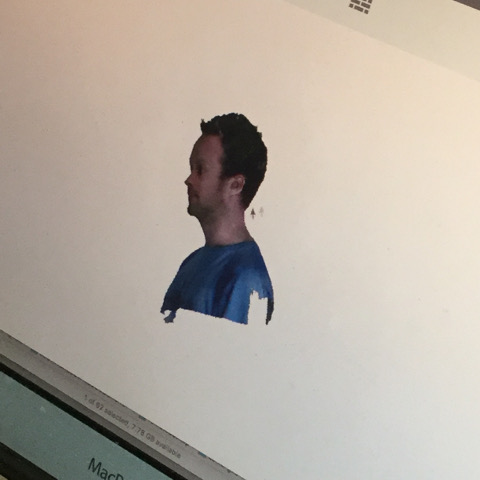
This week we also got to try 3D scanning. We used an instrument called Sense, which was a handheld device that we hooked up to Drew's laptop. Drew, Siron and I all took turns scanning each other. For the best results, we used the strong lighting in the Media Arts lab that is normally used for portrait photography. We also used a green screen back drop in hopes that this would be most easily distinguishable from the object or person being scanned. In general, this was a pretty cool exercise, although a bit challenging when the scanner would lose its point of reference. This happened a few times on Siron's hair. It was difficult to allign the scanner to its last point of reference by watching the computer screen, but moving the scanner in your hand around the person being scanned. If we were able to do this, we could continue with the scan, but if not, then we had to abandon it.
3D Printed Files
maze plan maze print