
Introduction
During the third week we learnt about computer-controlled cutting.
We have been using the same software installed in the previous week. Our laser cutting machine needs to use Corel Draw, but that's only installed in the computer connected to the machine. No need to install it here. We will make PDF files and them import them to Corel Draw.
To generate the PDF files I will use Adobe Illustrator and Inkscape. Inkscape has the possibility to clone parts so that could be very useful to generate parametric elements of the design.
Assignment
The assignment this week was to 1. do something with the vinyl cutter and 2. document a press-fit construction kit.
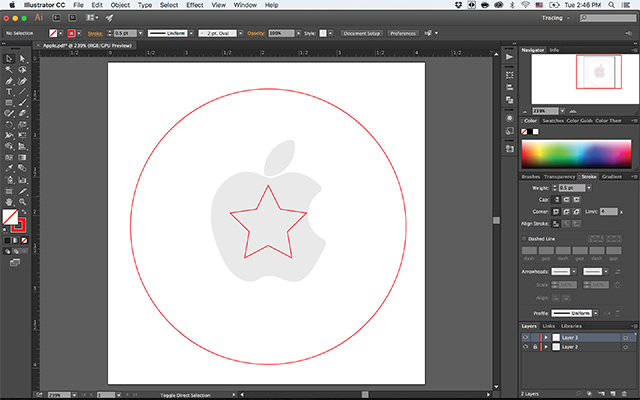
The vinyl cutting part was fun and I did a star for my computer, I downloaded an apple logo so I could know the dimensions so that the star would shine entirely through the apple. I used Adobe Illustrator for this.
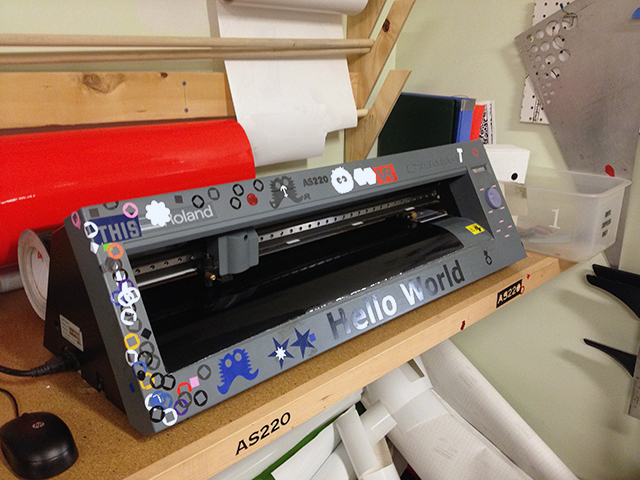
At AS220 we use the Roland CAMM-1 vinyl cutter. It works pretty good and it has been used plenty of times here to make a ton of signs and it's still running smoothly so I guess it has a good lifespan:
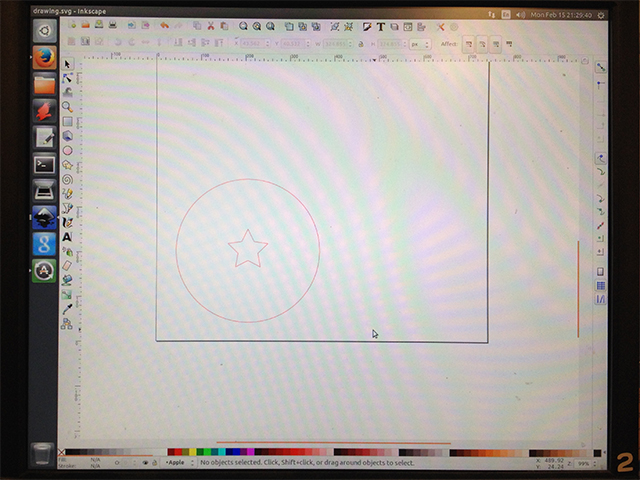
The computer attached to the Roland Vinyl cutter uses Inkscape and it is almost always already loaded with an open file with a page the size of the width the cutter can handle. So the best thing is to import your file. I imported my PDF and positioned it towards the bottom-left corner, because that is how it prints! From bottom-left to top-right. Also, the line has to be a "thin red line". By thin, it has to be 0.5pt or less:
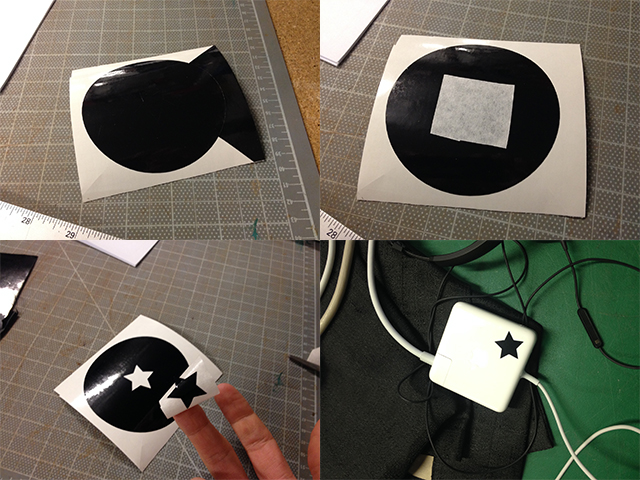
The vinyl cutter did it perfectly! I just cut with a utility knife the stripe of the black vinyl that came out cut and with a pair of scissors the little part that was surrounding my circle and star. I didn't want to waste the star so I figured I'd use it for my battery charger. The contact tape is very useful to remove the vinyl from its base and to stick it somewhere else:
Finally, I used the contact tape on top of the whole now "weeded" vinyl and I stuck it on my computer. I had some bubbles in the end, so next time I aim to try a smoother technique to avoid them! However, it's very difficult to see the bubbles and it looks really cool:
I also wanted to test the possibility of one piece matching to others so that they could be stacked on top of eachb other. It's also a little bit difficult to align the vinyl to the surface you want because once it touches surface it starts sticking. The round border is a good idead because then there's no chance of unparallel lines:
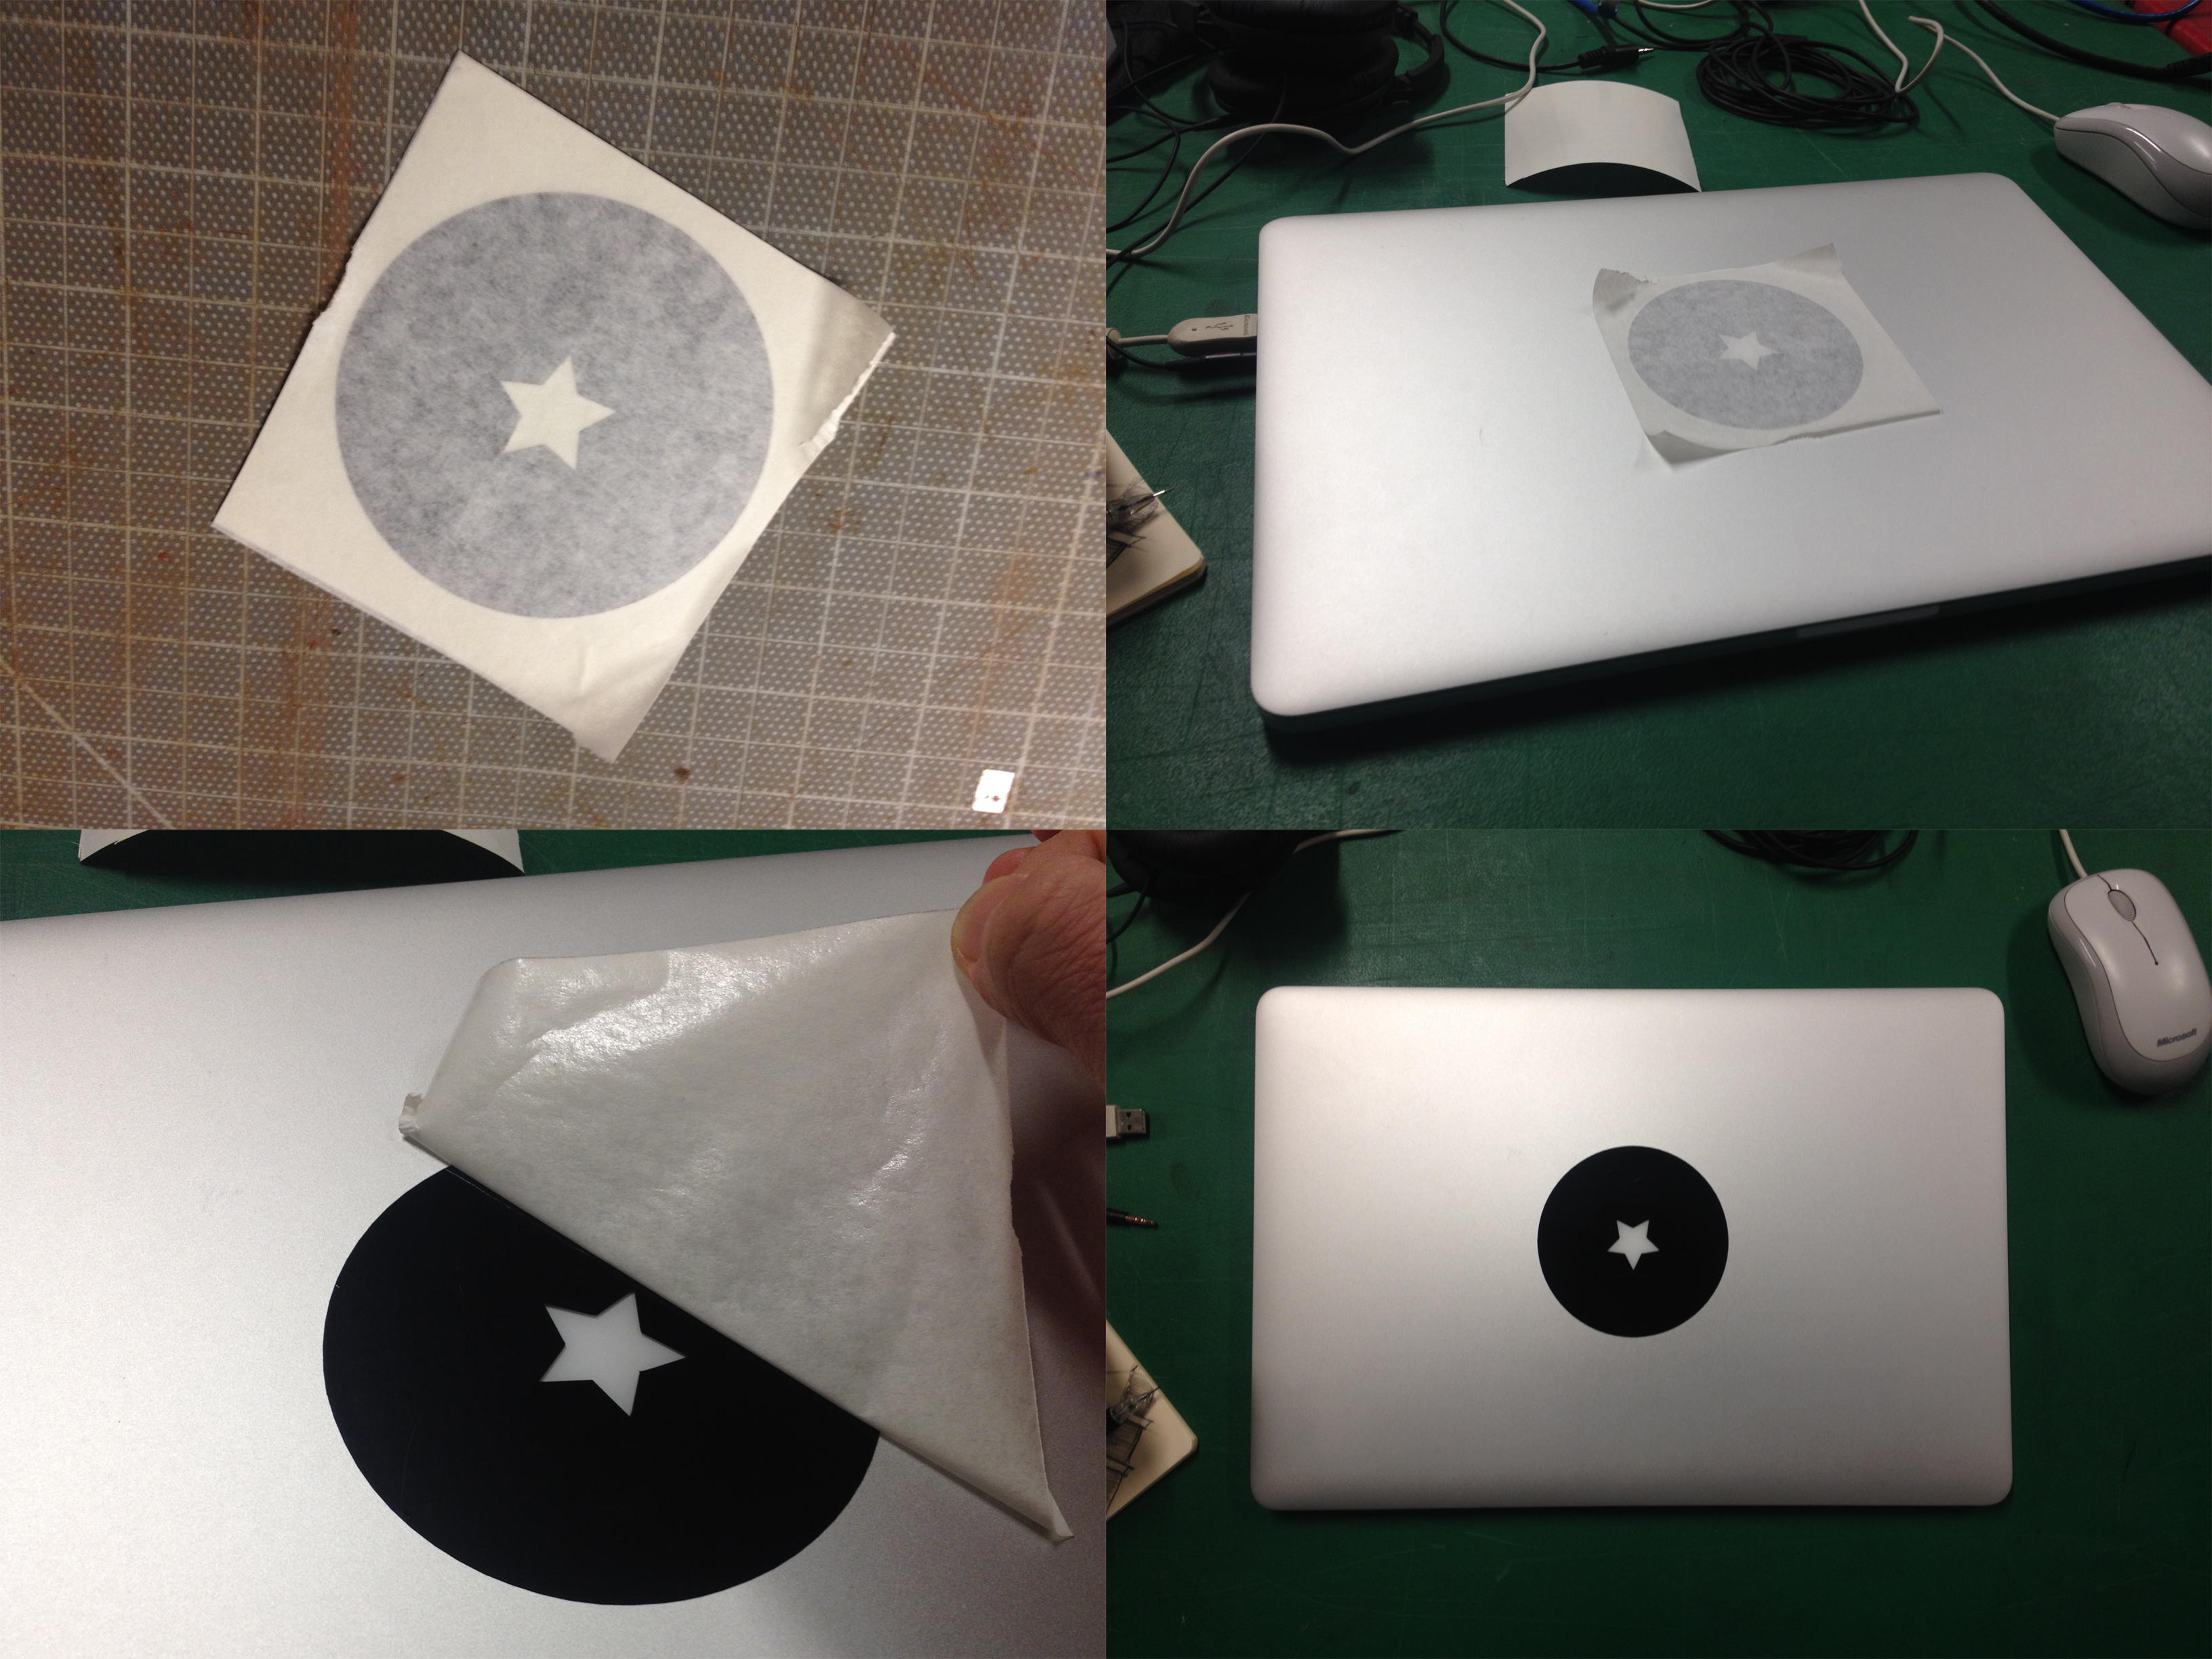
When it's on it looks like this. The apple still can be seen so I might do something in the future, maybe a second vinyl with another color si that the apple is completely opaque. But that's if you're near it. From far away it looks fine!

The second part of the assignment was to produce a press-fit construction kit. To do so I we used the laser cutter at the lab. It works with a computer at the side which has Corel Draw and only Corel Draw may be used to make the driver work correctly. CD can easily import any PDF file and it has been known that it is the best file format when trying to export for this particular laser cutter.
I used Inkscape to produce the necessary PDF files also because it has a clone function that can be arranged to work as a parametrical feature, especially with some thicknesses and explorations regarding the kerf product of the laser cut.
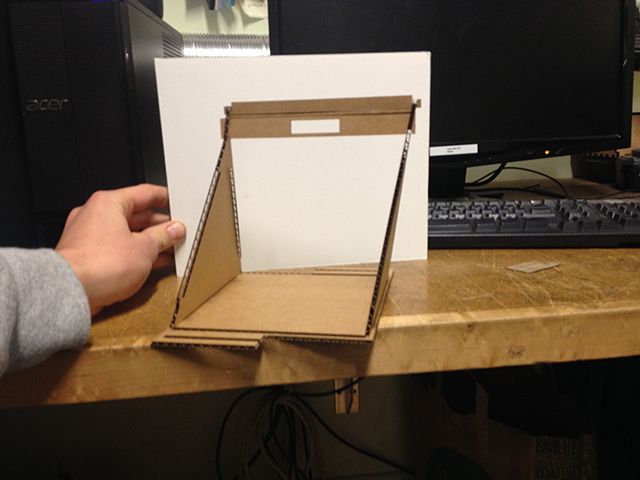
You can see how in week 2, I produced a 3d model of what I had in mind as the container for my final project. The multi-purpose box had already been designed thinking of some press-fit possibilities, but I still had to correct some things. I did so and I then arranged every piece of my Sketchup model on the ground of the model so that I could have a top parallel view afterwards, ready to be exported as a PDF file.

In Sketchup, making sure that the view was orthogonal (Camera> Parallel) and TOP view (you can also right click on a face that is facing towards the top and select 'Align View') I exported the file as a PDF. Check on the options when prompted to select a file name, you can set the scale of your drawing. It's normally set to "screen size" which is useless for laser cutting, so make sure it is 1 inch = 1 inch or something similar. My boxes measure 12 inches wide in an ideal scenario, but I first wanted to check them smaller so my skale is 1:2. You can also scale your model using Inkscape.
My next step was to create a document using Inkscape, I set the document properties to have a page 24x24 inches (NOT the size of the cutter bed, but I'd move around things afterwards) for everything to fit and I made sure to dimensions were in inches. Then I file>import the PDF file I had saved with Sketchup and it was good! I did some things here and there and I was impatient to laser-cut so I went directly to the machine:

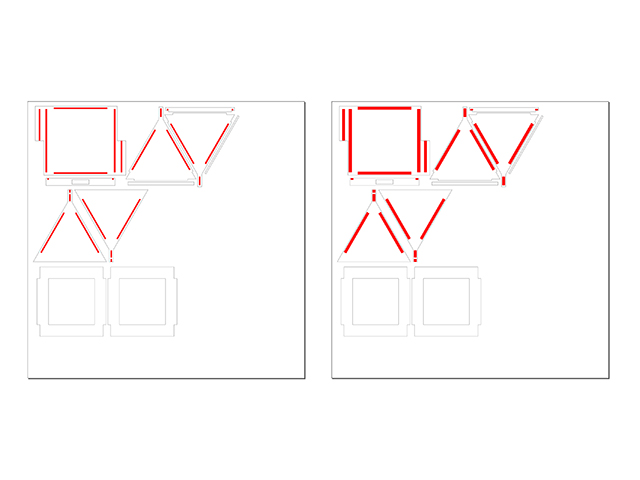
The Sketchup file exported with more than one line on top of the other and the laser cutter passes the beam as many times as lines there are. This made some parts to start burning a little bit so I had to abort the first mission. I then corrected my files, and I also started with a strategy in order to have a simple way to change the width of the holes where the press-fit borders would press-fit. What I did finally with inkscape was that I left my imported PDF group as the Layer 1 and I created a new Layer *2* on top of which I traced all of the paths. And for all the variable parts I created one rectangle that I scaled and rotated in different ways, but had only 1 parent. This means that if I change the width of the parent, they all change. The width HAS to change, though, by using the Object>Transform>Scale>(inches) in order for it to scale from the center outwards, otherwise it becomes messy. This is who the SVG parametric base looks like:
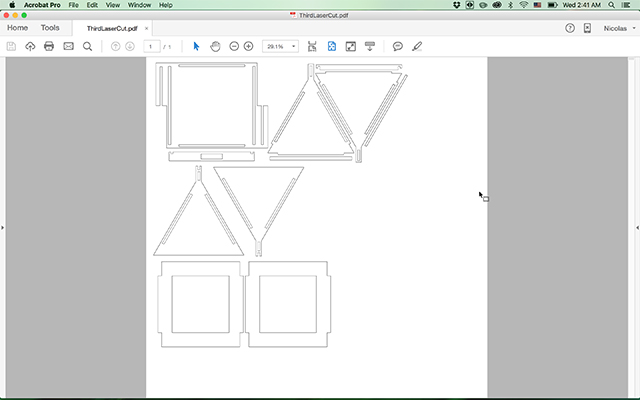
With this I was ready to start with no double lines. Right after setting a number for the red boxes, there's a previous step. You need to then make all the red boxes become lines instead of fills. This is easily done by changing the "fill and stroke" options in Inkscape. Some lines doubled because they remained at the border of the image, so I fixed this by using the Path>Difference option so it subtracted one from the other. I also made sure the width of the lines were at least 3/1000 of an inch so that if fitted the configuration of the vinyl cutter. The PDF file looked like this:
The laser cutting was on point! I started sending the first package of information to have the first real pieces:
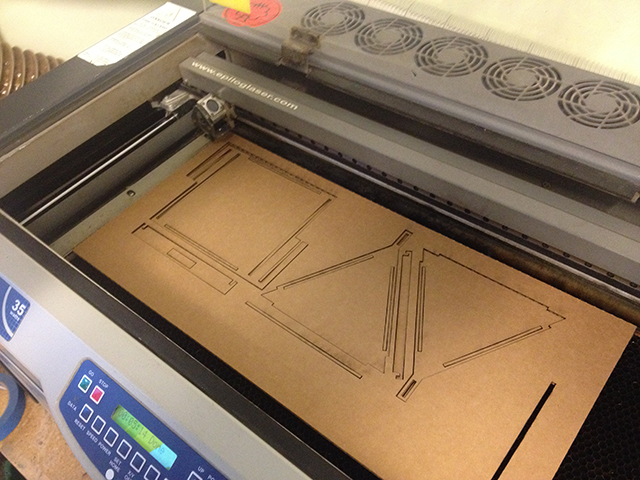
Other than the burning, the problem this time was that I didn't make sure that the focus was set correctly before I sent to cut my material. My friend Siron had been cutting with a thinner material and therefore had been using the cutting bed some fractions of an inch above the cardboard material I was using. This makes for a huge difference! The result was a very shaky assembly attempt:
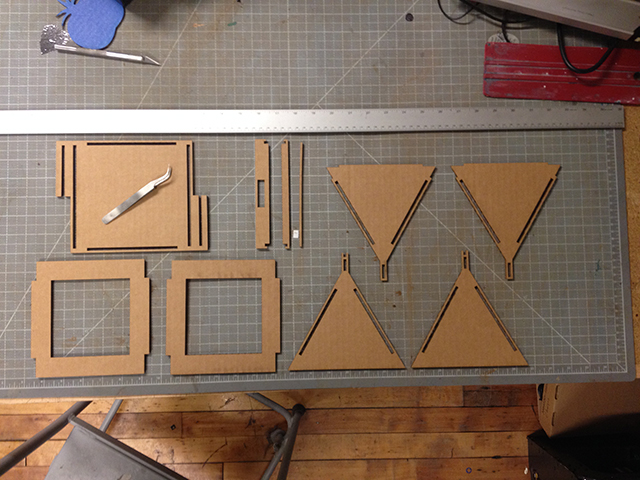
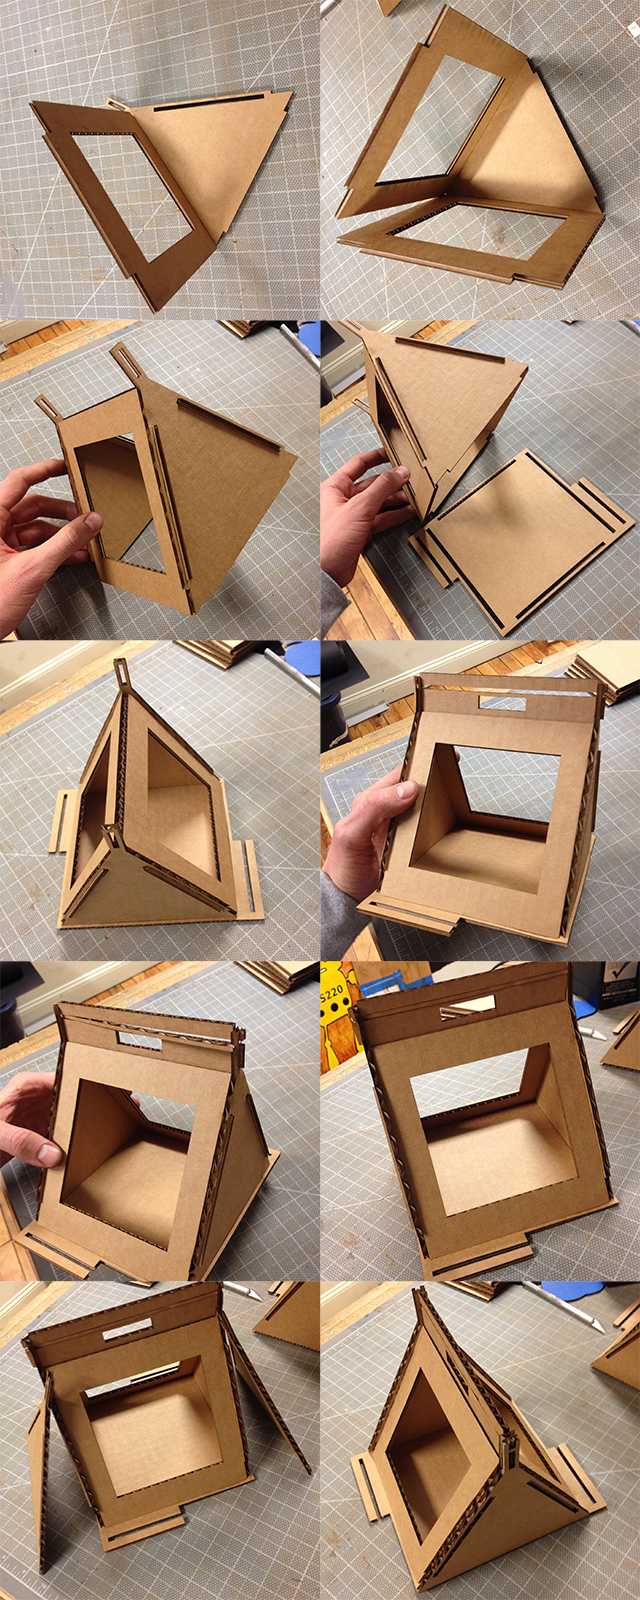
I finally made all the pieces with the correct measurements, they where excellent and they allowed me to start assembling this prototype for the boxes, this is a picture of all the pieces:
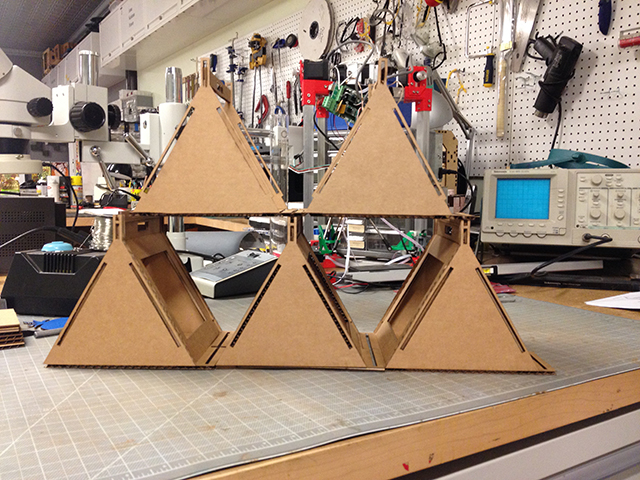
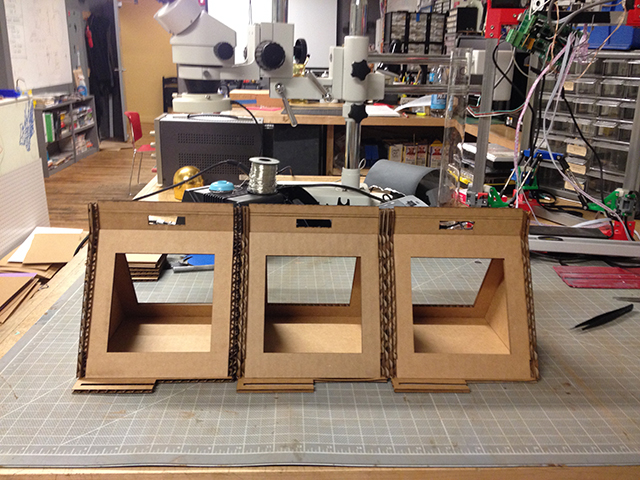
Of course, the multipurpose box is not only a press-fit kit itself but it press-fits other boxes in order to stack them. I made three of these to see how would they stack. It's a good beginning! Although I have to still change many things to have a perfect project.

This is a bigger version using boxes I made that weren't successful to be completed but that make the trick for the picture:
Tune in for next week!!!